


The Baker And The Beauty: The Best Makeup Looks
The Baker and the Beauty might be over, but that doesn’t mean we can’t swoon over the gorgeous makeup and fashion from the show one last time!
In case you haven’t seen it, the series is an adaptation of the Israeli romantic-comedy series Beauty and the Baker. It's a story of a Miami-based baker Daniel Garcia (Victor Rasuk) who falls in love with international superstar Noa Hamilton (Nathalie Kelley), and the pair are an unlikely match to say the least!
The show will make you laugh out loud, warm your heart, and have you hitting the rewind button, so you can pause to take in every single one of Noa’s breathtaking looks (trust us, there are plenty!).
In this article we’re reminiscing on all the best makeup looks from the show and showing you how to recreate these fabulous looks yourself.
Pretty in pink
Noa Hamilton (Nathalie Kelley)

Noa Hamilton is a high-profile model living a jet-set glamorous life, which means the majority of her looks are red-carpet ready.
At times in the show, Noa rocks a matching pink printed set of pants and a short-sleeve shirt. Her hair is natural and relaxed, adding to the summery vacation vibe of this look.
But did you know that actress Nathalie Kelley is the opposite of her character in real life?
Yes! She is known for keeping her beauty routine simple and natural.
“For me, beauty is health, beauty is how my internal organs are functioning,” explains the TV star.
Get the look:
A pinky-nude lip combined with a pop of pink blush highlight Noa’s pink outfit and create a super fun and feminine vibe.
Keep the brows natural (this is the best eyebrow pencil), swipe on some natural shimmery eyeshadow, and finish with a coat of mascara for fluttery lashes.
Classic French vibes

Noa keeps things très chic throughout the show, especially in the airport scene, by pairing classic dark-wash jeans with a block color shirt and a versatile trench coat. Any French woman following the five-piece French wardrobe would be proud!
She’s a frequent jet-setter known for hopping on a plane for international press trips, dodging the paparazzi, and attending glamorous events and parties. But no matter where she’s going, she always looks flawless.
Soft waves in Noa’s hair add a relaxed vibe to this look, while jewelry and accessories are kept to a minimum.
Get the look:
This is one of Noa’s more natural, classic makeup looks. Minimal products are used on her skin to create a natural, radiant look. Her eyes are lightly lined for definition and finished with a couple of coats of mascara for extra length and volume.
Complete the look with lipstick in a neutral tone to complement your natural skin tone.
Sun-kissed skin

Before we break down this glamorous look, can we take a moment to talk about how Nathalie Kelley’s skin always looks like it’s GLOWING?!
What’s her secret?
She’s a big fan of natural beauty and body techniques including Abhyanga (an Ayurvedic hot oil massage), gua sha, and facial cupping. When she’s not working, she wears next to no makeup and uses her lip balm to soothe her lips and add a hint of color to her cheeks.
That’s it!
But back to this look. What’s Noa doing and how can you do it too?
Get the look:
This look is all about sun-kissed skin and a smokey eye. For glowing skin, it’s all about highlighting and contouring to emphasize the parts of your face that will catch the light.
Next, for the perfect smokey eye, you’ll need two eyeshadows (a darker shade and a lighter, shimmery one), some eyeliner, and your favorite mascara. Make sure you check your eyes are symmetrical when you’re done, and equally smoldering on both sides.
Finish with a swipe of lip gloss or a muted lip color and you’re good to go!
Classical beauty
Piper (Georgina Reilly)

Piper has naturally pale, porcelain skin which adds to her classic, striking beauty throughout the show.
This look is all about keeping things simple and elegant. Less is more ladies.
Get the look:
Eyeliner and mascara add definition to Piper’s eyes here, which are accentuated by the way her fringe draws your attention right to them. A pop of pink blush creates the perfect, English rosy-cheeked look, while a pink-red lip keeps this look classic and feminine.
This is a perfect day-time look that can be amped up a notch with a bolder lip for the evening.
Casual glam
Vanessa Sanchez (Michelle Veintimilla)

Vanessa keeps things super sexy throughout the show with this look, but you’d be surprised how little makeup she actually wears.
Her brows are bold and defined and are the star of the show here. But how can you perfect your brow game?
Get the look:
The best eyebrow pencil for you will depend on the color of your eyebrows and hair. Light eyebrows should go for one shade darker than their hair, while women with dark brows should go one shade lighter than their hair. The key to beautiful-looking brows is all about gradually layering different products on top of each other.
Vanessa pairs her brows with a striking lip in a dark pink tone. The secret to a long-lasting lip color is to always remember to line your lips first, then fill them in starting at the center and working outwards.
Complete your look with some eyeliner on the upper lash line and a coat of mascara.
Less is more
Natalie (Belissa Escobedo)

You can’t help but love Natalie’s character—an awkward, lonely teen who’s trying to come to terms with her sexuality and figure out how her Catholic parents will react to her coming out.
Although Natalie wears glasses throughout the show which may distract you from her makeup, she actually has some really strong makeup moments that are both natural and effortless.
Get the look:
Natalie’s brows are kept bare and natural here, while her eyes are lightly lined then topped with a hint of mascara for extra oomph. Her voluminous lips are kept simple in a nude-pink shade of lipstick, while her hair is pulled back and accentuates her cheekbones and lengthens and frames her face.
Keeping it classy
Mari Garcia (Lisa Vidal)

Daniel’s mother, Mari (Lisa Vidal), is the natural leader of the family, and tends to take over and be a little overbearing at times!
What we love most about her is her natural glamour no matter where she’s going or what she’s doing. Her hair is always perfectly curled and never out of place. Her makeup is simple yet stunning. Style and class ooze out of this woman and you can’t help but wonder, how does she do it?!
Get the look:
Mari’s look is all about allowing your natural beauty to shine through. Her eyes are lightly defined here, while her face is lightly brushed with bronzer to create some definition and glow. Complete the look with your favorite nude lipstick and that’s a wrap!
We have loved re-visiting the best makeup looks from The Baker and the Beauty show! The key message here is to work with your natural beauty. The less makeup you use, the more your natural features can shine and work their magic.
Some screenshots from Netflix were used for visual reference in this blog post
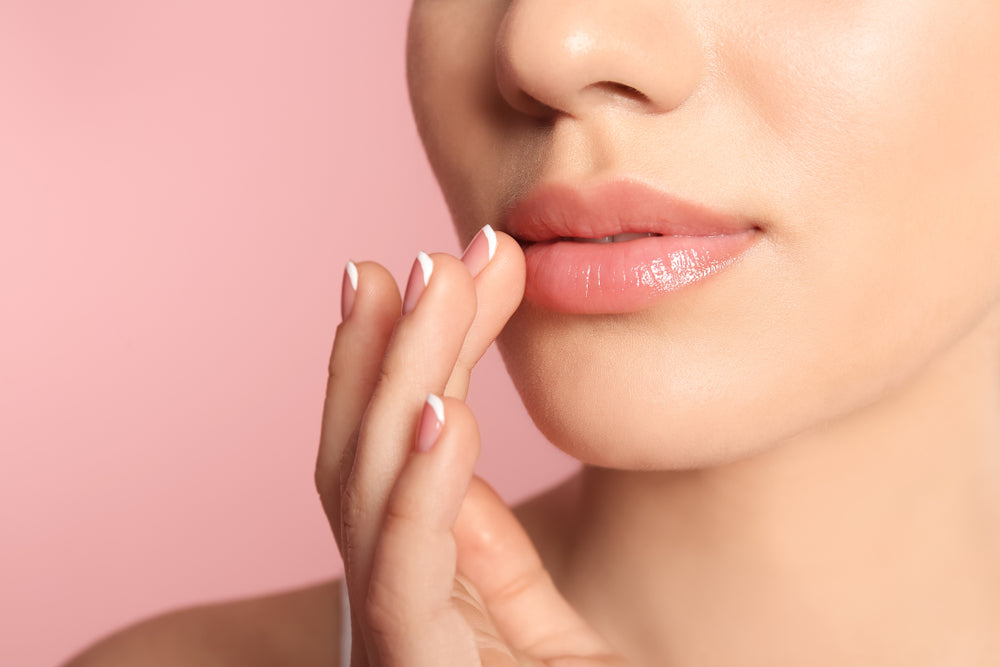
Our favorite look for low-effort glam calls for just a touch of mascara and a swipe of boldly colored lipstick. Focusing on the lips is a known French beauty hack, but for it to work well, our lips have to be in great shape! Lipstick can’t glide smoothly over chapped lips, which is why a good lip care routine is so important. Here are our tips for taking good care of your lips on the regular, along with some advice for special care when they get especially dry. Use a richer lip balm at night The lips can get incredibly dry at night, especially if the humidity in your room is low or if you tend to breathe from your mouth as you sleep. That’s why it’s best to apply a thicker lip balm before bed. If your lips are particularly chapped, using a rich balm will help to speed up their healing. Look for occlusive ingredients What on earth does occlusive mean, you ask? Occlusives are oily ingredients that are able to seal moisture in place and prevent evaporation. They’re essential for a truly healing lip balm. Our favorite occlusive ingredients for the lips are lanolin, squalane, shea butter, and petrolatum. A balm with these ingredients can create a protective seal over the lips that prevents moisture loss. Use lip balm as a barrier Another important time to apply lip balm is before brushing your teeth or using potentially-drying skincare products like retinoids or acne treatments. The balm will act as a barrier against those products and prevent their drying effects from impacting your lips. Layer your lip moisturizers When the situation is particularly dire, especially in winter, it can be beneficial to build up moisture in the lips with layers. First, start with a light layer of fragrance-free lotion or hydrating serum – once it sinks in, layer a heavy lip balm on top. That first layer will add hydration, while the second layer will lock the moisture in deeply. Opt for an SPF balm in the day Our lips are just as susceptible to sun damage as the rest of our skin, so during the daytime, opt for an SPF lip balm. Apply it to your lips at least 20 minutes before going out in the sun, and make sure they’re thoroughly coated. If you’d like to wear lipstick or gloss, just add it over the lip balm, and you’ll actually end up with a smoother finish than if you were to apply it to bare lips. Avoid minty fragrances We love a lip balm with a bit of flavor, but minty lip balms can actually cause some issues. Menthol is the key fragrance compound in mint essential oil, and it’s added to lip balms to give a cooling and stimulating effect. Unfortunately, those stimulating effects can also be drying and irritating, especially to already chapped lips. However, when your lips are well taken care of, you can actually benefit from the temporary stimulating effect of menthol because it can make the lips look plump and full. That’s why we do use a bit of menthol in our lip-plumping Polynesie Francaise glosses. Use a sulfate-free toothpaste All toothpaste can be a little drying, but toothpaste made with sulfates is the worst by far. Sulfates (usually sodium lauryl sulfate) are the ingredients responsible for your toothpaste foaming up. Unfortunately, they can also be quite drying and irritating, especially to the lips and gums. If you suffer from chronically dry lips, it’s very possible that your toothpaste is at fault, so switching to a non-foaming, sulfate-free toothpaste can make a big difference. Exfoliate your lips The final aspect of keeping the lips luscious and smooth is exfoliating them regularly. Exfoliation removes the flaky buildup of dead skin over the lips and allows lip moisturizers to do their job more effectively. Exfoliation can be done as a dry lip treatment when they’re a little chapped or flakey, but if they’re so chapped that the skin is a little broken, it’s important to wait until they heal. You also don’t want to over-exfoliate your lips. Once or twice a week is ideal, more often than that, and you risk irritating the skin and making things worse. Make a DIY lip scrub While you can certainly purchase a lip scrub at the store, making your own natural blend is safe and easy! All you need is half a teaspoon of brown sugar and a few drops of coconut or olive oil. You can mix them up in a little jar or even in the palm of your hand. You can use honey instead of oil if your skin is acne-prone. With your finger, rub the blend over your lips for a few seconds until they feel smooth. Finally, wipe it off or rinse it away with some water. The oil will help moisturize your lips, while the sugar will slough away all of the flakiness! Just make sure to mix up a small amount every time you want to exfoliate. Unlike commercial products made with preservatives, whatever you make at home is liable to spoil after a few days. Always prep before lipstick No matter which of our lip care tips you choose to adopt, always remember to take a few steps to pamper your lips before applying lipstick. You’ll need to make sure there are no flakey patches or dryness before starting your makeup, or else you’ll end up with patchy-looking lipstick. A coat of lip balm will be enough if the rest of your lip care routine is on-point, but sometimes you might need to do a full exfoliation routine to guarantee your lips are in tip-top shape. Motus et bouche cousue (our lips are sealed) Achieving plump, healthy lips isn’t difficult. It’s just a matter of adding lip care to your regular routine, especially before bed. Whether you go all out with exfoliation or just switch out your minty lip balm for a healthier alternative, we know you’ll discover smoother, happier, and more kissable lips.

If you haven’t yet caught a glimpse of Netflix’s hit show, Emily In Paris, where have you been?! We are obsessed with the French-girl beauty that storms our screens as Emily (British-American actress Lily Collins) settles into Parisian living. Actress Lily Collins steals the show with her low-key, simple yet chic beauty and fashion looks. There isn’t a scene where we’re not taking notes. Think fresh, clear skin, bold brows, voluminous lashes, and understated lips. Less is definitely more In France, and we’re loving it! But there’s one thing we want to know more about, and that’s Lily’s real-life beauty routine. How does she keep her skin looking so immaculate? What are her makeup must-haves? And how does she keep her beautiful brows in check? Don’t worry, we’re bringing you Lily Collins’ beauty routine in full detail here, no filter. This is what Lily Collins’ everyday beauty routine looks like. Morning skincare What does Lily’s AM skincare routine look like? Well, you’ll be surprised how low-key it is. She begins with a splash of cold water on her face to wake herself up. To kick-start her skincare routine, she uses a facial wash, toner gel, and moisturizing cream. Next up? Lily always applies a layer of sunscreen (her go-to is Kiehl’s), whether it’s summer or winter. We recommend at least an SPF 20 if possible. Look for a light-weight, non-greasy sunscreen that feels like a second skin. Lily has spoken out about embracing her natural, ivory skin, so you won’t find any tanning products in her house! She also loves rubbing some mint or spearmint oil on her temples and the back of her neck to wake herself up and feel invigorated inside and out. One of her favorites is Peppermint Halo by Saje, which comes in a handy roller ball. And, did you know Lily is obsessed with hand cream? Yes! You’ll find her re-applying it throughout the day to keep her skin feeling soft and silky, just the way her Grandma used to do. Her favorite scent? Rose wins out every time—Crabtree & Evelyn have a rosewater one she is crushing on. The perfect base Lily Collins is famous for channeling that French-girl beauty by keeping her makeup minimal and natural all the time, apart from on special occasions. When she’s at home, she wears very little; her motto being “the less there is on you, the less there is to go wrong!” But what about when she is wearing makeup? Lily loves to go for a foundation that is light enough to allow her natural freckles to shine through but just enough to give a nice base. She steers clear of heavy, coated products to avoid her pores getting clogged. For days when she wants something a little different, she mixes a small drop of light foundation with her favorite serum, then dabs it into her forehead, chin, and cheeks. To blend, she uses a sponge, then tops with a powder to set it, and a bit of blush for contouring. It’s all about the brows The next step on Lily Collins’ beauty routine is tending to her bold and beautiful brows. The question on all of our minds while watching Emily In Paris has been, what’s the secret to her brow game? Tell us all Lily! When asked what her favorite part of her beauty regimen is, she aptly said “It’s all about the brows.” She swipes a highlighter over her eyelid and under the brow to make her brows pop even more. She brushes her eyebrows up and over to slightly tame them. And that is IT. Seriously. On the odd occasion when they need a little more taming, she uses some mascara to lend a helping hand. To draw extra attention to her eyes, she applies a few flicks of liquid liner at the outer edges. She then adds a coat of volumizing mascara to bring fullness and life to her lush lashes. Nothing says French beauty quite like fluttery lashes does. If there’s one thing every French woman includes in her beauty routine, it’s a swoosh of black mascara. Lush lips When it comes to her lips, Lily begins by gently exfoliating them with a delicious, tropical coconut scrub. Once her lips are prepped, she coats them with lip balm–and you’ll find her reapplying it throughout the day to keep those lips looking lush. For an everyday look, Lily tops her lip salve with a swipe of nude lipstick and her favorite gloss. But what about those red-carpet occasions? Lily has perfected the shades that compliment her pale skin and dark hair and opts for softened red lipstick shades and deep plums. If you’re looking for some lipstick inspo, check out our long-lasting matte lipstick, which is available in four fabulous color combos. There’s guaranteed to be a shade that was made for you. Fabulous fragrance When it comes to fragrance, there are a few favorites that Lily loves. Rose makes the cut once again, then bergamot and oud. She’s usually drawn to deeper scents rather than feminine ones. But if she had to pick a scent of choice? La Vie Est Belle. That means “life is beautiful” in French. The scent swoops her back to her Paris-days and has her longing to be reunited with the most romantic city in the world. We can’t wait for that either, Lily! Messy hair, don’t care French women are loved (and envied) worldwide for perfecting that I-just-woke-up-like-this hair. It’s chic, but it’s not perfect. Think wind-swept runway romance. How do they do it?! Well, Lily seems to have perfected that Paris-hair, and guess what her secret is? She lets her hair do whatever it wants. Really. Her hair goes through a lot as an actress, constantly being colored and curled while on set. So when she’s off-duty, she keeps things super simple. She loves Kérastase for repairing her hair, and often goes for a volumizing hair gel when she desires some extra volume. She’s also a big fan of dry shampoo (could this woman be any cooler?). Oribe hair sprays are her favorite when she hasn’t washed her hair in a few days and needs a quick pick-me-up. Evening rituals Lily’s evening beauty routine echoes her morning ritual. She’ll shower, get cozy on the sofa, and remove all her makeup using face wipes. Later, she rinses her face with the same gel she used in the morning and applies some face cream. When her skin feels extra dry, she opts for a quick face mask and rubs natural coconut oil into her body. Then it’s off to bed for some much-needed beauty sleep.
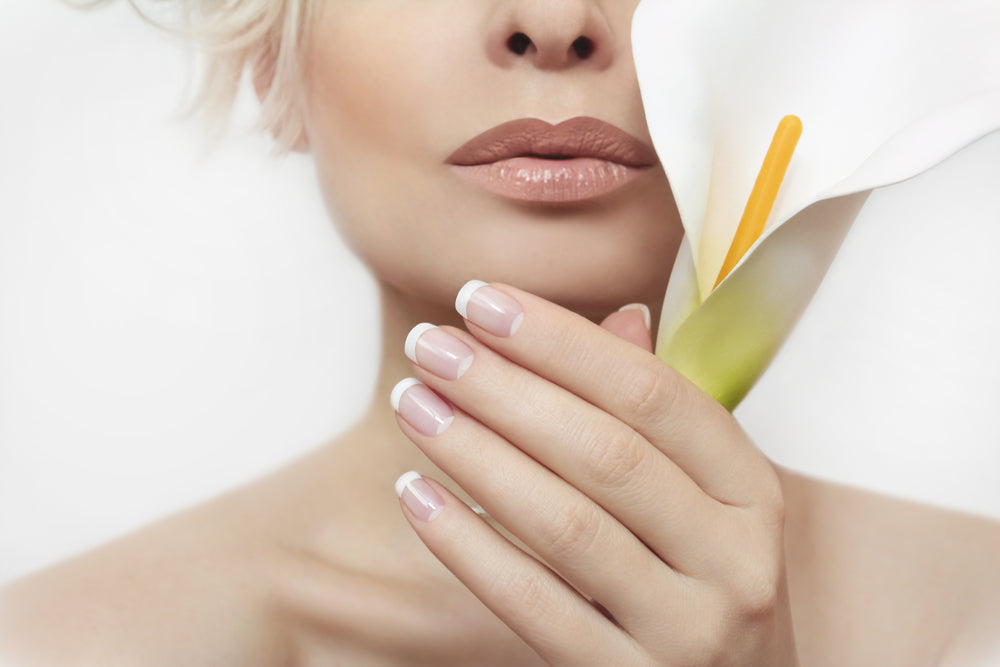
One of the most important parts of French beauty is looking well put-together. On the one hand, you want to look effortless, but on the other hand, you also want to look intentional. Groomed nails are essential for striking this balance, especially if you opt for a natural-looking French manicure. We’ve compiled a step-by-step guide to achieving perfect nails at home, so you can skip the nail salon. You can also adapt these tips to give yourself a relaxing pedicure! First, we’ll cover all the tools you need to have on-hand, and then dive straight into the how-to. At-home manicure tools You don’t need fancy tools to create a DIY French manicure at home, but you do need some basic nail grooming essentials. Here’s our comprehensive list of all the things you’ll need! Nail polish remover Emery or crystal nail file Cotton pads and cotton swabs Cuticle pusher (optional) Warm water and soap Hand cream or cuticle oil Hand scrub (optional) Clear base coat Clear topcoat Nude, pink, or colorful nail polish White nail polish Thin synthetic brush (optional) 1. Remove old polish First, if you still have some remnants of old nail polish on your nails, make sure to scrub it away thoroughly with cotton pads and nail polish remover. Some colors tend to really get lodged along the edges of the nail, in which case, use a cotton swab dipped in remover to really get in there and clean things up. 2. Shape your nails Next, file the tips of your nails to an even shape. There are all kinds of nail shapes you can choose from, but we prefer keeping it natural with an almond, oval, or rounded nail shape. When you file your nails, only go in one direction at a time, rather than filing back and forth. Go slowly, so you can control the shape you create and don’t accidentally over-do it. 3. At-home manicure soak If you plan to trim or push back your cuticles, it’s crucial that you soften them first with an at-home manicure soak. Fill up a shallow bowl of warm soapy water, and then dip your finger in, just up to the cuticle. Leave your fingers in the water for just 2-3 minutes, and take the moment to relax. This will be long enough to soften the cuticles but not so long that it’ll saturate your nails with water, which can compromise the integrity of your nail polish later on. If you’re happy with the condition of your cuticles, you can skip this step altogether! 4. Push back the cuticles (gently!) Pull your nails out of the water, and dry them with a soft towel. Then, use the cuticle pusher tool to gently press against your cuticles and push them back a little. If pushing on your cuticles is painful at all, it’s a sign you’re overdoing it, so make sure to ease up on the pressure. In general, we don’t recommend trimming the cuticles at home unless you already have a bit of professional experience. It’s easy to damage cuticles when trimming them, which may lead to infections or cause the skin to grow back thicker. 5. Exfoliate and moisturize Next, it’s time to give your hands and cuticles a nice treatment! For maximum pampering, exfoliate your hands by rubbing them with a scrub. You can even make your own! If your scrub is moisturizing enough, you can then just rinse your hands and move on to the next step. If you skipped scrubbing, then take a moment to rub your hands and nails with hand cream, or apply a designated cuticle oil to the nails. Wait a few minutes to allow your nails to absorb as much of the oil as possible. For simple groomed nails, you can stop here! Moisturized, well-shaped nails are already enough for simple French beauty. However, to take your nails to the next level, you’ll want to add some polish. 6. Remove excess moisture Next, dip a cotton swab in nail polish remover, and carefully wipe it only over your nail, being careful to avoid the cuticles. This will remove any excess moisture or oil from the nails to guarantee that the polish adheres well. Let the remover evaporate entirely before moving to the next step. 7. Lay down your base coat A base coat of polish is essential for protecting your nails from yellowing and creating an even base for the polish. Apply the base coat carefully to each nail, making sure to only use a minimal amount so that it dries quickly. 8. Apply your color Once your base coat has thoroughly dried, you can apply your colorful nail polish! Pink, peach, and nude are the classic choices for a French manicure, but other colors are perfectly acceptable as well. Apply the polish in thin layers, starting about a millimeter away from the cuticle, and painting it on in strips. Once your first coat fully dries, apply the second coat, and wait for it to dry, as well. 9. DIY nail tips Turn your classic mani into an ultra-chic French manicure. Dip an old eyeliner brush or a dedicated nail brush into some white nail polish. Then, carefully paint the tips (i.e., top 2-3 millimeters) of your nails. If your hand is a little shaky, you can lay down some sticky tape over the bottom of the nail first to guarantee a clean line. 10. Finish with a top-coat Once your polish is totally dry, finish things off with an ultra-thin layer of topcoat. This will help seal in all of your hard work, add some sheen, and prevent your nail polish from chipping. 11. Clean up the edges Once your topcoat is fully dry, it’s time to fix mistakes! Even the pros sometimes smudge a bit of polish over the cuticle, but thankfully, it’s easy to clean up. Just soak a cotton swab in some nail polish remover and use it to erase any smudges. Nailed it! It takes a bit of time and maybe even practice, but achieving the perfect manicure at home is totally doable. Don’t be afraid to skip the nail salon next time you want to treat yourself to a French manicure!