


Step-by-Step Winged Eyeliner
Perfect winged liner is one of the most challenging makeup techniques to master. At first swipe, you end up with an overly subtle winged eyeliner, so you decide to add just a touch more, and next thing you know, you’ve overdone it…
Don’t even get us started on getting both eyes to match!
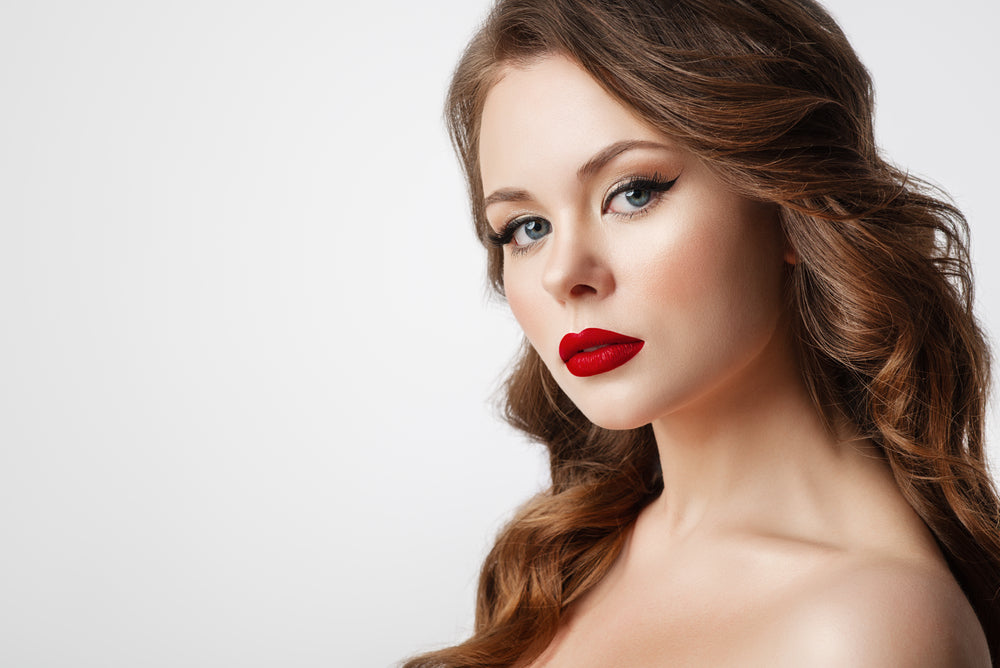
The only thing that might be tougher than winged eye makeup is a vivid red pout, so it’s funny how one of our favorite go-to looks in French beauty is a combination of these two.
Through years of practice, we've refined our skills and uncovered some of the best winged eyeliner hacks that make achieving that subtle wing a little easier. Today, we’ll be sharing all of our tips with you!
What kind of winged eyeliner look do you want?
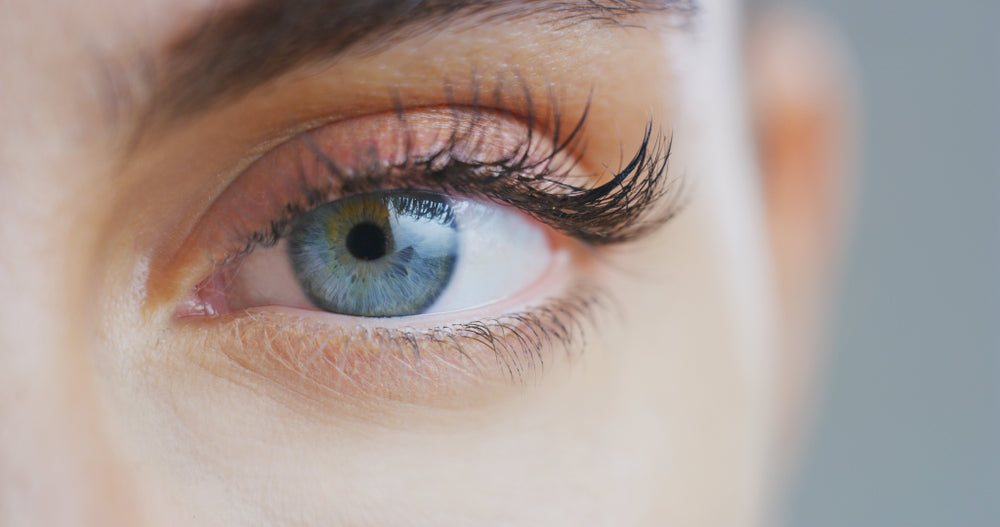
 Are you aiming for a natural winged eyeliner look, or would you prefer a dramatic cat eye? Winged eyeliner comes at a few different intensity levels, and the angle of your wing will have a big impact on your look.
These days, the sharp “fox” winged eyeliner look has become especially popular, but we’re still enamored with the subtle winged eyeliner of the ‘40s and the sultry winged eye makeup of the ‘70s.
While you do need to decide on the kind of look you want, our tips will help you achieve the perfect winged eyeliner every time.
Winged eyeliner for different eye shapes
 Taking your eye shape into account will help you figure out how to master the wing since when you draw on a liquid liner, you’re effectively changing the borders of your eye.
The more sharply angled your eyeliner, the more upturned your eyes will look, while if you go horizontal, they’ll look a little sleepy and sultry.
As for the lash line, a rounded shape will make the eyes look doll-like, while progressing from thin to thick towards the outer corner will make the eyes look almond-shaped.
What about the inner corner?
 In classic French beauty, we like to stop the eyeliner before the inner corner, and sometimes even at the eye’s center; this opens the eyes and gives the face a very fresh look.
However, in recent years, it’s become trendy to aim for a sultry look by bringing the eyeliner all the way down to the inner corner in its own little wing. Feel free to experiment and see what style you like best!
Choose the right eyeliner
 Liquid and gel eyeliners are the ideal choice for a winged look, but some are easier to work with than others. Gels usually come in a pot, so they require a separate brush, which can be inconvenient at times.
As for liquids, many come with ultra-thin brush applicators that are difficult to control. Felt-tipped pens, like the Feutre Fin, are ideal. With a tapered, sturdy felt tip, a pen eyeliner offers a precise wing but can still cover a lot of space when necessary.
Keep your distance from the mirror
 This is one of our most useful winged eyeliner tips, so read closely.
Instead of holding your mirror close to the face as you draw on your eyeliner, take a step back. This will allow you to see both of your eyes simultaneously, which is essential for achieving perfectly symmetrical eyeliner wings.
Otherwise, working too close to the mirror can easily result in two gorgeous eyeliner wings that look nothing like the other – giving you a lopsided look.
Steps to a perfect wing
 Now, for the actual application! If you start with the hard part first, the rest of your winged eye makeup will be a breeze. It just so happens that the most challenging part of winged eyeliner is the wing itself.
- Start with the eye you usually struggle with, and draw the lower line of the wing by following your lower lash line.
- Do the same thing on your other eye while checking for symmetry in the mirror.
- Then, draw on each wing’s top line, creating a little triangle at the outer corner.
- Once again, do the same on the other eye and check that everything lines up.
- If your wing is a little more dramatic, you may need to fill it in a little as well.
Small lines from outer corner to inner corner
 Now it’s time to draw your liner over the lash line. To avoid gaps between the liner and your lash line, pull your lid upwards (gently!) as you apply. Then, working from the outer corner inwards, draw the eyeliner on in short strokes.
Don’t worry too much about achieving a perfect line yet — once you let go of your lid, you’ll be surprised to see how even and delicate your winged eyeliner looks. You can then correct or thicken up the line after you have that base layer down.
Keep the eye open to fit a hooded lid

One common struggle many makeup lovers face is how to apply winged eyeliner to hooded eyes. The secret is to draw the top line of your eyeliner wing while your eyes are totally open so that your eyeliner sort of “skips” over the crease. It’ll look like there’s a little step or divet in your eyeliner when your eyes are closed, but when they’re open, it will look incredibly flattering.
No more winging it
 Using liquid eyeliner might seem daunting at first, but with our winged eyeliner hacks and suggestions, we know that not only will you master the wing, but you’ll also refine it to suit your flare.
The big, beautiful brow trend doesn’t appear to be going anywhere anytime soon. Full, natural-looking brows are so hot right now, and if we’re honest, we’ve always been a big fan. This is classic French beauty at its best! If you take your eyebrow game as seriously as we do, chances are you’ll have heard of eyebrow lamination. This is the latest eyebrow trend, and plenty of actors, models, and influencers are hopping on it without a second thought. But what is eyebrow lamination? What does the process involve? Are there any potential side effects? How much does brow lamination cost? And what’s better—laminated brows or a natural brow approach? We’ve got all the answers to your burning questions and more in this article. What is eyebrow lamination? Although it seems to be incredibly popular with Insta influencers, eyebrow lamination is a relatively new beauty procedure. You can think of it as a perm for your brows. The aim is to create fuller, smoother, shinier-looking brows and reduce the need for applying eyebrow makeup. Here’s what the brow lamination process looks like: Your beautician applies cream to your brows to “lift” your hairs. Your brow hairs are brushed upwards to get them into a uniform vertical direction. A neutralizer is applied to help seal your brows in place. A nourishing oil is added to prevent irritation and dryness caused by the chemicals in the process. The process usually takes around an hour to complete. You may also want to add additional treatments like tweezing excess hairs, waxing to create your desired shape, or color tinting. You will also need to apply a nourishing brow oil or cream every night after the procedure to prevent your brows from drying out. So although you may be able to wake up with beautiful brows that don’t need any eyebrow makeup, there’s still eyebrow maintenance involved! How much does eyebrow lamination cost? As you’d expect, the cost of an eyebrow lamination session varies depending on where you go. But you can expect one session to set you back anywhere between $50 and $100. Don’t forget—brow lamination is a semi-permanent procedure. That means you’ll have to repeat the process to keep your brows looking the way you want them to. On average, one session lasts about eight weeks. Brow lamination vs microblading What’s the difference between brown lamination and microblading? Microblading is an invasive eyebrow procedure that involves needles and coloring. The process is similar to tattooing. Small cuts are made into the skin beneath your brows, and pigments are inserted into these cuts to create a fuller eyebrow look. One microblading session can last anywhere between 12 and 18 months before the color starts to fade. The main difference is that brow lamination is a non-invasive, semi-permanent procedure. Potential risks of eyebrow lamination Although eyebrow lamination is non-invasive and doesn’t use needles, there are still side effects and potential risks to be aware of. This is because the chemicals involved in the procedure are quite harsh and can irritate the skin. Some of the common side effects include: Swelling Redness Peeling Itching Dryness Bumps These effects can show up beneath and above your eyebrows, as well as extending to your eyelids. There’s also the potentially serious risk of eye damage if the chemicals accidentally run into your eyes during the process. So if you’re set on getting your brows laminated, it’s important you get them done by someone who is properly trained and knows what they are doing. Because of the risks, brow lamination is not recommended for people who suffer from: Sensitive skin Rosacea Eczema Have a history of contact dermatitis The chances of you experiencing side effects increase if you repeat the brow lamination process more frequently than recommended (no more than every six weeks). Like with dying your hair, it’s recommended you do a patch test before going ahead with the full procedure. A patch test will show whether you have any allergic reactions or if your skin is too sensitive. Should you go for laminated brows or the natural look? Laminated brows might be the hottest eyebrow trend right now, but all trends come and go. Why risk damaging your eyebrows when you can achieve the same look with makeup in a matter of minutes? And in our humble opinion, there’s nothing more beautiful than embracing your natural beauty. Here’s why we recommend avoiding harsh brow treatments and opting for the natural brow look: It’s safer and better for your health. It’s cheaper (more money to spend on whatever else you like!) We’re big fans of embracing your natural beauty. There are makeup products for your brows that will safely help you yield the same results as lamination. The secret to natural, fuller brows Step 1: Follow your natural brow line Whether you choose to pluck, wax or thread, be sure to follow the natural shape and arch of your brow line. This is the secret to brows that perfectly suit your bone structure. Remember—don’t overdo it! You’re going for the natural look. Step 2: Find an eyebrow pencil to match your brows The secret to selecting the right eyebrow pencil is to go one shade lighter than your hair color. We cannot get enough of the Brow Arcade eyebrow pencil. You can create a natural or bold look depending on the occasion. The thin tip makes the application process super simple and precise without the need for a brow stencil. The Brow Arcade eyebrow pencil comes in four gorgeous shades: Blonde Soft brown Chestnut Black-brown Step 3: Brush your brows Did we mention that the Brow Arcade also has a fabulous spoolie brush attached so you can brush your brows? The secret is to brush your eyebrow hairs in a downward direction with the spoolie to help you spot any patchy areas and fill them in. This will give your brows that added definition you’re searching for. Once you’re done, remember to brush your brows back upward! Conclusion: Beautiful brows don’t have to be risky! We hope we’ve shown you that everyone can enjoy natural, beautiful brows without the need for risky or invasive procedures like eyebrow lamination. Plus, we believe that putting makeup on is part of the joy. It’s therapeutic and magical as you watch yourself at work. And you get to go shopping for new eyebrow makeup—who doesn’t love that?!
If you love the look of long eyelashes and thick eyebrows as much as we do, you’ve probably heard about castor oil. Castor oil is said to help grow eyelashes and eyebrows like a magical serum. A bottle of this unusual oil only costs a few dollars and it promises dramatic results. If you’re less than enthused about the state of your lashes or brows then you might be tempted to try it out! However, the jury's still out about it's lengthening abilities, so maybe you're feeling a twinge of doubt. After all, castor oil for eyelash growth is one of those things that sounds too good to be true! With some skepticism but also a touch of hope, we delve deep to find the truth behind those castor oil claims. What is castor oil? Castor oil is a thick oil with a dry yet sticky texture. One of the most unique things about it is that, unlike other oils, it acts as a humectant, which means that it can pull water into the skin. Like all botanical oils, castor oil is composed of fatty acids. The main one is ricinoleic acid, which is responsible for its unique texture and also imbues it with some anti-inflammatory properties. It’s a great moisturizing and soothing oil, although its consistency is a bit different from that of a regular moisturizer. Does castor oil really grow eyelashes and eyebrows? Despite the pervasive myth, it turns out that there’s little scientific basis or decent evidence to suggest that castor oil can improve lash and brow growth. However, it’s also worth noting that, to date, no one has done any extensive scientific studies to actually test castor oil for this. Looking at beauty forums and online reviews, we found a real mish-mash of experiences, but no definitive answers. Some users who tried castor oil claim to have noticed real improvement when it comes to their lashes or brows, while others don’t see any difference. It’s impossible to quantify the varying self-reported experiences so, unfortunately, these testimonials don't really offer a conclusion. There are also very few compelling reasons as to how castor oil could work. Some say it’s anti-inflammatory or anti-bacterial, but we dismiss that immediately since other, more potent anti-inflammatory and anti-bacterial agents don’t improve lash growth. One study suggested that ricinoleic acid might be able to inhibit prostaglandin D2, which is responsible for hair loss in men. However, the study was done with a computer simulation, so it’s not even close to being conclusive, not to mention that it’s not transferable to lash and brow growth. Is castor oil safe for eyelashes? Castor oil might not be an effective lash or eyebrow growth serum, but it is totally safe. There’s no harm in trying it out, as long as you go about it safely. However, before you take a bath in the stuff, we recommend doing a patch test. As with many other natural ingredients, castor oil does have a slight potential to irritate the skin. To patch test castor oil, simply test it for a few days in a row on a patch of skin where a negative reaction will be easy to deal with. You can apply a little to your forearm, neck, or behind your ear, for example. If all goes well, you can try it on your brows or lash line next. Keep in mind that if the castor oil gets in your eyes, it may cloud your version a bit. If it stings or irritates your skin at any point, stop using it! Additionally, castor oil can be quite dangerous if consumed, so keep it away from curious pets or children. Bottom line You can definitely try castor oil for eyelash and eyebrow growth, especially if you want to keep them moisturized (a proven benefit of castor oil that we love). Just remember that it’s probably not as effective as some people claim when it comes to improving hair growth. You can always use makeup to give your brows and lashes a nice boost! Our Brow Arcade can lend a hand in adding a few hair-like strokes to your brows, while a double-dose of the Cabaret Premier Eyelash Primer and Provocation Mascara will help give the lashes some serious oomph. No matter what route you take, we just hope you keep batting your lashes with confidence!

Are you looking for some super fun eyeliner looks to explore? From simple eyeliner styles to how to put on liquid eyeliner, and the best eyeliner pencil to use for a chic look, this article has it all! It’s easy to get into a rut with makeup, especially your eyeliner. Do you find you’re always creating the same look day in, day out? Well, it’s time to mix things up! Whether you’re looking for something simple and chic, quick to apply, a pop of color, or something a little more special—we’ve got a look for you. There really are no limits when it comes to getting creative with your eyeliner. And beginners and pros are all welcome here. Check out these 11 fun eyeliner looks below. The less is more look Less can often be more, especially when it comes to French-girl makeup and beauty. After all, who doesn’t love rolling out of bed in the morning and getting their makeup complete in ten minutes? More time for sleeping in, getting your workout in, or even eating a delicious breakfast. So, if this is your makeup philosophy, embrace it. This is one of the more simple eyeliner styles on our list. First, you trace your upper lash line making a thin line along your top lashes with a black eye pencil. To complete the look, curl your lashes and add a healthy coat of lengthening mascara. Told you this was going to be simple and effortless! The semi-outlined eye For this look, you’ll need a liquid eyeliner and an angled brush. Use both together to trace your upper lash line, kicking the line out slightly at the outer corner of your eye to create a winged effect. Next, using the liner and brush again, draw a line from the outermost part of the wing you just drew, all the way back to the halfway point of your lower lash line. And voila—you just created your semi-outlined eyeliner look! The French flick The French flick is also described as the toned-down version of a French woman’s classic eyeliner look. The difference with this look is you start at the center of the upper lid instead of the inner corner. This creates a subtle and smooth line. Use a micro angled brush to help you apply your eyeliner in whatever shade you like. Black is the classic, and you can't wrong with it. Be sure to check your flick is symmetrical on both sides. Two is better than one For this look, you’ll need your standard black eyeliner plus another color for contrast. You can go for a neutral color here or something more vibrant—it’s up to you! Apply your eyeliner as usual to your upper and lower lash line. Next, apply your second color under the lower lashes for contrast. Use an angled brush if you want a thin, crisp line. Don’t forget to finish your look with a swoosh of mascara to make your lashes pop. A kitten-eye This look is all about dialing things back a notch from a full cat-eye, hence the kitten-eye name! We’re opting for a brown eyeliner for this one to create a subtler look, perfect to wear day or night. Use an angled brush to lightly line your top lash line. Start at the inner corner and extend it out into a baby cat-eye. If you want to make this look all about the eyeliner, avoid curling your lashes and adding mascara. Barely there eyeliner Here’s another simple eyeliner style for those of you who don’t want your eyeliner to steal the show. Applying a long-lasting eyeliner between your lashes is more than enough to add some beautiful definition to your eyes. And if you choose the best eyeliner pen for the job, it’ll last you all day and well into the night. It’s true what they say—a little goes a long way. Without a doubt, this is an effortlessly chic way to wear eyeliner. Smudged and smokey To create a smudged, smokey look, use a black pencil to line your lashes. Next, use a smudger brush to blend it out into an almond shape past your lash line. Then sweep some shimmery gold shadow onto your eyelids and the inner corners of your eye, and blend for a sexy, smoldering finish. Sleek ‘60s wing On the hunt for a classic winged eyeliner look? You’re going to love this sleek ‘60s wing. Use a peachy cream eye shadow as your base color, applying it from the lash line to the crease. Next, use a fine-tipped liquid eyeliner to draw a thin, straight line from the inner corner of your eyes, all the way to just past the outer corner. The trick is to extend the line upward, in the direction of the tail of your brow, but ease up on the pressure as you reach the outer corner. This will create a softer, faded line. Finish the look with some fluttery lashes by adding a coat of your favorite voluminous mascara. Thick and thin Have you ever played with the width of your eyeliner? This is a fun look to try while maintaining the definition of your eyes. Try sweeping on a thicker line to your upper lash line, and keep the bottom lash as you usually would. You can even experiment with different colors to make this look extra playful! Baby wings This is a cute spin on the classic winged eyeliner look. Connect your upper and lower eyeliner with the smallest flick at the outer corners. You’ll still create a winged look, but it’s simpler to achieve and can be just as dramatic. Metallic magic A flash of metallic can take a regular eyeliner look into something that is red carpet ready in minutes! Line your eyes as usual with your black eyeliner of choice. Wait for it to dry. Next, use a metallic liquid eyeliner and apply a thin line on top of the previous line. This will make sure it stands out and gives you that wow factor. We’re loving rose gold right now, but any metallic shade will work well with this look. You now have 11 fun and almost effortless ways to up your eyeliner game, and try out a new look. Remember, makeup is all about feeling good and having fun. Classic looks are what we adore, but don’t be afraid to step outside of your comfort zone and try something a little different now and then. The golden rule? There are none!