


11 Effortlessly Chic Ways to Wear Eyeliner
Are you looking for some super fun eyeliner looks to explore?
From simple eyeliner styles to how to put on liquid eyeliner, and the best eyeliner pencil to use for a chic look, this article has it all!
It’s easy to get into a rut with makeup, especially your eyeliner. Do you find you’re always creating the same look day in, day out?
Well, it’s time to mix things up!
Whether you’re looking for something simple and chic, quick to apply, a pop of color, or something a little more special—we’ve got a look for you. There really are no limits when it comes to getting creative with your eyeliner. And beginners and pros are all welcome here.

Check out these 11 fun eyeliner looks below.
The less is more look
Less can often be more, especially when it comes to French-girl makeup and beauty. After all, who doesn’t love rolling out of bed in the morning and getting their makeup complete in ten minutes? More time for sleeping in, getting your workout in, or even eating a delicious breakfast.
So, if this is your makeup philosophy, embrace it.
This is one of the more simple eyeliner styles on our list. First, you trace your upper lash line making a thin line along your top lashes with a black eye pencil. To complete the look, curl your lashes and add a healthy coat of lengthening mascara.
Told you this was going to be simple and effortless!
The semi-outlined eye
For this look, you’ll need a liquid eyeliner and an angled brush.
Use both together to trace your upper lash line, kicking the line out slightly at the outer corner of your eye to create a winged effect.
Next, using the liner and brush again, draw a line from the outermost part of the wing you just drew, all the way back to the halfway point of your lower lash line.
And voila—you just created your semi-outlined eyeliner look!
The French flick
The French flick is also described as the toned-down version of a French woman’s classic eyeliner look.
The difference with this look is you start at the center of the upper lid instead of the inner corner. This creates a subtle and smooth line. Use a micro angled brush to help you apply your eyeliner in whatever shade you like.
Black is the classic, and you can't wrong with it.
Be sure to check your flick is symmetrical on both sides.
Two is better than one
For this look, you’ll need your standard black eyeliner plus another color for contrast. You can go for a neutral color here or something more vibrant—it’s up to you!
Apply your eyeliner as usual to your upper and lower lash line. Next, apply your second color under the lower lashes for contrast. Use an angled brush if you want a thin, crisp line.
Don’t forget to finish your look with a swoosh of mascara to make your lashes pop.

A kitten-eye
This look is all about dialing things back a notch from a full cat-eye, hence the kitten-eye name!
We’re opting for a brown eyeliner for this one to create a subtler look, perfect to wear day or night.
Use an angled brush to lightly line your top lash line. Start at the inner corner and extend it out into a baby cat-eye.
If you want to make this look all about the eyeliner, avoid curling your lashes and adding mascara.
Barely there eyeliner
Here’s another simple eyeliner style for those of you who don’t want your eyeliner to steal the show.
Applying a long-lasting eyeliner between your lashes is more than enough to add some beautiful definition to your eyes. And if you choose the best eyeliner pen for the job, it’ll last you all day and well into the night.
It’s true what they say—a little goes a long way. Without a doubt, this is an effortlessly chic way to wear eyeliner.
Smudged and smokey
To create a smudged, smokey look, use a black pencil to line your lashes. Next, use a smudger brush to blend it out into an almond shape past your lash line.
Then sweep some shimmery gold shadow onto your eyelids and the inner corners of your eye, and blend for a sexy, smoldering finish.
Sleek ‘60s wing
On the hunt for a classic winged eyeliner look? You’re going to love this sleek ‘60s wing.
Use a peachy cream eye shadow as your base color, applying it from the lash line to the crease. Next, use a fine-tipped liquid eyeliner to draw a thin, straight line from the inner corner of your eyes, all the way to just past the outer corner. The trick is to extend the line upward, in the direction of the tail of your brow, but ease up on the pressure as you reach the outer corner. This will create a softer, faded line.
Finish the look with some fluttery lashes by adding a coat of your favorite voluminous mascara.
Thick and thin
Have you ever played with the width of your eyeliner?
This is a fun look to try while maintaining the definition of your eyes.
Try sweeping on a thicker line to your upper lash line, and keep the bottom lash as you usually would. You can even experiment with different colors to make this look extra playful!

Baby wings
This is a cute spin on the classic winged eyeliner look.
Connect your upper and lower eyeliner with the smallest flick at the outer corners. You’ll still create a winged look, but it’s simpler to achieve and can be just as dramatic.
Metallic magic
A flash of metallic can take a regular eyeliner look into something that is red carpet ready in minutes!
Line your eyes as usual with your black eyeliner of choice. Wait for it to dry. Next, use a metallic liquid eyeliner and apply a thin line on top of the previous line. This will make sure it stands out and gives you that wow factor.
We’re loving rose gold right now, but any metallic shade will work well with this look.

You now have 11 fun and almost effortless ways to up your eyeliner game, and try out a new look.
Remember, makeup is all about feeling good and having fun. Classic looks are what we adore, but don’t be afraid to step outside of your comfort zone and try something a little different now and then.
The golden rule? There are none!
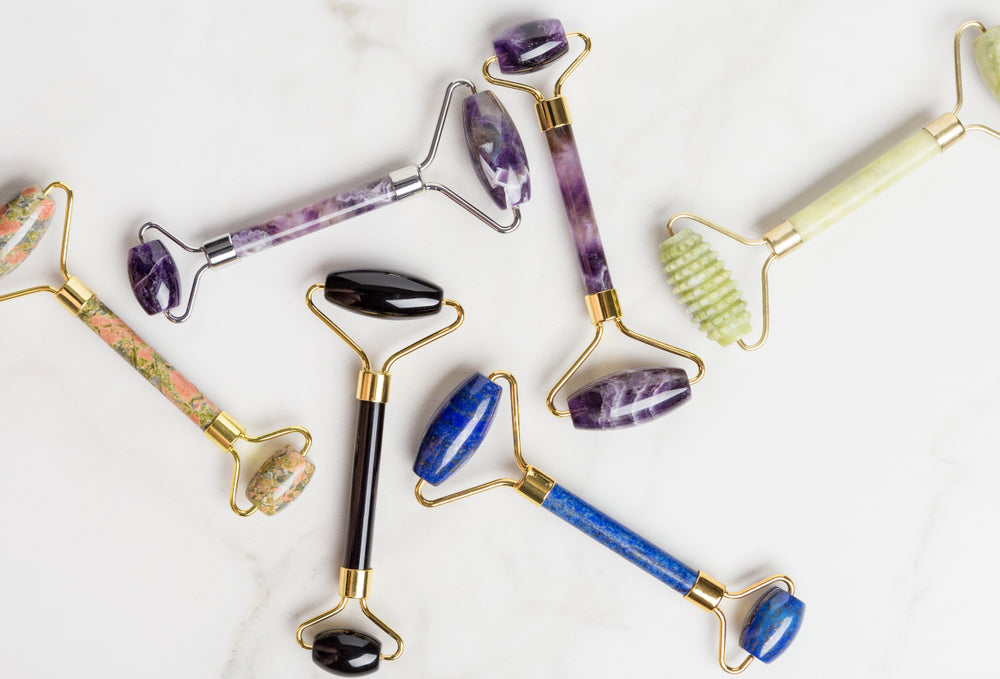
In French beauty, the skin is always the star. French women rarely cover their faces with more than a sheer tinted moisturizer. Instead, they focus on achieving healthy skin with great skincare and an invigorating daily facial massage. While the hands are the traditional tool of French aestheticians, facial rollers have been a welcomed addition to French women’s daily skin care routines. If you’d like to add a face roller to your beauty routine, as well, keep reading! We’ll help you learn everything you need to know about how to use a face roller for maximum effects. The benefits of face roller massage Using a face roller on a regular basis has immense wellness benefits. It goes beyond just the skin — the effects of a facial massage have physical impacts below the epidermis. The rolling motion of a facial roller exerts less pressure on the skin than a traditional face massage, so it yields results quicker and is more gentle. Face rollers are inherently cool, so they have a soothing effect on the skin. You can boost this effect by keeping your face roller in the fridge. They tone the face and eliminate puffiness by moving and draining lymphatic fluid. They give facial muscles a relaxing massage that helps to drive away tension, especially from the jaw and temples. The massage improves blood circulation to the skin, which gives a youthful glow and may have long-term anti-sagging effects. The gentle massage helps skincare products penetrate into the skin more quickly and deeply. How to choose the best face roller When selecting the best face roller for you, consider what kind of features you’re especially interested in. Some stones do a better job of staying cold, while others have a smoother surface that’s more gentle on the skin. In general, we recommend purchasing a double-sided roller, with a large side for rolling over the face and a smaller one for around the eyes. Jade rollers are the classic choice, as they were the first facial rollers available on the market, and they’re quite affordable. They’re lightweight compared to other stones, but they’re also a hint quicker to lose their smoothness. Rose quartz facial rollers have become more popular in recent years. They’re a little heavier than jade rollers so they can exert more pressure on the skin, but they also stay cold for longer and are generally more durable. Amethyst rollers are the new thing in the facial roller scene. They’re structurally similar to rose quartz, but they’re quite expensive. The companies producing them often put more effort into manufacturing, so they’re usually smoother and less likely to make noise. Finally, there are ice rollers. They have a liquid core that turns to ice if you put them in the freezer. Using one is like getting an ice facial that rapidly cools the skin. They soothe irritation and reduce puffiness, but the cold shock can be too intense for daily use. How to use a face roller When not in use, keep your facial roller in the fridge, especially in the summer when the cold can be very refreshing. Always start with clean skin. The face roller will glide more easily if it’s also covered in a thin layer of moisturizer or face oil. If you’re a fan of sheet masks, you can use your facial roller on top of the sheet mask to allow the essence to soak in more thoroughly. Once you’re ready to roll over the face, remember this basic principle: Always start in the middle and work outwards and upwards, mirroring your motions on both sides of your face. You can roll along each area as many times as you like. Start at the neck, rolling upwards towards the jawline. Next, starting at the point of your chin, roll outwards following the curve of your jawline. Bring the roller up a bit, and roll in the same way over the chin and above the curve of the jawline. Then, roll along the cheeks, starting near the nose and going outwards. Roll over the forehead in upward lines, from above the brows up to the hairline. Flip your roller over to use the smaller side above the upper lip, along the sides, and up the bridge of the nose. To roll around the eyes, start below the eye’s inner corner and move outwards in a circular motion following the orbital bone. How to take care of your face roller As with anything that comes in contact with your skin, you should thoroughly clean your face roller after each use. Since it’s a non-invasive tool, you can simply wash it in warm water with a bit of soap or detergent. Then, towel-dry gently or place it somewhere safe to air-dry. How often should you use a facial roller? A massage with a face roller is a safe daily habit that’s incredibly gentle on the skin. Some women swear by using their jade roller twice a day, but once a day or week will also give you satisfying results. Even if you don’t have the time to use it every day, keep it around for the days when you feel like your skin needs that extra cooling, firming touch. Savoring the ritual French beauty practices are steeped in history, but we love updating them with new tools. A jade roller’s relaxing touch is the perfect upgrade, boosting your skin care practice and soothing the skin. That daily French ritual of facial massage becomes quicker and easier, and amidst your long, busy days, what more could we want?
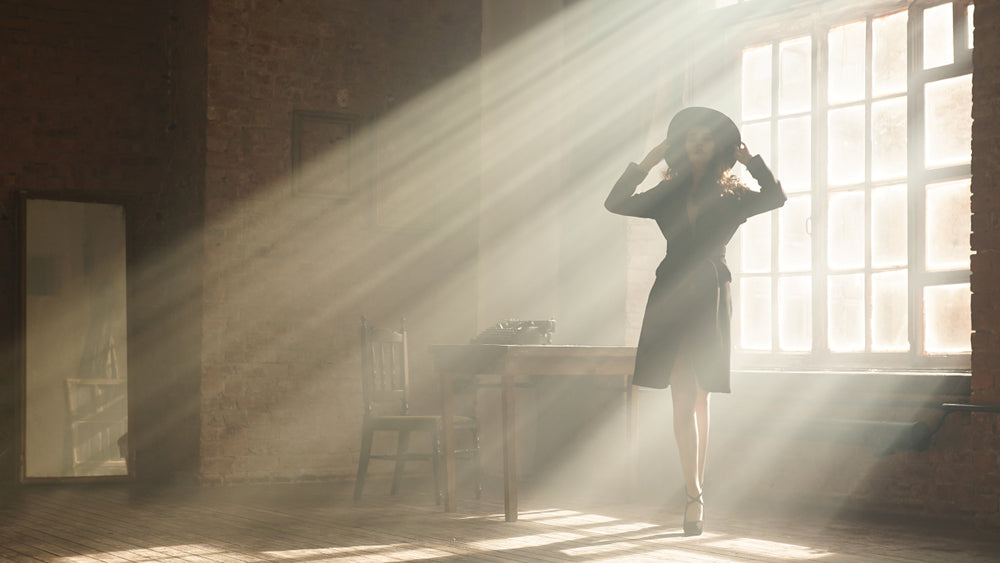
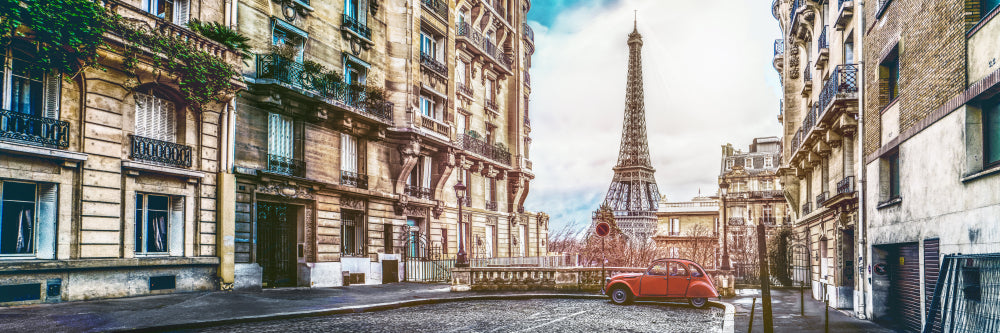
Do you love Parisian style and want to know how to create the perfect French fashion statement? French women are known for their impeccable, timeless style. Paris street style is effortless, chic, classic, and subtly sexy. The French have mastered the balance between looking dressed up while remaining laid back. Basics are mixed with one statement piece, so nobody ends up looking overdressed. Fashion in France is about clean lines and simplicity. Want to know the best thing about Parisian style? It values comfort. We don’t mean heading out the door in sweatpants and sneakers, but French women will never wear something that isn’t comfortable. For example, ballet flats are still chic and look great — comfort and quality are just as important as a piece’s aesthetics. Don’t you love that? Ditch those heels you can’t walk in and those jeans that are so tight you feel like your circulation is cut off. It’s time to do what the French women do and get comfortable while perfecting the Paris look. Here are twelve French fashion statements that Parisians love. 1. Sophisticated sunglasses No Paris look is complete without the addition of a sophisticated pair of sunglasses. Parisians favor big, bold style frames over slim ones. It doesn’t matter if the sun is shining or it’s the middle of winter — sunglasses are a must. They add cool points and help you channel the strut that Paris fashion week is renowned for. When in Paris, always wear sunglasses. Forget about what others may think; after all, French women never worry about such thoughts. 2. Mindful minimalism Nobody knows Parisian style quite like Coco Chanel does. When it comes to any outfit, minimalism is key. Less is always more. That means build most of your outfit up with simple basics: a plain white t-shirt, a tailored pair of black trousers, a white button-down shirt, a strappy camisole top, a classic trench coat or blazer. “Before you leave the house, look in the mirror and take one thing off.” - Coco Chanel If you want to wear a statement piece, then stick to one, like an amazing scarf, handbag, or a pair of shoes. This will help streamline your look and keep it refined and elegant. When it comes to jewelry, the rule is to keep it simple and don’t wear more than three delicate pieces. Minimalism is the secret to everyday Paris street style. 3. Casual glam Paris outfits are renowned for being sophisticated with a hint of imperfection. And the secret to this is mixing casual pieces with more glamorous evening pieces. A pair of jeans can be mixed with a silky, lace camisole top or a pair of jewel-encrusted sandals. A lovely printed dress might be paired with some old biker boots. A pencil skirt paired with ballet flats instead of traditional heels. Fashion in France isn’t about perfection, whether it’s your outfit or your hair and makeup. So when in doubt, mix things up. 4. The I-woke-up-like-this look When it comes to makeup, French women are all about highlighting their natural beauty. A good face cream, some SPF, a touch of brow gel, a coat of mascara, a pinch of blusher, some tinted lip balm, and you’re Paris ready. Remember to keep things relaxed. Go for simple eyeliner looks. Instead of perfectly straightening your hair, try for a natural wave and add a little texture. Classic colors are preferred over anything “in-your-face.” And opt for dewy, matte textures instead of shiny ones. 5. Hardly-there handbags No Parisian wardrobe is complete without a good quality leather handbag. This can be a quality faux leather too. French women strive to look chic rather than rich, which means avoiding big, recognizable logos. It’s okay to keep it subtle. Work with your budget, and invest in something that is small enough it can be hand-held but not too small that you can’t fit anything in it! 6. Have your cake and eat it: style & comfort French-style clothing prioritizes comfort but doesn’t compromise on style. It’s the best of both worlds. So, if you can’t walk in heels all day without hurting your feet, leave them at home! Most Parisian women prefer classic loafers and ballet shoes as their footwear of choice, or a low block heel. Cardigans are another French wardrobe staple, in a neutral color and high-quality fabric like wool, cashmere, or angora. Pair over a basic t-shirt or silk cami — you’ll feel oh-so toasty and comfy. A plain t-shirt in white or light gray is also a must-have item. Pair with a blazer or some high-rise straight jeans for an effortlessly chic look. Be sure to choose t-shirts made from 100% cotton (organic is best) — it will feel soft against your skin, and the quality will show. 7. The modern vintage look View this post on Instagram A post shared by Sabina Socol (@sabinasocol) If you don’t yet have a classic tailored blazer, you’ll want to add one to your wardrobe to perfect the Paris look. The great thing about a blazer is it goes with just about everything. Wear it with a basic t-shirt, a pair of jeans or tailored trousers, and even a mini dress. French women prefer an oversized blazer that looks like it came out of a man’s closet. Better yet, raid your partner’s wardrobe and see if there’s one you can borrow! 8. Laidback silhouettes Leave your skinny jeans and body-con dresses at home, ladies. Parisian style is centered on a more relaxed silhouette. Think A-line dresses, straight leg jeans, and oversized outerwear. If you opt for a tight pencil skirt, then pair it with a loose-fitting top to balance your look out. French women express femininity with masculine-inspired silhouettes and laid back shapes. Nothing should ever be too tight or fitted. 9. Timeless outerwear Always inspired by the philosophy that less is more, Parisians splash their cash wisely. They’ll save up and make investments in key pieces that can be worn over and over again. One of the most important pieces for any Parisian wardrobe is timeless outerwear: trench coats, biker jackets, bombers, and blazers. If there’s one item you must own, it’s a chic long beige trench coat. And given the unpredictable weather in Paris, you’ll certainly make the most out of it. Before making any purchase, ask yourself if this will be something you wear for the next few years. If the answer is yes, you’re thinking like a Parisian. 10. From day to night: the little black dress The little black dress is a classic piece for any woman’s wardrobe worldwide. But Parisians love wearing that LBD day or night. In the day, they’ll pair it with sneakers or some ballet flats with a loose blazer on top, and at night they swipe on some bold red lipstick and some voluminous mascara for a sexier look. When it comes to the shape, stick to what is most flattering for your figure and something you feel comfortable in. It can be short or long, and with or without sleeves or straps. 11. Head to toe neutral tones When it comes to color, neutral tones are your friend. Head to toe monochrome looks are part of everyday Paris street style — it’s all about discretion. Neutral tones include white, black, beige, camel, navy blue, gray, and khaki. The great thing about neutral colors is they can easily be mixed and matched with other pieces in your wardrobe. As a general rule, no French outfit will have more than three colors. 12. It’s not what you wear; it’s how you wear it There’s a reason why Parisian style is so simple yet chic. It’s less about the actual clothing you wear and much more about how you wear it. French style is all about how you mix and layer pieces together, the way you carry your handbag, your posture, and the way you smile. So the secret to French beauty isn’t about being a slave to the latest trends, but more about finding your unique style and wearing pieces that flatter your figure. And the most important thing to remember about making a French fashion statement? Have fun with it!
Welcome to the first post in our brand new series: Learn French phrases! Each post in this series will be centered around a different theme, so you can walk away a Parisian pro when it comes to French culture and cosmetics. Don’t worry; this isn’t going to be like the French classes you remember from your school days. Forget the boring phrases — we’re going to teach you everything you need to know about French beauty, from la crème solaire to les lingettes démaquillantes. Next time you’re looking at a product and notice the label or tag is entirely in French, you won’t be phased. You’ll feel right in your comfort zone! This post is all about learning French phrases relating to morning and evening beauty routines. Are you ready to learn some fabulous French with us? Learn French Phrases: Morning Skincare Routine What you put on your face first thing in the morning matters. The main focus? Protection and preservation. And while some skincare experts swear by 12-step routines, most of us just don’t have time for that. The good news? Follow these steps, and you can say hello to a flawless face. La crème solaire: Sunscreen La crème solaire is a must, and no French woman leaves home without it. Try and find a sunscreen with at least an SPF of 15, but 30 is best. Make sure you apply it to your face, neck, and décolletage. Un sérum: A lightweight moisturizer A serum is a thin moisturizer that helps to smooth out imperfections and reduce the appearance of pores. This will protect your face from bacteria, pollution, and your dirty phone screen. When it comes to un sérum, a little goes a long way. L’huile: Oil L’huile helps hydrate your skin, replenish it with vital vitamins and nutrients, and leaves your skin glowing and firm. Just a couple drops of oil will be more than enough. Une crème hydratante: Moisturizer There are so many moisturizers on the market, so your best bet is to pick one that works with your skin type (sensitive, dry, or combination). Moisturizer will keep your skin hydrated all day long. But remember, it’s not a replacement for drinking water! Une crème mains: Hand cream While we’re pampering our skin, let’s not forget our hands — they age as quickly as your face does. Regularly applying hand cream throughout the day (after washing your hands) can improve elasticity and lock the moisture in. We hope you’re enjoying learning French phrases with us! Ready for some more? Learn French Phrases: Nighttime Skincare Routine Your night skincare game is just as important as your daytime one. When you sleep, your skin has a chance to repair and recover from the damage done throughout the day. So the products you put on your skin before bed matter. This is the optimum time for the ingredients to work their magic because your skin is most receptive at night. Les lingettes démaquillantes: Makeup remover wipes L’huile démaquillante: Makeup remover Boules de coton: cotton balls Leaving your makeup on when you go to sleep is like committing a crime... against yourself. No matter how tired or hungover you are, always remove your makeup! Remember to be gentle as you do it, especially around the eye area. Une mousse nettoyante: Cleansing foam Using a cleanser is vital for getting rid of dead cells and any residual damaging agents at the end of the day. Like most beauty products, the best cleanser for you will depend on your skin type. Une lotion / Une crème de corps: Body lotion After you’ve showered, you want to lock in your skin's moisture with a nourishing body lotion. This will help your skin stay hydrated and elastic, and prevent it from becoming dry or flaky. Une crème de nuit: Night cream Applying a night cream is a must before going to sleep. This is the one thing that will keep your skin barrier healthy, and keep your skin looking radiant. Tip: use a special eye cream for your delicate eye area, and apply gently. Une masque de nuit / une masque de sommeil: Night mask Sleep masks are a brilliant invention. You cover your face with the mask before bed, it absorbs into your skin, and the ingredients gradually release through the night. The best part? All you have to do is pop the mask on, and your work is done. Do this once or twice a week instead of your regular crème de nuit. A night mask can reduce dullness and improve hydration, plus so much more! High five ladies — you are now a pro with French phrases about morning and evening beauty routines.