


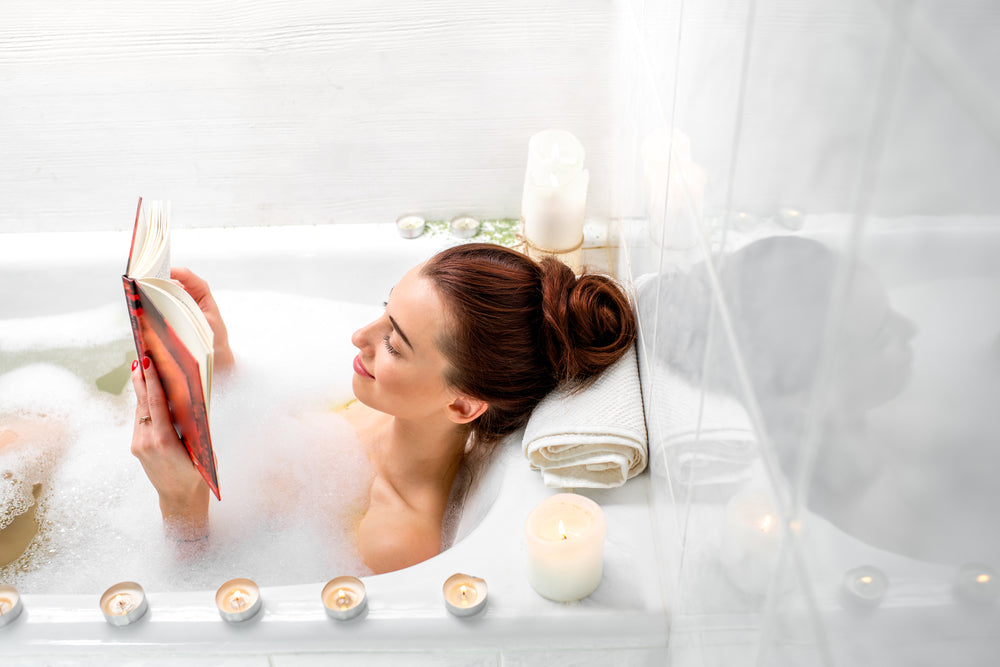
How to Have the Perfect Bath
The best way to show yourself love is to take time out of your day and do something that is wholly and completely for you.
A bath certainly counts! It feels divine as it relaxes the muscles and helps you unwind. It’s also a wonderful chance to pamper yourself with skin treatments, bath salts, and scented oils.
We’ve put together this guide to help you learn how to take a luxurious bath like no other. We’ll help you set up a relaxing bath routine, with tips on how to run the perfect bath temperature and advice as to what kind of accessories you’ll need to have a great time.
Even if you don’t have a bath, give this a read, ‘cause we cap things off with some relaxing shower tips. Dive in!
Set the scene
Ambiance is everything, darling. Turn your bathroom into an environment where you can unwind. Instead of harsh electric light, opt for some scented candles, and queue up the dreamiest playlist. Any music or soundscape that helps you relax will do; you can try tree.fm’s forest soundscapes, some guided meditation, or even a spa playlist on Spotify.
Perfect the temperature

The question of how to run the perfect bath temperature is a tough one. On the one hand, you want the water to stay hot for as long as possible, but on the other hand, you still want it to be pleasant right from the start.
Filling up the bathtub can take a while, so turn on the tap early. Twist the tap to a position where it’s just a little hotter than you would normally shower or bathe in, but not cranked all the way up.
There is some debate as to what the ideal bath temperature is, but most of us don’t keep thermometers on hand to check the precise temperature, anyway. You’ll know you’ve landed on the correct temperature when you can dip your foot in the water and leave it in for 5 seconds without any issues.
Waterproof your entertainment
A book or a TV-show can be pleasant bathtub companions, but bringing paper or tech devices into the water with you requires some planning. You can choose a cheap paperback, so it won’t be a great loss if it falls in, or simply waterproof your devices.
For the best luxury bubble baths, consider buying a waterproof case or even a waterproof device.
Consider a beverage

The next little treat for your relaxing bath routine is a beverage. Wine is the classic choice for a luxury bath, but don’t feel constrained. Tea, hot chocolate, and even juice are equally suitable companions.
If you do opt for an alcoholic beverage, make sure to also have some water on hand. It’s easy to get dehydrated or overheated in the bath, and alcohol will compound that, so staying hydrated is essential.
Start with a pre-bath rinse
Before getting into the bath, rinse yourself off, especially if you’ve had a long and grueling day. If you have both a shower and a bath, you can do this while the bath is filling up! Otherwise, you can do this before starting to fill up the tub. Keep the water lukewarm, and soap yourself up quickly—there’s no need to go overboard.
A bath pillow is essential
Unfortunately, even the most luxurious bathtubs are designed out of rock-hard porcelain, so resting your head on the lip of the tub isn’t the most comfortable. You can fold-up a small towel to cushion your head as you lie back, but if you really want to take your bathing experience to the next level, purchase a dedicated waterproof bath pillow.
Consider your bath additives
There are a few lovely options for additives that you can add to your bathtub. Luxury bubble baths can be a lot of fun, but the detergent-laden blends aren’t great for the skin, so here’s what we recommend.
- Natural bath bombs are amazing because they fizz, sparkle, and smell gorgeous. It’s even better if you learn how to make your own!
- Epsom salts can be a simple, affordable addition that’ll help your muscles unwind.
- To nourish your skin, pour in some bath oil or even just a spoonful of coconut oil. Just remember that oil will make the bathtub a little slippery when it’s time to get out.
- Finally, a few drops of your favorite essential oil will turn the entire bath into an excellent aromatherapy experience. Be sure to always be mindful of what oils you allow to come in contact with your skin and always test on a small area of your body before putting anything in the tub.
Enjoy a skin treatment
How can you take a luxurious bath without adding in some face treatments? We don’t think it’s possible. Steamy bath time is ideal for face treatments! You’ll have time to lie back while the added steam helps nourishing ingredients penetrate into the skin. Try a purifying clay mask, apply a Korean sheet mask, or go with your favorite facial skincare treatment!
Guarantee a cozy finish
Eventually, even if you’ve run the perfect bath temperature or put on your favorite soundtrack, you’ll still need to get out of the bathtub. Don’t let the luxurious experience end in disappointment with a scratchy, threadbare towel. Instead, prepare your fluffiest towel or bathrobe well in advance, so you can feel pampered right up until the end.
What if you don’t have a bathtub?

Unfortunately, not every home is fitted with a bathtub, especially if you live in a big city apartment. We’ve gathered some tips so you can have a relaxing shower, instead.
- While it might be hard to enjoy candles through the shower curtain, you can still dim the lights for a calming environment.
- Waterproof Bluetooth speakers will allow you to enjoy some music despite the noise of the showerhead.
- It’s harder to relax when you’re standing upright, so consider placing a plastic stool in your shower, so you can sit back under the warm spray.
- While bath oils or salts won’t work in the shower, you can pamper your skin with an exfoliating salt and oil scrub.
- Placing a bath bomb by the shower drain will create just as dramatic an aromatherapy experience as it does in the bath. As the warm water melts it away, it will release the fragrance, enveloping you in relaxation.
And off to bed
After a relaxing shower or a luxury bubble bath, you’ll be ready for bed! The bath routine is designed to promote calmness and relaxation. It’s ideal to save the pampering for the end of the day when you need to unwind. By the time your bath is over, you’ll want nothing more than to sleep deeply and soundly. Bonne nuit!
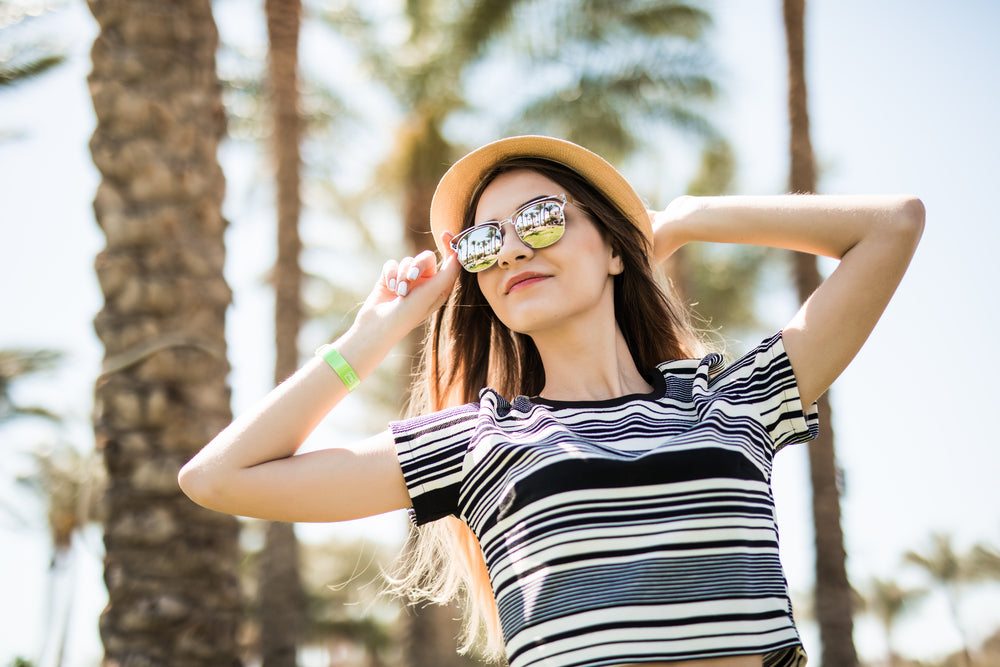
As the weather starts getting warmer, we’re ready to change up our look! For us, timeless summer looks have to be a little lighter and softer, as opposed to the darker colors we favored in the winter. However, just because we prefer a more natural summer makeup look, doesn’t mean we’re giving up on any of the beauty or glamour. Makeup for hot weather shouldn’t feel heavy, but it can still pack a punch. That’s why we’ve selected our favorite summer makeup looks for 2021. Have a look at the photos to get inspired, and then follow our tips so you can try these makeup looks for yourself. Glowy and natural To start, let’s talk about natural summer makeup looks that help you feel cool and refreshed no matter how hot it gets outside. This stunning look is ideal for daytime, with a focus on healthy, glowy skin and bright, vivacious eyes. To achieve this look, start with a good canvas of well-prepped skin. Don’t skimp on moisturizer and sunscreen, especially if you’ll be spending any time under the sun. Use just a hint of tinted moisturizer to even out the skin tone, and then build up layers of bronzer and highlighter for that sunkissed, glowy look. If you don’t have a liquid highlighter on hand, a dab of shimmery gloss can totally do the trick! To make the eyes pop, frame them with a lengthening Vivienne Sabó mascara. The newest addition to our mascara collection, the Polynésie Francaise is ideal, because it offers natural length with water-resistant and non-flaking formula. Finally, fill in your brows, and then brush them up for that fluffy look. Our Brow Arcade pencil comes with a comb on the end, so it’s perfect for the job. Feeling pink If you’d like to have a bit of fun with your eye makeup without necessarily spending ages on eyeshadow, get inspired by this makeup look! Pops of color are going to be everywhere in 2021. A swipe of pink along the lash line is a great way to rock the trend without feeling silly or overdone. This look isn’t quite as glowy as the previous one we showcased, but otherwise, the two are quite similar, with a more natural vibe. Just use a slightly more dramatic Vivienne Sabó mascara, like the volumizing Provocation. Finish things off with a dose of a more pigmented pink lip gloss, like our Le Grand Volume in Raspberry, to match the eyes. Nude glam This is one of those timeless summer looks for the evening. It’s elegant and polished, with a refined glamour that’s never in danger of looking like too much. This kind of nude glam look is fitting for any occasion, including a day at the office or a night at the opera. Because the colors used in this look are natural, it’s possible to slightly amp up the intensity of both the eyes and the lips. For the eyes, a shimmery champagne shade is ideal for the lids while brown eyeshadow helps to contour the crease. Finally, a soft Feutre Fin wing is essential for framing the eyes, along with a few coats of mascara. To give the lips that glossy fullness, the secret is to first use a warm nude lip pencil to contour the lips. Then, a coating of our Polynesie Francais gloss in Tahiti completes the look with a radiant sheen. Soft and smokey If you want smoldering makeup for hot weather, a soft smokey eye is our favorite. It’s an alluring and irresistible look with a lot of sex appeal. Because it relies on brown eyeshadows, it doesn’t have the heaviness of a black smokey eye. As with all of our favorite summer makeup looks for 2021, the base here is also natural, soft, and incredibly glowy. The eyes are the focus, of course, so apply a soft, shimmery brown to bring out the lids. Then, in the crease, apply a medium brown shade that’s just a little darker than your skin tone. Use that same color all along your lower lash line, to create that smokey effect. Finally, use a darker brown shade to deepen the outer corner of the eye and the crease. To finish things off, apply your liquid liner in a very thin line, right along both the top and bottom lash lines. Finally, apply a generous coat of Vivienne Sabó mascara, and a light dab of nude gloss on the lips. Peachy keen A softer way of adding color to your summer eye makeup is to use peach! The vibrant color looks incredibly natural against the skin and adds a touch of warmth that’s perfect for the season. It’s universally flattering, and because of its orange base, it really makes blue eyes pop. This monochrome look is a great way of making this color work! There’s no need for eyeliner—just a swipe of peach over the lids and across the cheekbones. A coat or two of mascara and a touch of warm lipstick like our Matte Constance in Warm Pink finish the look. Summer night glam Red lipstick fits every season. It’s elegant and eye-catching, so it’s perfect for a classy summer soirée or romantic dinner date. In true French beauty fashion, this timeless summer look also features a subtle black wing and perfectly groomed brows. To make this work for you, choose a red lipstick with rich depth, like our Matte Constance in Classic Red. A dab of gloss only at the center of the lips adds a reflective touch that makes the lips look a little bigger and fits in well with summer 2021 trends. Bringing the heat The best season of the year is just around the corner, and with these makeup looks, we’ll be bringing the heat! Sure, there’s no reason why you can’t wear these timeless summer looks during other seasons, but to us, they perfectly capture everything Vivienne Sabó loves about the warmest season. They’re light, fresh, and timelessly beautiful.
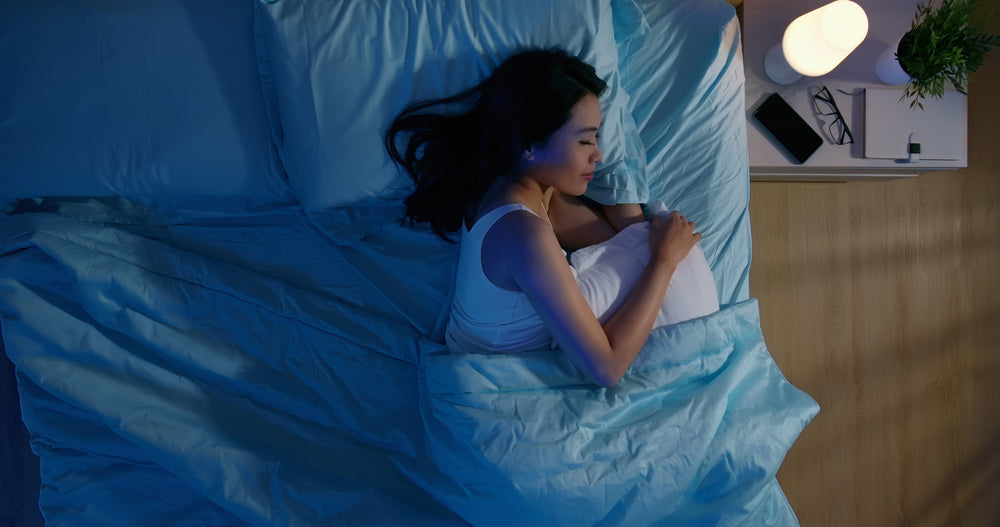
My brain is my greatest enemy, at least when it comes to falling asleep. I used to lay in bed rehashing past events. Those nighttime thoughts weren’t helpful or revelatory—they just made falling asleep much harder. Over the years, I’ve cultivated a series of bedtime rituals that help me turn off the brain noise. My nighttime skincare routine plays a key role, but so do the little wellness habits that help me unwind and improve my sleep quality. I’ll share all of my nighttime steps with you in this article, along with an evening routine checklist in case you want to give my habits a try. For me, this is the best way to end the day, so maybe you’ll find some ideas here that’ll work for you, as well! Prepare for tomorrow Before I can truly start unwinding, I make sure to do any important prep for the next day. I go over tomorrow’s schedule and to-do list, set my alarm if I have to be up at a specific time, and if I’m feeling ambitious, I lay out my outfit for the morning. Put the phone away After I check my email and social media one last time, I set my phone to silent and close all of the tempting apps. From this point until I slide into bed, I try to look at my devices as little as possible. I know that once I start scrolling or replying, I’ll lose an hour or two to my phone and end up falling asleep much later than intended. Water and bedside essentials The next thing I do is check that I have everything I’ll need in the middle of the night. Usually, that just means filling up my reusable water bottle and checking that I have a stick of lip balm by the bedside (my lips get so dry at night!). You might have your own bedside accessories to check on, like an essential oil diffuser that needs filling or maybe a pen and notebook to jot down your dreams in the morning. A relaxing soundtrack Before I start my other bedtime rituals, I choose a podcast to play in the background. This helps me unwind and takes my mind off the day I’ve had. It might seem like a small thing, but doing this has vastly improved my sleep quality. History and mythology shows like Tides of History and The Hidden Djinn are my favorites because they strike the perfect balance between calming and interesting. My little trick is to play them at a slower speed, which amps up the soothing factor. If you’re not one for podcasts, you can try playing a nature soundscape, classical music, or have a comforting TV show on in the background. Gentle makeup removal Now I can start my nighttime skincare routine in earnest. Removing makeup and sunscreen is the first order of business, since sleeping with makeup on can irritate the eyes and clog pores. I love the minimalism of French beauty, so I opt for just one cleansing step with a creamy facial cleanser that doesn’t irritate or dry out my skin. I massage the cleanser into my skin when it’s dry, which allows it to break down all of my makeup thoroughly. Next, I hop into the shower to rinse it all off! An evening shower I always feel a little grimy at the end of a long day, which is why I prefer to shower in the evening. I also find that rinsing off makeup and cleanser residue is much more comfortable in the shower than hovering over the sink. I set the water to a lukewarm temperature at first so I don’t damage my face or hair with hot water. Despite what dermatologists say, I can’t resist a bit of steam, so once it’s time to wash my body, I do turn up the heat. I always opt for a sulfate-free body wash, to mitigate some of the damage, and I don’t overuse the soap, since I know a little goes a long way. Head-to-toe skincare When I’m out of the shower, I gently towel dry just to soak up the excess water, although I leave my skin a little damp. Then, to make up for the onslaught of the hot shower, I moisturize my skin thoroughly. I start with my face and neck, massaging in my serums and lotions in circular, upward motions that help stimulate the muscles. Occasionally, I even treat myself to a massage with a jade roller, especially if my skin feels a little puffy! With that done, I apply a protective lip balm to my lips and use a heavier body cream to nourish my body, hands, and feet, which also deserve some attention. Brush and floss, of course! This probably needs no saying, but flossing and brushing are important nightly (and daily) habits. I prefer to use a sulfate-free toothpaste, to avoid drying out my lips. For floss, I stay away from floss picks because I think they’re worse for the environment. Dedicated sleepwear Going to bed wearing something that’s special for bedtime puts me in the right mindset for sleep, and helps to separate nighttime from the day. I’m not really a pajama wearer, but I do have a few T-shirts and ultra-soft lounge pants that have become my dedicated sleepwear. Pre-sleep meditation On nights when I really struggle to let go of the previous day, meditation helps a lot. There are all kinds of fantastic guided meditation apps, but I like to do it by myself. I lie back with my eyes closed and focus on my breathing. I inhale to a count of four, exhale to a count of eight, and then sit in the emptiness for a few seconds before starting again. This kind of breathing is based on Bahya breathing from yoga, and it’s believed to help with tranquility. I certainly find that it works! Dors bien! Good sleep is incredibly important to our overall beauty, health, and wellbeing. Maybe some of my habits can also help you improve your sleep quality, but what really matters is creating a consistent ritual that tells your mind and body, “the day is over, you can rest now.”
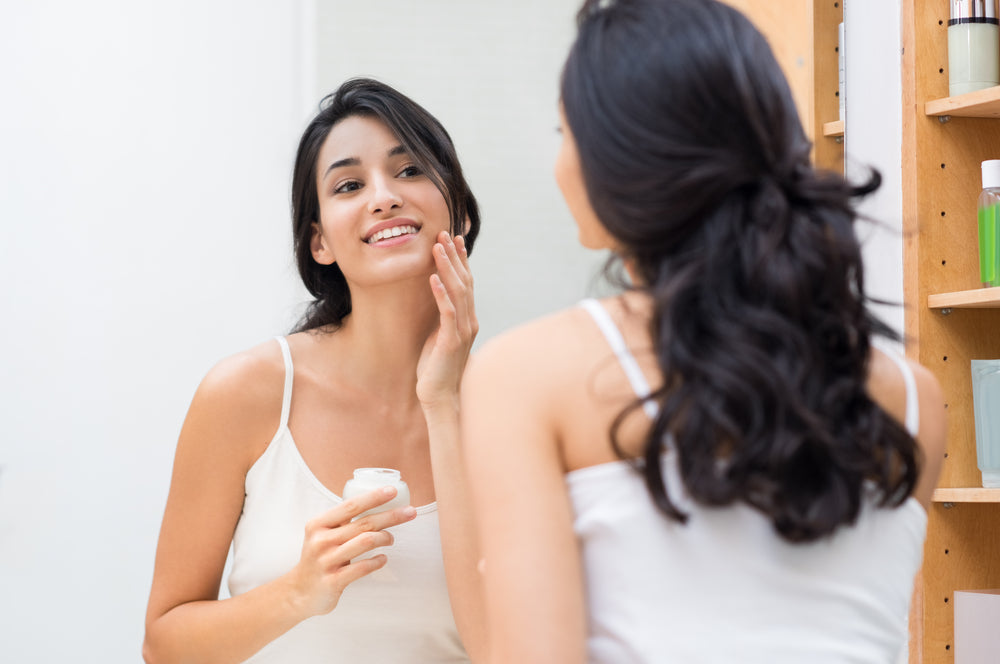
The modern skincare world can seem incredibly complicated, with a ton of different products and so much advice. The French skincare routine is much easier compared to some of the 10-step routines we’ve been seeing online! In reality, there are a few different ways to achieve healthy skin, so our goal is to help you with simple yet life-changing advice. When it comes to French beauty, it’s not only about your specific products but also how you use them! With these easy skin care tips, you’ll be able to make the most out of your beauty routine. French pharmacy brands In France, most women buy their skincare products at the pharmacy, and French pharmacy brands are an important staple in most French skincare routines. These brands are renowned for formulating gentle products that are suitable for sensitive skin, and for investing a lot of money in clinical research. While French pharmacy brands put a large emphasis on science, their products still contain a lot of lovely natural skin care ingredients that have their own nourishing effects on the skin. Be consistent French skincare comes at all kinds of price points, and contrary to popular belief, more expensive doesn’t always mean better. That’s why another one of our most important tips for great skin is to be consistent, no matter what products you decide to use. Cultivate skincare as a habit that you do every day, without changing up your products too much from day-to-day. Remove your makeup and moisturize every night, and wear sunscreen every morning. This consistency will pay off in the long term, by keeping your skin at optimal health for years to come. Cleansing should be gentle One of the most important French beauty secrets to healthy skin is gentle cleansing, no matter your skin type. In many countries, those with oily skin resort to scrubbing their face with harsh, stripping cleansers that throw their skin off balance, leading to irritation, breakouts, and more oiliness. However, in the best French skincare routines, cleansing is gentle and usually done with creamy milk cleansers. These days, oil cleansers and micellar water are also incredibly popular, but the key is to avoid any harsh, foaming cleansers. Moisturize damp skin Another easy skincare tip that makes a big difference is to apply moisturizer to the skin when it’s damp. This also applies to serums, essences, and any other hydrating skincare steps, although in French beauty, it’s okay to keep things minimal. Water makes the skin more permeable, so moisturizing agents sink in more deeply instead of sitting in a layer on top of the skin. The result is bouncy, more hydrated skin that feels soft to the touch but never greasy. Don’t neglect the neck and decolletage The skin doesn’t stop at the face! The French skincare routine extends from the face to the neck and chest, since those areas are all actually quite similar when it comes to skin thickness and level of exposure to the elements. Make sure to use your cleanser, moisturizer, and sunscreen from the face all the way down to your decolletage. It’s particularly important if you rely on your skincare routine to prevent premature signs of aging. If you forget to care for your neck, it’ll be an instant giveaway. Nurture your body with oils The rest of the body also deserves some attention, although it doesn’t necessarily need the same products as the delicate skin on the face and neck. The skin on the body is a little thicker and it’s usually less prone to acne, which is why French women love to nurture it with body oils rich in beneficial fatty acids and regenerative antioxidants. Just as with the face, the body is also most ready to accept moisture when it’s damp. The best time to use body oil is immediately after the shower when the skin is totally saturated with water. Using oil immediately after will help to prevent that water from evaporating, which will leave the skin hydrated and soft. Skincare can be aromatherapeutic This skincare tip won’t work for everyone, but for many French women, it’s what makes their beauty routine so fun. France has a centuries-old tradition of perfumery, essential oil production, and aromatherapy, which also touches into the skincare world. While the benefits that essential oils have for the skin are debatable, it’s undeniable that they can have a beneficial effect on the mood. Lavender is incredibly calming while rose essential oil can make you more cheerful. Using natural skincare with essential oils can have a positive impact on your mental health, and it can also simply make the skincare experience more sensorial and enjoyable! If your skin is sensitive to fragrances, try lighting a scented candle while doing your beauty routine, instead. Go all-out with the occasional treatment While consistency is important, treating yourself to some extra self-care can also be beneficial! In general, it’s not great to surprise the skin with new products, but a few times a week, you should exfoliate or mask your skin and give yourself a longer-than-normal massage. While these added treatments aren’t mandatory for healthy skin (it’s what you do every day that really matters), they’re still an easy way to amp up your glow and to feel pampered. It’s not all or nothing Since consistency is so important, we also want to reinforce that skin care is not all or nothing! While a multi-step routine with double cleansing, toning, multiple serums and creams can be nice, you’re also allowed to keep things basic and even to take shortcuts. Having a few pre-planned shortcuts, like a bottle of micellar water in a cupboard for easy makeup removal or a bottle of face lotion near your bed can go a long way towards helping you maintain your consistency on nights when you’re too tired to go all-out. Simple skin care success Skin care is highly individual since each person has a different skin type and slightly different concerns. However, our tips for great skin are universal, because no matter who you are or what your budget is, you deserve to have healthy, well-cared-for skin!