


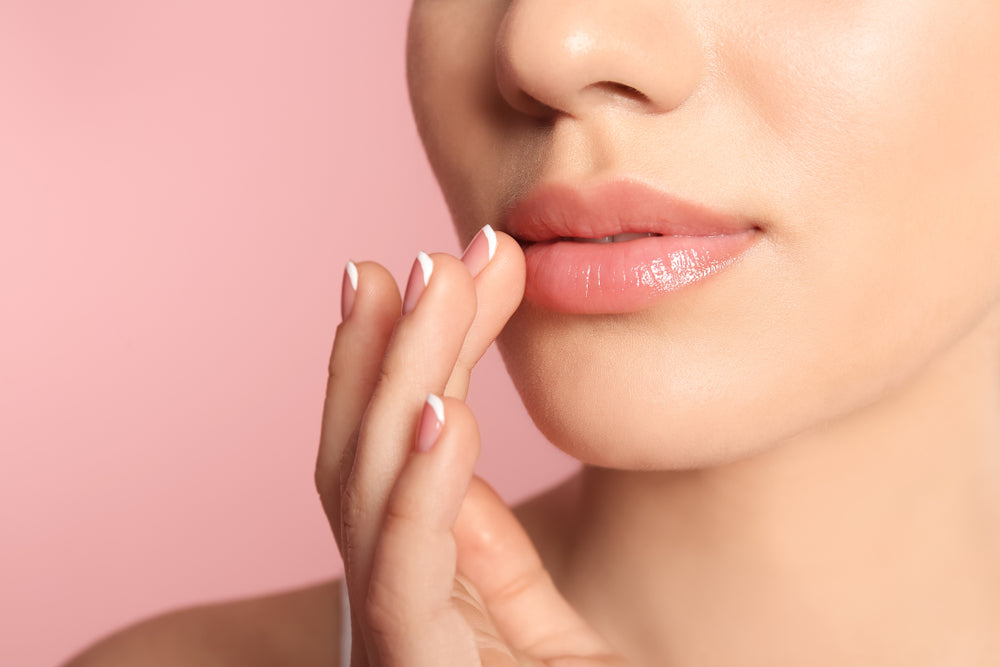
The Ultimate Lip Care Guide for a Nourished Pout
Our favorite look for low-effort glam calls for just a touch of mascara and a swipe of boldly colored lipstick. Focusing on the lips is a known French beauty hack, but for it to work well, our lips have to be in great shape!
Lipstick can’t glide smoothly over chapped lips, which is why a good lip care routine is so important. Here are our tips for taking good care of your lips on the regular, along with some advice for special care when they get especially dry.
Use a richer lip balm at night

The lips can get incredibly dry at night, especially if the humidity in your room is low or if you tend to breathe from your mouth as you sleep. That’s why it’s best to apply a thicker lip balm before bed. If your lips are particularly chapped, using a rich balm will help to speed up their healing.
Look for occlusive ingredients
What on earth does occlusive mean, you ask? Occlusives are oily ingredients that are able to seal moisture in place and prevent evaporation. They’re essential for a truly healing lip balm. Our favorite occlusive ingredients for the lips are lanolin, squalane, shea butter, and petrolatum. A balm with these ingredients can create a protective seal over the lips that prevents moisture loss.
Use lip balm as a barrier
Another important time to apply lip balm is before brushing your teeth or using potentially-drying skincare products like retinoids or acne treatments. The balm will act as a barrier against those products and prevent their drying effects from impacting your lips.
Layer your lip moisturizers
When the situation is particularly dire, especially in winter, it can be beneficial to build up moisture in the lips with layers. First, start with a light layer of fragrance-free lotion or hydrating serum – once it sinks in, layer a heavy lip balm on top. That first layer will add hydration, while the second layer will lock the moisture in deeply.
Opt for an SPF balm in the day
 Our lips are just as susceptible to sun damage as the rest of our skin, so during the daytime, opt for an SPF lip balm. Apply it to your lips at least 20 minutes before going out in the sun, and make sure they’re thoroughly coated. If you’d like to wear lipstick or gloss, just add it over the lip balm, and you’ll actually end up with a smoother finish than if you were to apply it to bare lips.
Avoid minty fragrances
We love a lip balm with a bit of flavor, but minty lip balms can actually cause some issues. Menthol is the key fragrance compound in mint essential oil, and it’s added to lip balms to give a cooling and stimulating effect. Unfortunately, those stimulating effects can also be drying and irritating, especially to already chapped lips.
However, when your lips are well taken care of, you can actually benefit from the temporary stimulating effect of menthol because it can make the lips look plump and full. That’s why we do use a bit of menthol in our lip-plumping Polynesie Francaise glosses.
Use a sulfate-free toothpaste
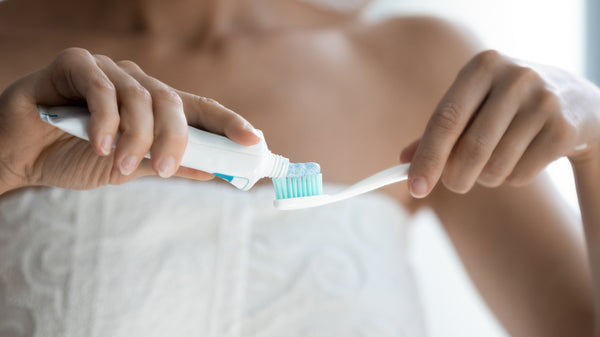
All toothpaste can be a little drying, but toothpaste made with sulfates is the worst by far. Sulfates (usually sodium lauryl sulfate) are the ingredients responsible for your toothpaste foaming up.
Unfortunately, they can also be quite drying and irritating, especially to the lips and gums. If you suffer from chronically dry lips, it’s very possible that your toothpaste is at fault, so switching to a non-foaming, sulfate-free toothpaste can make a big difference.
Exfoliate your lips
The final aspect of keeping the lips luscious and smooth is exfoliating them regularly. Exfoliation removes the flaky buildup of dead skin over the lips and allows lip moisturizers to do their job more effectively.
Exfoliation can be done as a dry lip treatment when they’re a little chapped or flakey, but if they’re so chapped that the skin is a little broken, it’s important to wait until they heal.
You also don’t want to over-exfoliate your lips. Once or twice a week is ideal, more often than that, and you risk irritating the skin and making things worse.
Make a DIY lip scrub
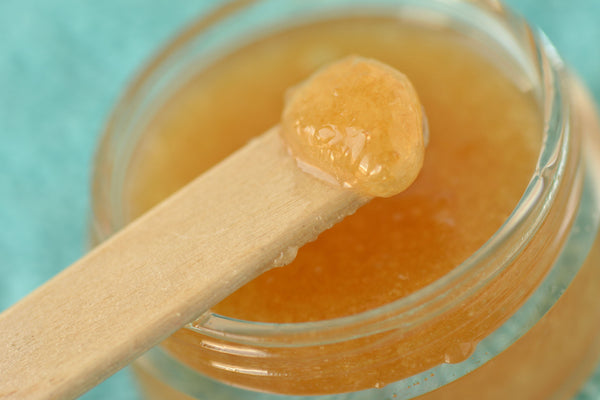
While you can certainly purchase a lip scrub at the store, making your own natural blend is safe and easy!
All you need is half a teaspoon of brown sugar and a few drops of coconut or olive oil. You can mix them up in a little jar or even in the palm of your hand. You can use honey instead of oil if your skin is acne-prone.
With your finger, rub the blend over your lips for a few seconds until they feel smooth. Finally, wipe it off or rinse it away with some water. The oil will help moisturize your lips, while the sugar will slough away all of the flakiness!
Just make sure to mix up a small amount every time you want to exfoliate. Unlike commercial products made with preservatives, whatever you make at home is liable to spoil after a few days.
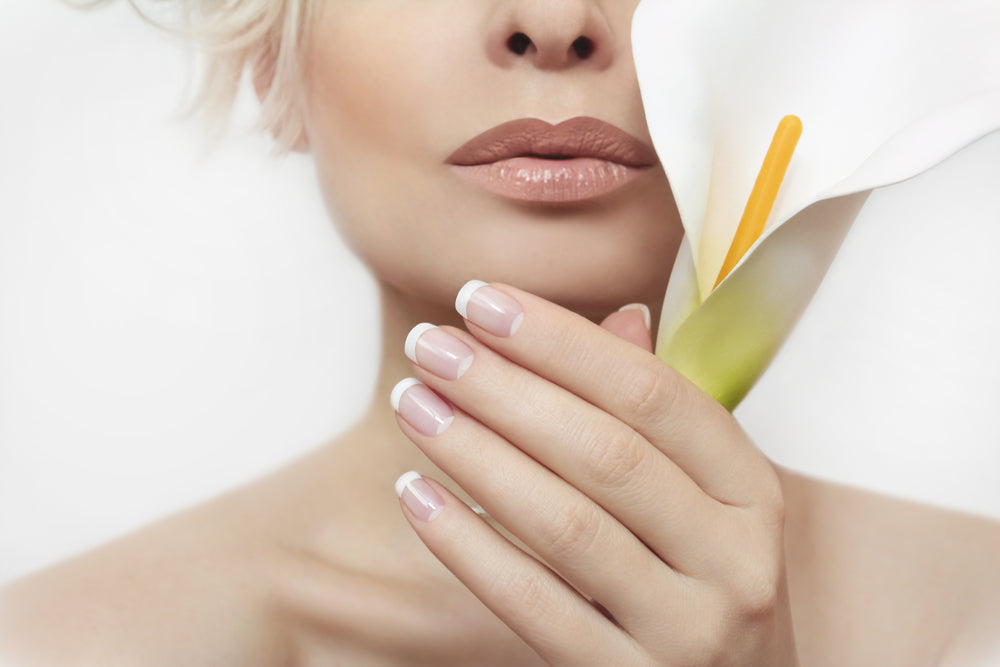
Always prep before lipstick
No matter which of our lip care tips you choose to adopt, always remember to take a few steps to pamper your lips before applying lipstick. You’ll need to make sure there are no flakey patches or dryness before starting your makeup, or else you’ll end up with patchy-looking lipstick.
A coat of lip balm will be enough if the rest of your lip care routine is on-point, but sometimes you might need to do a full exfoliation routine to guarantee your lips are in tip-top shape.
Motus et bouche cousue (our lips are sealed)
Achieving plump, healthy lips isn’t difficult. It’s just a matter of adding lip care to your regular routine, especially before bed. Whether you go all out with exfoliation or just switch out your minty lip balm for a healthier alternative, we know you’ll discover smoother, happier, and more kissable lips.

My brain is my greatest enemy, at least when it comes to falling asleep. I used to lay in bed rehashing past events. Those nighttime thoughts weren’t helpful or revelatory—they just made falling asleep much harder. Over the years, I’ve cultivated a series of bedtime rituals that help me turn off the brain noise. My nighttime skincare routine plays a key role, but so do the little wellness habits that help me unwind and improve my sleep quality. I’ll share all of my nighttime steps with you in this article, along with an evening routine checklist in case you want to give my habits a try. For me, this is the best way to end the day, so maybe you’ll find some ideas here that’ll work for you, as well! Prepare for tomorrow Before I can truly start unwinding, I make sure to do any important prep for the next day. I go over tomorrow’s schedule and to-do list, set my alarm if I have to be up at a specific time, and if I’m feeling ambitious, I lay out my outfit for the morning. Put the phone away After I check my email and social media one last time, I set my phone to silent and close all of the tempting apps. From this point until I slide into bed, I try to look at my devices as little as possible. I know that once I start scrolling or replying, I’ll lose an hour or two to my phone and end up falling asleep much later than intended. Water and bedside essentials The next thing I do is check that I have everything I’ll need in the middle of the night. Usually, that just means filling up my reusable water bottle and checking that I have a stick of lip balm by the bedside (my lips get so dry at night!). You might have your own bedside accessories to check on, like an essential oil diffuser that needs filling or maybe a pen and notebook to jot down your dreams in the morning. A relaxing soundtrack Before I start my other bedtime rituals, I choose a podcast to play in the background. This helps me unwind and takes my mind off the day I’ve had. It might seem like a small thing, but doing this has vastly improved my sleep quality. History and mythology shows like Tides of History and The Hidden Djinn are my favorites because they strike the perfect balance between calming and interesting. My little trick is to play them at a slower speed, which amps up the soothing factor. If you’re not one for podcasts, you can try playing a nature soundscape, classical music, or have a comforting TV show on in the background. Gentle makeup removal Now I can start my nighttime skincare routine in earnest. Removing makeup and sunscreen is the first order of business, since sleeping with makeup on can irritate the eyes and clog pores. I love the minimalism of French beauty, so I opt for just one cleansing step with a creamy facial cleanser that doesn’t irritate or dry out my skin. I massage the cleanser into my skin when it’s dry, which allows it to break down all of my makeup thoroughly. Next, I hop into the shower to rinse it all off! An evening shower I always feel a little grimy at the end of a long day, which is why I prefer to shower in the evening. I also find that rinsing off makeup and cleanser residue is much more comfortable in the shower than hovering over the sink. I set the water to a lukewarm temperature at first so I don’t damage my face or hair with hot water. Despite what dermatologists say, I can’t resist a bit of steam, so once it’s time to wash my body, I do turn up the heat. I always opt for a sulfate-free body wash, to mitigate some of the damage, and I don’t overuse the soap, since I know a little goes a long way. Head-to-toe skincare When I’m out of the shower, I gently towel dry just to soak up the excess water, although I leave my skin a little damp. Then, to make up for the onslaught of the hot shower, I moisturize my skin thoroughly. I start with my face and neck, massaging in my serums and lotions in circular, upward motions that help stimulate the muscles. Occasionally, I even treat myself to a massage with a jade roller, especially if my skin feels a little puffy! With that done, I apply a protective lip balm to my lips and use a heavier body cream to nourish my body, hands, and feet, which also deserve some attention. Brush and floss, of course! This probably needs no saying, but flossing and brushing are important nightly (and daily) habits. I prefer to use a sulfate-free toothpaste, to avoid drying out my lips. For floss, I stay away from floss picks because I think they’re worse for the environment. Dedicated sleepwear Going to bed wearing something that’s special for bedtime puts me in the right mindset for sleep, and helps to separate nighttime from the day. I’m not really a pajama wearer, but I do have a few T-shirts and ultra-soft lounge pants that have become my dedicated sleepwear. Pre-sleep meditation On nights when I really struggle to let go of the previous day, meditation helps a lot. There are all kinds of fantastic guided meditation apps, but I like to do it by myself. I lie back with my eyes closed and focus on my breathing. I inhale to a count of four, exhale to a count of eight, and then sit in the emptiness for a few seconds before starting again. This kind of breathing is based on Bahya breathing from yoga, and it’s believed to help with tranquility. I certainly find that it works! Dors bien! Good sleep is incredibly important to our overall beauty, health, and wellbeing. Maybe some of my habits can also help you improve your sleep quality, but what really matters is creating a consistent ritual that tells your mind and body, “the day is over, you can rest now.”
One of the most important parts of French beauty is looking well put-together. On the one hand, you want to look effortless, but on the other hand, you also want to look intentional. Groomed nails are essential for striking this balance, especially if you opt for a natural-looking French manicure. We’ve compiled a step-by-step guide to achieving perfect nails at home, so you can skip the nail salon. You can also adapt these tips to give yourself a relaxing pedicure! First, we’ll cover all the tools you need to have on-hand, and then dive straight into the how-to. At-home manicure tools You don’t need fancy tools to create a DIY French manicure at home, but you do need some basic nail grooming essentials. Here’s our comprehensive list of all the things you’ll need! Nail polish remover Emery or crystal nail file Cotton pads and cotton swabs Cuticle pusher (optional) Warm water and soap Hand cream or cuticle oil Hand scrub (optional) Clear base coat Clear topcoat Nude, pink, or colorful nail polish White nail polish Thin synthetic brush (optional) 1. Remove old polish First, if you still have some remnants of old nail polish on your nails, make sure to scrub it away thoroughly with cotton pads and nail polish remover. Some colors tend to really get lodged along the edges of the nail, in which case, use a cotton swab dipped in remover to really get in there and clean things up. 2. Shape your nails Next, file the tips of your nails to an even shape. There are all kinds of nail shapes you can choose from, but we prefer keeping it natural with an almond, oval, or rounded nail shape. When you file your nails, only go in one direction at a time, rather than filing back and forth. Go slowly, so you can control the shape you create and don’t accidentally over-do it. 3. At-home manicure soak If you plan to trim or push back your cuticles, it’s crucial that you soften them first with an at-home manicure soak. Fill up a shallow bowl of warm soapy water, and then dip your finger in, just up to the cuticle. Leave your fingers in the water for just 2-3 minutes, and take the moment to relax. This will be long enough to soften the cuticles but not so long that it’ll saturate your nails with water, which can compromise the integrity of your nail polish later on. If you’re happy with the condition of your cuticles, you can skip this step altogether! 4. Push back the cuticles (gently!) Pull your nails out of the water, and dry them with a soft towel. Then, use the cuticle pusher tool to gently press against your cuticles and push them back a little. If pushing on your cuticles is painful at all, it’s a sign you’re overdoing it, so make sure to ease up on the pressure. In general, we don’t recommend trimming the cuticles at home unless you already have a bit of professional experience. It’s easy to damage cuticles when trimming them, which may lead to infections or cause the skin to grow back thicker. 5. Exfoliate and moisturize Next, it’s time to give your hands and cuticles a nice treatment! For maximum pampering, exfoliate your hands by rubbing them with a scrub. You can even make your own! If your scrub is moisturizing enough, you can then just rinse your hands and move on to the next step. If you skipped scrubbing, then take a moment to rub your hands and nails with hand cream, or apply a designated cuticle oil to the nails. Wait a few minutes to allow your nails to absorb as much of the oil as possible. For simple groomed nails, you can stop here! Moisturized, well-shaped nails are already enough for simple French beauty. However, to take your nails to the next level, you’ll want to add some polish. 6. Remove excess moisture Next, dip a cotton swab in nail polish remover, and carefully wipe it only over your nail, being careful to avoid the cuticles. This will remove any excess moisture or oil from the nails to guarantee that the polish adheres well. Let the remover evaporate entirely before moving to the next step. 7. Lay down your base coat A base coat of polish is essential for protecting your nails from yellowing and creating an even base for the polish. Apply the base coat carefully to each nail, making sure to only use a minimal amount so that it dries quickly. 8. Apply your color Once your base coat has thoroughly dried, you can apply your colorful nail polish! Pink, peach, and nude are the classic choices for a French manicure, but other colors are perfectly acceptable as well. Apply the polish in thin layers, starting about a millimeter away from the cuticle, and painting it on in strips. Once your first coat fully dries, apply the second coat, and wait for it to dry, as well. 9. DIY nail tips Turn your classic mani into an ultra-chic French manicure. Dip an old eyeliner brush or a dedicated nail brush into some white nail polish. Then, carefully paint the tips (i.e., top 2-3 millimeters) of your nails. If your hand is a little shaky, you can lay down some sticky tape over the bottom of the nail first to guarantee a clean line. 10. Finish with a top-coat Once your polish is totally dry, finish things off with an ultra-thin layer of topcoat. This will help seal in all of your hard work, add some sheen, and prevent your nail polish from chipping. 11. Clean up the edges Once your topcoat is fully dry, it’s time to fix mistakes! Even the pros sometimes smudge a bit of polish over the cuticle, but thankfully, it’s easy to clean up. Just soak a cotton swab in some nail polish remover and use it to erase any smudges. Nailed it! It takes a bit of time and maybe even practice, but achieving the perfect manicure at home is totally doable. Don’t be afraid to skip the nail salon next time you want to treat yourself to a French manicure!

Ever wondered how to dress like a French woman? There’s something about Parisian style that’s just so captivating. The barely-there makeup, the sophisticated yet comfy clothing, and the carefree attitude to boot. How do they do it? Since the days of Brigitte Bardot and Jane Birkin, French-style clothing has been firmly on the fashion map. It’s classic at its core, mixed with an element of surprise and freshness. Every outfit appears timeless, yet totally on-trend, which means they never go out of style. French women are known for placing quality over quantity. Less is definitely more. They choose clothing that feels comfortable and will last them years over trendy pieces that come and go. If you’re looking for some inspiration when it comes to French outfits, you’re in the right place. Here are our favorite traditional French outfits that any woman can try. Are you ready to master French-girl fashion? Glastonbury chic (day dress & blazer) Every French woman has at least one trusty blazer in her wardrobe. Not sure which one to go for? A classic herringbone will give you a vintage feel, while a block color black or navy will look more formal. Pro-tip: If you want to save yourself some cash, raid your partner’s or friend's wardrobe instead! An oversized masculine blazer will channel Isabel Marant’s infamous catwalk style. This is a must-have piece in every cool French girl’s closet. Pair your blazer with your favorite day dress for an eclectic, playful outfit. Finish with tousled hair and some sunglasses, and you’re Paris ready. Date night (straight-leg cropped jeans & a satin cami) Classic French style is all about surprising people, and blurring the lines between casual and formal wear. If you’re looking for a casual going-out look, the French-girl go-to is a pair of straight-leg cropped jeans and a glamorous top. Think silky and satin fabrics, lace, and sexy spaghetti straps. If there’s one thing French women love it’s opulent fabrics. Silk is always a must-have. It looks beautiful and feels oh-so-soft against your skin. When it comes to jeans, French ladies aren’t a big fan of skinnies. They favor a looser fit and cut, creating a more relaxed silhouette. Complete this look with a pair of strappy sandals—perfect! Sleek soirée (slip skirt & mules) The slip skirt and mules look became popular a few years ago and hasn’t gone away since. This look is comfortable, practical, and just a little sexy. Not too sexy though—French women are all about leaving plenty to the imagination. When it comes to choosing a slip skirt, let your imagination run wild. Choose any print, color, or fabric you like. Pair with a comfy pair of mules that will take you from the office to a cocktail party without having to go home and get changed. That means more time having fun! We love this outfit already. Summer staple (classic printed wrap dress & tan shoes) The wrap dress originated in the US, but has quickly become synonymous with classic French style. Why do French women love this item of clothing? It’s universally flattering. No matter what shape or size your body is, a wrap dress will hug you in all the right places and accentuate your fabulous feminine curves. This is a beautiful spring/summer look. Choose a dress in a gorgeous floral print or in a pop of color. Pair with classic espadrille wedges, a woven bag, a dainty piece of jewelry, and a pinch of pink blusher. And voilà! Classic comfort (marinière & ballet flats) When you think of French clothing, you may picture a blue and white striped top. Is it a cliché? Yes. But do French women love a blue and white striped top? Yes, they do! In France, it’s known as a marinière top. It originated from Bretagne where they were first popularized by the label Saint James, who took inspiration from local sailors. There isn’t a more traditional French outfit than this one right here. You’ll find blue and white striped tops in so many cuts and fabrics everywhere. Take your pick. Pair this top with a classic and comfy pair of ballet flats. You’ll look like a true local in Paris. The go-to dress (LBD & your favorite handbag) The little black dress is a staple item in every woman’s wardrobe across the world. But French women get the most wear out of their LBDs. How? They wear this versatile dress on a job interview, in the office, on a date, at a cocktail party, and so much more. It’s their go-to dress whenever they’re unsure about what to wear. The secret all comes down to accessorizing. For a daytime look, pop a trench coat or cardigan over your LBD and pair it with ballet flats or sandals. At night, swipe on some voluminous mascara and a bold red lip (we love this one), step into your favorite heels, grab your favorite handbag, and you’re runway ready! Office chic (button up shirt & tailored trousers) No French-girl’s wardrobe would be complete without a classic white or blue Oxford shirt. This is another staple item inspired by menswear (and another great reason to raid your man’s wardrobe!) Pair with jeans for a more casual look, or with a plaid blazer or tailored trousers for an effortless office outfit. French women love tailored clothing because of the fit. This is how they always look so chic—they invest in clothing that fits them like a glove. Bond girl off-duty (a black jacket & plain white tee) A plain white t-shirt is mandatory in every person’s wardrobe. Stock up on a few quality ones that will last a long time and go with pretty much everything in your wardrobe. Looking for a glamorous, off-duty look? Pair your classic white tee with a tailored black smoking jacket. The original one was made by Yves Saint Laurent, but there are plenty of affordable versions to suit your budget. This jacket is likely to last you forever and is definitely worth investing in. Cute & cozy (the oversized sweater & a mini skirt) The oversized sweater is an item that French women popularized before anyone else. It gives you a casual, carefree, masculine-vibe look. It’s sexy because you’re not trying to be sexy at all—this is French women in a nutshell. A comfy oversized sweater is perfect to transition from summer to fall. Be sure to choose a color that will work with lots of other items in your wardrobe. Pair with a cute mini skirt in faux leather or suede. If you prefer a longer length, a pencil or maxi skirt in a floaty fabric will work too. A French-girl’s best friend (the beige trench coat & a silk scarf) Finally, on our list of French outfits we love, is the trench coat paired with a classic silk scarf. A beige trench coat is every French-girl’s best friend all year-round—because the weather is so unpredictable! If the Burberry version is out of your budget, look to the high street for something more affordable. What matters is it’s practical, comfortable, and well-made. You want this coat to last you for years. Silk scarves are a popular accessory with French women, elegantly completing any look. This is one item where you are encouraged to go for a bright color or crazy pattern. It’s a little flash of playfulness that will top off any outfit. And that’s our ten favorite French outfits!