


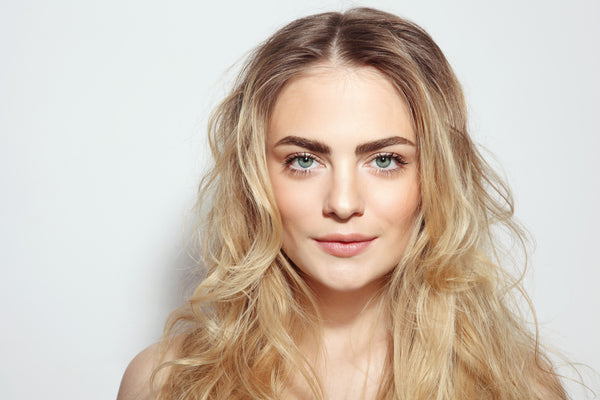
Bold Beauty Trends Around the World
The only thing better than a round-up of the best beauty trends is a round-up of the best beauty trends from around the world!
We’re lucky to live in a time when we’re so connected as a world and can mix and match inspiration and ideas from countries far and wide.
The result?
We get the best beauty tips and secrets from each part of the globe and can take and leave whatever we like.

Love Mexico’s bold lip? Give it a go next time you’re glamming up for a night out. Do you want dreamy, spotless skin? Look to South Korea for its advanced skincare trends and products.
Prefer natural makeup? Australian women have got this down to an effortless art.
This is why makeup is so much fun; you can experiment with new colors, looks, and products using these cultural trends as inspiration every day.
Here are nine of the biggest beauty trends from around the world
Enjoy experimenting with your favorites and incorporating them into your everyday makeup routine!
Mexico: The bold lip
Latina women are infamous for daring to wear bold red lipstick, which pairs perfectly with their sun-kissed skin. And it always looks stunning!
The secret?
Confidence.
So many women are afraid of painting on a bold lip out of fear of drawing too much attention or not being comfortable with such an intense look. But finding the courage to rock a red lip might give you the confidence and power you’ve been searching for.
Why not give it a try and see?
Another misconception is that red lipstick doesn’t suit everyone. This is a total myth! There is a shade of red out there to suit all skin tones—you just need to find the right one for you.
Line your lips first for neatness and extra definition. Finish by filling in your lips with a striking swipe of red. Check out our Long-Lasting Matte Lipstick in Coral & Classic Red for some inspiration.
Save it for a special occasion or a random Monday morning when you want to feel like a goddess.

India: Beauty comes from within
Indian women have always taken a more holistic approach to beauty and makeup. They look to their individual skin type as a guide for what products and skincare routines they need to create balance in their body.
They’re big on using natural products in their everyday skincare routine.
This includes using coconut oil to moisturize the skin or as a hair mask to create extra shine. The neem plant has anti-inflammatory, antiseptic, and antibacterial properties and is widely used to soothe and treat acne. Turmeric is often mixed into face masks to soften skin and reduce wrinkles.
Keep in mind that you should always test any new product or treatment on a small area of your wrist or elbow before applying it to your face.
India reminds us that beauty doesn’t need to come in the form of expensive store-bought products. Many of the ingredients for their most popular beauty trends can be found in your home and whipped up in a matter of minutes!

Japan: The doll blush
Many Japanese women have a playful, eccentric approach to makeup, and the doll face look is one of their most popular beauty trends.
The number one thing that stands out is the rosy pink pop of blush. It’s always applied slightly higher on the cheeks, directly under the eyes, making your facial features appear rounder, softer, and more youthful.
Who wouldn’t want that?
Blush is often paired with fake lashes and colored contacts to create a more bold and playful look. But you don’t have to go too wild with this trend. A pop of pink blush on its own can look really fresh and vibrant.

France: Strobing makeup
If there’s one makeup trend French women loathe, it’s contouring, and we totally understand where they’re coming from. So, instead of using dark pigment to shape the face, they prefer using highlighter to accentuate the parts they want to catch the light.
It’s all about working with the natural angles and beauty of your face, as well as natural light. This brings focus and shape to the face in a subtler way.
It makes sense that French women are a fan of strobing makeup because if there’s one thing they’re renowned for, it’s looking naturally beautiful with minimal makeup.
Combine strobing with a swipe of Classic French Mascara (i.e., the best selling mascara on Amazon), and you’re Paris ready in minutes!

South Korea: Cream skin
South Korea is, without a doubt, leading the way when it comes to many skincare trends.
First, they brought us “glass skin” (dewy, reflective looking skin). Next came skip-care (minimizing your skincare routine into fewer steps). And the biggest beauty trend right now is “cream skin.”
Based on the skip-care philosophy, cream skin combines toner with moisturizer to create a soft and springy look. It focuses on hydrating and moisturizing the skin with minimal effort.
More hydration + less work? That sounds fabulous to me!

Sweden: The nude lip
Nobody does minimalist chic quite like the Swedes do. So it makes perfect sense that their makeup is also simple and understated. A popular, staple makeup trend across Scandinavia is the nudish-grey toned lip.
This is a new take on makeup in the '90s, updated with a taupe or mauve base with gray undertones.
Pair a nude lip with minimal makeup elsewhere for a simple, natural look. Or go for extra drama around the eyes with a smokey eyeshadow and volumizing mascara to make your lashes pop.

UK & Dubai: Bold brows
Both the UK and Dubai have welcomed the bold brow trend with open arms. Perhaps this is a backlash from the over-tweezing and waxing culture we’ve become so used to?
Either way, we say hell yeah to embracing our natural brows.
You can still tweeze or wax in the middle and over the top of your brows, but avoid going underneath. Follow the natural shape of your brows and allow them to guide you. This is what bold brows are all about.
Use a colored brow gel or powder to fill in any gaps and create a more defined look.
Africa: Glittery eyeshadow
African women are pioneers when it comes to countless makeup trends over the past decades. But one of the most fun trends has been incorporating glitter into makeup products.
Glitter on the eyes, lips, and cheeks first became popular through superstars Pat McGrath (makeup artist) and Keyshia Ka’oir (celebrity stylist), who used glitter like it was their religion.
The beautiful thing about glitter is you can be as subtle or theatrical as you like with it. Opt for a sheen of glitter in a highlighter, or go all-in with dense, textured glitter on the eyelids.

Australia: Natural makeup that is barely there
Few do natural makeup better than Australian women do. Maybe it’s because they’re so used to the vacation lifestyle, with a constant stream of sun, sea, and sand?
Whatever the reason, we’re all for it.
Think glowing sun-kissed skin, neutral eyeshadow tones, a touch of highlighter, and a natural swoosh of mascara to brighten up the eyes.
Top tip: Aussie ladies love doubling up on their bronzer and using it as an eyeshadow too.

Egypt: The dramatic smokey eye
If we go right back to ancient times, the Egyptians were actually the first people to create an iconic, smokey eye, using a combo of eyeliner, mascara, and eyeshadow.
Kohl was used back then to accentuate the eyes and create a powerful look. It was made using natural ingredients, mostly charcoal and galena.
Today, it’s especially popular with Arabic and Middle Eastern women. But women worldwide want to know how to create this iconic look, to frame and highlight their eyes.

So whatever your style, try giving some of these bold trends a go! We’re sure you’ll enjoy the process, and ultimately the way you look. Have fun connecting with beauty cultures from around the world, and turn some heads in the process. Be bold, be beautiful, be you.

You might be pleasantly surprised to know that bold makeup looks can be simple and easy to create. A lot of makeup can take time to perfect and recreate. But these easy and fun makeup looks will be like a breath of fresh air. We’ve searched high and low to bring you the best bold makeup looks that will only add a few extra minutes to your current makeup routine (we’re talking ten minutes max!). Even if you’re spending most of your time at home right now, adding something fun and different to your makeup routine might be just what you need. You get to be creative, try out a new look, and feel pampered. And the best part is if you mess it up, there’s no one to judge you! Just wipe it off and start again. Plus, there’s no need to stock up on a ton of extra beauty supplies. The charm of these makeup looks is that so many of them can be done working with the products you already have. Dig deep in your drawers and vanity case and pull out everything you have. Chances are you’ll have a bright eyeliner or bold lipstick or eyeshadow palette in there that hasn’t seen the light of day in a while! And now is the time to use it. Here are ten easy bold makeup looks to try at home today. Red carpet ready Who says you can’t get dressed up to the max and look a million dollars when you’re not going anywhere? Makeup was created for us women to have fun, reinvent ourselves whenever we please, and feel good. This red carpet look is easy to do, requires just a small amount of makeup and a ton of sass. Find the boldest shade of red lippy, a matching lip liner, and a tube of your favorite sexy mascara. A red lip combined with fluttery lashes is a classic combo that will never go out of style. Wanna take this look further? Put on the most glamorous outfit you can find, and strut around your house like you are literally walking the red carpet. Because, why not?! Smokey eye with a twist We all love a sexy, smokey eye—it has to be one of the best eye makeup looks ever invented. And even if you’ve never tried this look before, it’s simpler to recreate than it first looks. But today, we’re giving you a smokey eye with a twist and a bucket load of drama. This look focuses on the under-smoke on your lower lash line. Top tip: use a combination of chocolate brown and black eyeshadow for this look. Using the two together will create a warmer, more luxurious finish. Really layer the shadow under your eyes to create a rich, sultry look. All-over shimmer To create an all-over shimmery look, you’ll just need a few key products. For a simpler look, opt for a neutral color palette. And if you want something a little more fun, pick one color and apply different shimmery and glossy shades on various features. Use a shimmer-filled highlighter along your cheekbones and below your brows. Choose a gloss to swipe over your eyelids for extra dewiness. Complete the look with a glossy lip. And voilà! Let the light catch your face and shine like a diamond all day long. Double metallics The metallic trend is so hot right now. But what’s better than metallic eye shadow? Double metallic eyeshadow, of course! Pick your two colors of choice. You can stick with classic metallics like silver and gold or make this look even more fun by throwing in a jewel-toned metallic color. Apply one color on your eyelids (right up to about 1-2 cm below your brows) and the other to your lower lash line. Don’t worry about trying to apply it perfectly—this look is more about letting those metallics work their magic. Finish with a coat of mascara. Half and half This bold makeup look is a ton of fun and can be created in a couple of minutes. All you need is two different eyeshadow colors that you love, and an eyeshadow brush. The brighter the colors, the louder this look will be. Remember to use an eyeshadow base on your lids first to help your topcoat stay put and have a more vibrant finish. Pretty pastels This is a gorgeous look, especially for the spring/summer season. Choose a bright, punch pastel eyeshadow or eye pencil, and apply it to your upper lash line. If you want a simpler, subtler look, keep your line thin. And if you want to make more of a statement, thicken the line up and even extend it up and out past the outer corners of your eyes. We’re loving this fresh, minty-aqua shade. Don’t forget to finish your eye makeup with a coat of classic mascara to make your eyes pop. Color clash Clashing colors is not a fashion faux pas. Forget everything you ever learned growing up—the secret to a bold makeup look is often about breaking the rules! Playing with color is an easy and fun way to create a striking look. For a statement color clash, use two different colors for your lips and eyes. For example, shimmery gold eyeshadow and a satsuma orange lip. A cherry red lip and a purple eye shadow. The choice is yours. Play with different colors. See what you like and what works best with your skin tone. French girl daydream This play on the classic French look is so simple to do and looks stunning. It’s all about a winged eyeliner with a twist. The twist being, you exaggerate the upper lash line and only draw half of your lower lash line. Keep the rest of your makeup natural and low-key; tinted moisturizer, some concealer wherever needed, a bit of brow gel, and a hint of blush on your cheeks. And no French beauty look would be complete without some voluminous mascara. Punchy pink lip A bold red lip is a classic choice for making a statement. But why not mix things up and opt for a pop of pink instead? A bright pink lipstick is fun, feminine, and can be just as dramatic as a red lip. Plus, it’ll pair really well with a natural overall makeup look. That means you can recreate this look in minutes! Don’t forget to line your lips to ensure your lipstick lasts all day long. Filled-in cat eye We all know and love a classic cat eye, but eyeliner is fiddly, and it can take a long time to learn how to properly put on eyeliner for this look. This is why we love a filled-in cat eye for an easy, bold makeup look that anyone can do at home. Outline the under and upper eye (including the outer edges). And don't worry, it doesn’t have to be immaculate because it won’t be the main focus here. When you’re done, fill in your full lid with an eyeshadow color of your choice. Match your color to your outfit, clash it on purpose, or keep it simple with a subtler shade. It’s up to you! Are you ready to try these easy, bold makeup looks at home? If you’re looking to inject some fun and newness into your ordinary makeup routine, these looks are a great place to start. The key to creating a stunning makeup look is learning what colors, textures, and styles work with your skin tone and structure and accentuate your natural features. There’s no better time than now to experiment and try out some new looks!

When you love French beauty, knowing the French words for certain makeup products can be quite helpful. They can come in handy if you’re planning to do some shopping in Paris, but it’s also useful for knowing what’s behind the names of your favorite French makeup products. Read our guide for some must-know French makeup vocabulary. You’ll learn what’s behind the names of some of Vivienne Sabó’s most iconic products, as well as the meanings of some products from other French makeup brands. From terms for different parts of the face to the names of products and tools, we cover it all! Parts of the face in French Le visage: the face. It sounds so elegant in French, so it’s no surprise that so many brands all over the world have incorporated the word into their naming schemes! La peau: the skin. La yeux: the eyes. Cils: eyelashes. Les sourcils: the eyebrows. You might notice a similarity between the French words for brows and for eyelashes! The French term sourcils comes from the Latin supercilium which translates to “above the eyelash.” Les joues: the cheeks. Les lèvres: the lips. French makeup terms Le maquillage: makeup. Fond de teint: foundation. Fond means base or foundation, while teint means tint, so literally, it’s a tinted base. It’s especially fitting because French women prefer a light tint over a full-coverage look. Base de teint: primer. La poudre: powder. Poudre de soleil: bronzer. The literal translation is “sun powder,” which is beautifully appropriate since bronzer is meant to give the skin the illusion that it’s been sunkissed. Fard: This term is a synonym for makeup, but it’s usually used to refer to specific products. Le fard à paupière: eyeshadow. It translates as “makeup for the eyelids.” Blush: blush. Contrary to popular belief, French women don’t use the word rouge to refer to blush. Instead, French makeup aficionados use the English term. Le fard à joues: blush. This is another commonly used term, although it’s less popular than simply saying “blush.” It literally translates as “makeup for the cheeks.” Anticerne: concealer. Correcteur: corrector, a synonym for concealer. Le crayon: pencil. Crayon à lèvres: lip liner. Eyeliner: eyeliner. This is another one of those words that have been directly lifted from English to French. Eyeliner liquide: liquid eyeliner. Crayon yeux: eyeliner pencil. This is the term to use if you’re talking specifically about a kohl-style pencil, although it can also apply to retractable eyeliners. Feutre fin: felt tip, also known as our must-have eyeliner. This eyeliner won't let you down, and the design itself is ideal for drawing on a precise wing in seconds. Palette yeux: eyeshadow palette. Mascara: mascara. Mascara volumateur: volumizing mascara. We like our mascara to add some volume and amp up the drama, so this term is especially helpful. Mascara allongeant: lengthening mascara. Mascara waterproof: waterproof mascara. While the French word for waterproof is étanche, when it comes to makeup, the English term is used. Éclat: radiance or shine. The word is flexible, referring both to the delicate glow of the moon as well as to the brilliant radiance of a precious gem, which is why it’s so useful in makeup. Highlighter/illuminateur: highlighter. Most French makeup lovers use the English term for this glowy makeup product, but occasionally, the French word illuminateur is used instead. Le rouge à lèvres: lipstick. Most French women own a signature red lipstick, so it’s no surprise that a more literal translation would mean, “red for the lips.” However, in practice, the phrase applies to all lipsticks no matter the shade! Gloss à lèvres: Lip gloss. Other French beauty terms Faux-cils: False eyelashes. Coffret: Box or kit. This is the term used for makeup sold in sets or bundles, as well. Éponge de maquillage: makeup sponge. Les pinceaux de maquillage: makeup brushes. Recourbe-cils: eyelash curler. Le vernis à ongles: nail polish. Trousse de maquillage: makeup bag. Démaquillant: makeup remover. Sans cruauté: cruelty-free. This one is especially important for us since all Vivienne Sabó products are cruelty-free and never tested on animals. Nos amours, you’re ready for Paris! Armed with the most important French makeup terms, you’ll be able to shop at the small beauty boutiques and the large makeup stores with ease. Keep practicing as you do your makeup every morning, and you’ll become a French language and beauty pro in no-time.

If you’ve ever wondered how to brighten your eyes with your makeup, this article is for you. We’ll be covering everything from the best eyeshadow for blue eyes to the best eyeliner for green or brown eyes and how to make your eyes pop. We always like to emphasize that when it comes to makeup, there are no rules. Makeup should be an expression of who you are and how you feel on any given day. That being said, there are certain tips and tricks that will enhance our beautiful natural features. Your eyes are the window to your soul. They’re often the first thing that anyone will notice about you. So, when it comes to makeup, what can you do to enhance your natural eye color and make it sing? Don’t match your eyeshadow to your eye color There’s a common myth circulating the globe that matching your eye color to your makeup is the way to go (i.e., wearing blue eyeshadow with blue eyes, or green eyeliner with green eyes, brown mascara with brown eyes.) But in fact, the opposite is true when it comes to making your eyes pop. Blue makeup doesn’t enhance your blue eyes; it will make them appear less blue and striking and lead to them disappearing into your face. The same is true for all eye colors—it’s best to avoid matching your makeup to your eye color if you want to draw attention to your eyes. But what if you have blue eyes, and you love your blue makeup? If you can’t bear the thought of completely swapping out your favorite color yet, try switching to a different shade—for example, a pastel blue eyeshadow, a turquoise eyeliner, or a midnight blue mascara. The color wheel is your friend You may have briefly checked out a basic version of the color wheel while you were doing an art class at school. But if you haven’t taken a look in awhile, it’s time to get reacquainted with it. Colors that are side by side on the wheel are known as analogous colors, while colors opposite each other are known as complementary colors. To make your eyes pop, you want to choose shades that are opposite (or close to opposite) your natural eye color. However, it’s important to note that most people’s irises are not just one color. There are usually different flecks and hues within that one color. For example, you might have hazel eyes with hints of honey in them. You might have green eyes with hints of teal or mustard. Take a close look at your eyes in both the daylight and at night. And when it comes to makeup, the color wheel should be used as a starting guide, but not taken literally. There are so many shades and tones of each color, all of which will show up differently depending on your eye color and skin tone. The best approach is to try different colors out and see what works for you and what you like most. Blue eyes Keep it simple Blue eyes on their own can be really bright and striking, which is why you want to try and not over-do your makeup. This can leave your eyes and skin looking washed out. The best approach? Keep it simple. Less is more. Eyeshadow The best eyeshadow for blue eyes is anything with an orange base. That means warm copper, gold, apricots, peaches and brown tones. The warmth in these colors will help make your eyes pop and stand out, and highlight any warmer flecks in your eyes. Purple is another shade that can be quite striking with blue eyes. All shades from lavender through to plum can work to help your eyes appear even bluer and brighter. Highlight Subtle highlighting around your eyes can help frame them without the need for eyeliner. It can also prevent them from looking too icy. Apply a highlighter across your brow bone (just under the brow), as well as the inner corners of your eyes. Opt for a shimmery highlighter rather than a glittery one to keep this look subtle. Neutral and champagne shades will work best. Liner Keep your eyeliner minimal and apply it in a thin line. You can also keep your liner to your upper lash line and skip the lower lash line because blue eyes are strong enough to not disappear into your face. This can actually leave them looking bigger and brighter! Grey eyes Which color is most prominent in your eyes? Grey eyes can contain many flecks of color including green, gold, blue and brown tones. The first step for you is to decide which color is most prominent in your eyes. You can then pick complementary colors accordingly. Winning colors To enhance the green in your eyes, choose shades with pink undertones like rich plums and purples. To enhance the blue, go for shades with orange or peach undertones. Green eyes Don’t head for red You’d be right in thinking that red is opposite green on the color wheel. But red is a difficult shade of eyeshadow to pull off. The tones will usually end up making you look sickly. The best eyeshadow for green eyes is within the red spectrum, but opt for reddish browns or plum shades, or even pink. These tones will help make your green eyes the star of the show. Soft blush on the cheeks Add some subtle, soft blush on the apple of your cheeks in a pinky shade. This is a gorgeous feminine look for both work and play. Liner The best eyeliner for green eyes is something in a copper or violet shade. But if you prefer a more classic look, black goes with everything and is a staple for creating both simple and more dramatic makeup looks. A swoosh of liner and a plain, glossy lid is a simple but sexy look. Let your green eyes do the talking If you really want your green eyes to stand out, keep everything else natural. Think voluminous lush lashes (try this mascara), glowing cheeks, and a glossy lip. Gorgeous! Hazel eyes Green or brown? Did you know there’s no such thing as pure hazel eyes? You’re likely to have a mix of tones and flecks in your eyes, ranging from shades of brown to green. Depending on which color you want to accentuate, you can mix up your makeup accordingly. To bring out the green, follow what green-eyed girls do and go for red and purple-toned eye makeup. To enhance the brown, opt for blue or copper tones. Want more drama? If you’re looking for a bolder look, try a smokey eye, a mix of dark metallic and coppery green tones. Liner For a natural look, use brown eyeliner to give your hazel eyes a little more oomph. And for a more radiant, glowing look, try a gold liner. Brown eyes Concealer is your friend Did you know that dark circles can steal attention away from your beautiful, brown eyes? Before you do anything, find the right concealer for your skin tone and spot it lightly under your eyes as needed. This is a crucial step before you go any further. Brown eyes suit almost any eye makeup color! Great news, you can get away with wearing almost any color you like! If you want to make your brown eyes pop, then contrast is key. Think baby blues, turquoise, and metallic greens. Pink is also a great contrasting color to brown. But as a general rule, you have free reign here to try out all the colors of the rainbow! Metallics are a must Shimmery shades will create a lovely striking contrast against your brown eyes and make them glow. Reserve metallic eyeshadow or liner for those special occasions when you want to make a serious impact. Don’t overlook the neutrals Neutrals might seem boring from the outset, but they can create a really sexy, effortless look while also bringing out the natural color of your eyes. Plus, you can’t ever go wrong with a nude color with brown eyes. Think neutral eye shadows, some brown bronzer, or even a nude lip. Liner Classic brown and black eyeliners will always work against your brown eyes. But if you’re looking for an extra-special look, try a blue or purple eyeliner. Most eye colors can’t pull this off, but you can! Complete the look with mascara for extra volume Mascara is a must regardless of your eye color. Brown can work well for blue eyes, but black will suit every eye color. Apply some lash primer, one or two coats of classic French mascara, and get ready for your eyes to pop! Getting your makeup to enhance your eye color is all about knowing which colors suit you and which ones to steer clear of. So get experimenting and try out these tips today!