


How to Get Your Makeup to Enhance Your Eye Color
If you’ve ever wondered how to brighten your eyes with your makeup, this article is for you.
We’ll be covering everything from the best eyeshadow for blue eyes to the best eyeliner for green or brown eyes and how to make your eyes pop.
We always like to emphasize that when it comes to makeup, there are no rules. Makeup should be an expression of who you are and how you feel on any given day. That being said, there are certain tips and tricks that will enhance our beautiful natural features.
Your eyes are the window to your soul. They’re often the first thing that anyone will notice about you. So, when it comes to makeup, what can you do to enhance your natural eye color and make it sing?

Don’t match your eyeshadow to your eye color
There’s a common myth circulating the globe that matching your eye color to your makeup is the way to go (i.e., wearing blue eyeshadow with blue eyes, or green eyeliner with green eyes, brown mascara with brown eyes.)
But in fact, the opposite is true when it comes to making your eyes pop. Blue makeup doesn’t enhance your blue eyes; it will make them appear less blue and striking and lead to them disappearing into your face.
The same is true for all eye colors—it’s best to avoid matching your makeup to your eye color if you want to draw attention to your eyes.
But what if you have blue eyes, and you love your blue makeup?
If you can’t bear the thought of completely swapping out your favorite color yet, try switching to a different shade—for example, a pastel blue eyeshadow, a turquoise eyeliner, or a midnight blue mascara.
The color wheel is your friend

You may have briefly checked out a basic version of the color wheel while you were doing an art class at school. But if you haven’t taken a look in awhile, it’s time to get reacquainted with it.
Colors that are side by side on the wheel are known as analogous colors, while colors opposite each other are known as complementary colors.
To make your eyes pop, you want to choose shades that are opposite (or close to opposite) your natural eye color.
However, it’s important to note that most people’s irises are not just one color. There are usually different flecks and hues within that one color.
For example, you might have hazel eyes with hints of honey in them. You might have green eyes with hints of teal or mustard. Take a close look at your eyes in both the daylight and at night.
And when it comes to makeup, the color wheel should be used as a starting guide, but not taken literally. There are so many shades and tones of each color, all of which will show up differently depending on your eye color and skin tone.
The best approach is to try different colors out and see what works for you and what you like most.
Blue eyes

Keep it simple
Blue eyes on their own can be really bright and striking, which is why you want to try and not over-do your makeup. This can leave your eyes and skin looking washed out.
The best approach? Keep it simple. Less is more.
Eyeshadow
The best eyeshadow for blue eyes is anything with an orange base. That means warm copper, gold, apricots, peaches and brown tones. The warmth in these colors will help make your eyes pop and stand out, and highlight any warmer flecks in your eyes.
Purple is another shade that can be quite striking with blue eyes. All shades from lavender through to plum can work to help your eyes appear even bluer and brighter.
Highlight
Subtle highlighting around your eyes can help frame them without the need for eyeliner. It can also prevent them from looking too icy.
Apply a highlighter across your brow bone (just under the brow), as well as the inner corners of your eyes. Opt for a shimmery highlighter rather than a glittery one to keep this look subtle. Neutral and champagne shades will work best.
Liner
Keep your eyeliner minimal and apply it in a thin line. You can also keep your liner to your upper lash line and skip the lower lash line because blue eyes are strong enough to not disappear into your face. This can actually leave them looking bigger and brighter!
Grey eyes

Which color is most prominent in your eyes?
Grey eyes can contain many flecks of color including green, gold, blue and brown tones.
The first step for you is to decide which color is most prominent in your eyes. You can then pick complementary colors accordingly.
Winning colors
To enhance the green in your eyes, choose shades with pink undertones like rich plums and purples. To enhance the blue, go for shades with orange or peach undertones.
Green eyes
Don’t head for red
You’d be right in thinking that red is opposite green on the color wheel. But red is a difficult shade of eyeshadow to pull off. The tones will usually end up making you look sickly. The best eyeshadow for green eyes is within the red spectrum, but opt for reddish browns or plum shades, or even pink.
These tones will help make your green eyes the star of the show.
Soft blush on the cheeks
Add some subtle, soft blush on the apple of your cheeks in a pinky shade. This is a gorgeous feminine look for both work and play.
Liner
The best eyeliner for green eyes is something in a copper or violet shade. But if you prefer a more classic look, black goes with everything and is a staple for creating both simple and more dramatic makeup looks.
A swoosh of liner and a plain, glossy lid is a simple but sexy look.
Let your green eyes do the talking
If you really want your green eyes to stand out, keep everything else natural. Think voluminous lush lashes (try this mascara), glowing cheeks, and a glossy lip. Gorgeous!
Hazel eyes

Green or brown?
Did you know there’s no such thing as pure hazel eyes?
You’re likely to have a mix of tones and flecks in your eyes, ranging from shades of brown to green.
Depending on which color you want to accentuate, you can mix up your makeup accordingly.
To bring out the green, follow what green-eyed girls do and go for red and purple-toned eye makeup. To enhance the brown, opt for blue or copper tones.
Want more drama?
If you’re looking for a bolder look, try a smokey eye, a mix of dark metallic and coppery green tones.
Liner
For a natural look, use brown eyeliner to give your hazel eyes a little more oomph. And for a more radiant, glowing look, try a gold liner.
Brown eyes
Concealer is your friend
Did you know that dark circles can steal attention away from your beautiful, brown eyes?
Before you do anything, find the right concealer for your skin tone and spot it lightly under your eyes as needed. This is a crucial step before you go any further.
Brown eyes suit almost any eye makeup color!
Great news, you can get away with wearing almost any color you like!
If you want to make your brown eyes pop, then contrast is key. Think baby blues, turquoise, and metallic greens. Pink is also a great contrasting color to brown.
But as a general rule, you have free reign here to try out all the colors of the rainbow!
Metallics are a must
Shimmery shades will create a lovely striking contrast against your brown eyes and make them glow. Reserve metallic eyeshadow or liner for those special occasions when you want to make a serious impact.
Don’t overlook the neutrals
Neutrals might seem boring from the outset, but they can create a really sexy, effortless look while also bringing out the natural color of your eyes.
Plus, you can’t ever go wrong with a nude color with brown eyes. Think neutral eye shadows, some brown bronzer, or even a nude lip.
Liner
Classic brown and black eyeliners will always work against your brown eyes. But if you’re looking for an extra-special look, try a blue or purple eyeliner. Most eye colors can’t pull this off, but you can!
Complete the look with mascara for extra volume
Mascara is a must regardless of your eye color. Brown can work well for blue eyes, but black will suit every eye color. Apply some lash primer, one or two coats of classic French mascara, and get ready for your eyes to pop!
Getting your makeup to enhance your eye color is all about knowing which colors suit you and which ones to steer clear of. So get experimenting and try out these tips today!
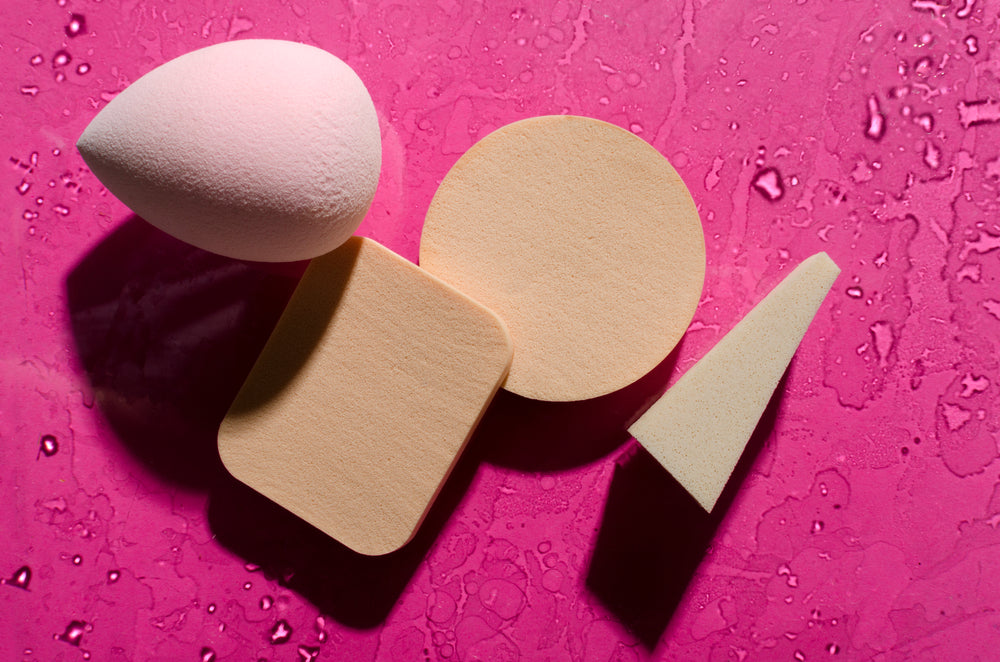
When the Beauty Blender was first released, it shook the makeup world from top to bottom. Before it came around, we were using flat brushes and dry, triangle-shaped sponges. These tools worked, but applying foundation would take ages. Nowadays, these egg-shaped makeup blenders are the ideal tool for applying a natural-looking layer of foundation or blending out concealer. Reusable makeup sponges give the skin a natural finish, and they’re oh so simple to use. There are a few key tricks to making a Beauty Blender work, which we’ll explain in this post. The most important amongst them? You have to use your makeup sponge wet. Keep reading to learn why! Why should you wet makeup sponges? Using a wet makeup sponge makes a major difference, so here are the reasons why we recommend it so strongly. Less product waste First of all, using a damp makeup sponge can save you a lot of time and money in the long term, because it wastes less product. When your sponge is dry, it absorbs a ton of foundation right into its center. If you’ve ever found yourself dispensing more and more foundation, but getting no coverage, that’s the reason why. On the other hand, when the sponge is damp, the water takes up all of the space in the sponge, and there’s no room for the foundation to soak in. Instead, it stays on the surface, so you can stipple it over your skin with no product waste. Flawless finish The second reason to use a damp makeup sponge is that it makes your foundation or concealer look so much better. Some of the water in the sponge infuses with the foundation, which gives the skin a more luminous and healthy finish. Because the sponge is expanded, it also leaves less of an imprint on the skin, which leads to a much smoother and more blended finish. How to use a wet makeup sponge Whether you’re using a wet makeup sponge to apply or blend your foundation, here’s the most fool-proof way to prep and then use it. First, run the tap and place your reusable makeup sponge under the stream. Let the sponge get saturated with water, and then squeeze it a few times. As the sponge takes in the water, it’ll expand to twice or triple its original size. Turn off the tap, and squeeze the sponge to remove excess water. It should be damp rather than soaking wet. Then, you can use the sponge to either apply or blend your foundation. Applying your foundation directly with the sponge will give a more sheer application. If you like full coverage, apply your foundation with a brush or fingers, and then use the sponge to blend it out. Whether you’re blending or applying, the main trick is to bounce the sponge over your skin. The bouncing motion helps the foundation glide over pores and it blurs away any brush streaks. Use the tip of the sponge for blending out or applying concealer under the eyes or along the side of the nose. Stick to the same bouncing motions as you apply it to those smaller areas. Once your foundation is perfected, you can finish off the rest of your makeup! More tips for using a makeup blender Using a Beauty Blender the classic way is great, but we have a few more hacks that will allow you to get the most out of your reusable makeup sponge! If you don’t like getting your hands dirty, you can use your Beauty Blender to apply moisturizer and primer before you do your makeup. If your skin is especially dehydrated, you can saturate your Beauty Blender with a moisturizing toner, which will hydrate the skin even more dramatically. For days when you really need your makeup to last, saturate your reusable makeup sponge with a setting spray, instead. It’ll help lock your foundation in place as you apply it. If your skin is oily or you’d like to waterproof your makeup, you can use a damp makeup blender to press translucent powder into your skin to set your base. While this technique can make dry skin look drier, it works well for those with oily skin, helping to make your foundation incredibly budge-proof. If you make any mistakes winging out your eyeliner or you want your eye makeup to have a sharper line, put a bit of foundation along the side of the pointy end of your sponge. Then use it to clean up the lines along the outer corner of the eye. A Beauty Blender is perfect for applying and blending out cream blush, highlighter, or contour! Use the pointy end to add those contour lines, or blend out your blush with the rounded end for a very natural flush of color. Don’t forget to wash it Finally, once you finish your makeup, always remember to wash your sponge with soap and water! Otherwise, Beauty Blenders can harbor bacteria if they’re left dirty or damp. To clean your sponge, hold it under the running tap, and then add some soap. Squeeze it a few times so it foams up well, and finally, rinse it clean. Squeeze it to get as much of the water out, and then place it somewhere clean and safe to air dry. This will keep your reusable makeup sponge in top shape for up to 6 months. Flawless foundation every time Considering how simple of a trick it is, using a wet makeup sponge has an amazing impact! There is no better way to guarantee a seamless and natural-looking foundation application. Give this trick a try to stop wasting foundation and to perfect your base.
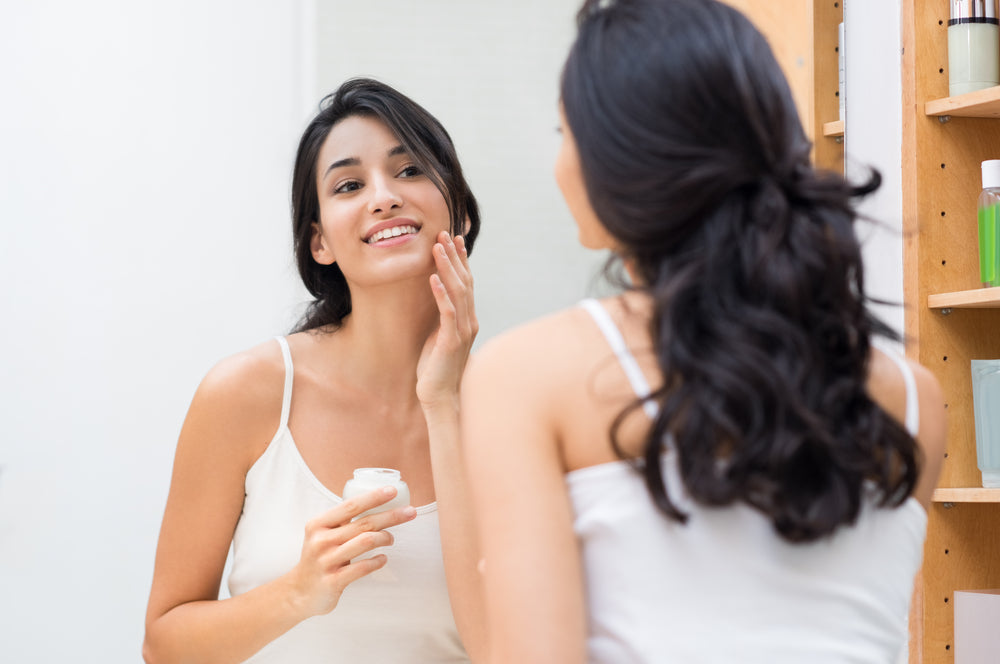
The modern skincare world can seem incredibly complicated, with a ton of different products and so much advice. The French skincare routine is much easier compared to some of the 10-step routines we’ve been seeing online! In reality, there are a few different ways to achieve healthy skin, so our goal is to help you with simple yet life-changing advice. When it comes to French beauty, it’s not only about your specific products but also how you use them! With these easy skin care tips, you’ll be able to make the most out of your beauty routine. French pharmacy brands In France, most women buy their skincare products at the pharmacy, and French pharmacy brands are an important staple in most French skincare routines. These brands are renowned for formulating gentle products that are suitable for sensitive skin, and for investing a lot of money in clinical research. While French pharmacy brands put a large emphasis on science, their products still contain a lot of lovely natural skin care ingredients that have their own nourishing effects on the skin. Be consistent French skincare comes at all kinds of price points, and contrary to popular belief, more expensive doesn’t always mean better. That’s why another one of our most important tips for great skin is to be consistent, no matter what products you decide to use. Cultivate skincare as a habit that you do every day, without changing up your products too much from day-to-day. Remove your makeup and moisturize every night, and wear sunscreen every morning. This consistency will pay off in the long term, by keeping your skin at optimal health for years to come. Cleansing should be gentle One of the most important French beauty secrets to healthy skin is gentle cleansing, no matter your skin type. In many countries, those with oily skin resort to scrubbing their face with harsh, stripping cleansers that throw their skin off balance, leading to irritation, breakouts, and more oiliness. However, in the best French skincare routines, cleansing is gentle and usually done with creamy milk cleansers. These days, oil cleansers and micellar water are also incredibly popular, but the key is to avoid any harsh, foaming cleansers. Moisturize damp skin Another easy skincare tip that makes a big difference is to apply moisturizer to the skin when it’s damp. This also applies to serums, essences, and any other hydrating skincare steps, although in French beauty, it’s okay to keep things minimal. Water makes the skin more permeable, so moisturizing agents sink in more deeply instead of sitting in a layer on top of the skin. The result is bouncy, more hydrated skin that feels soft to the touch but never greasy. Don’t neglect the neck and decolletage The skin doesn’t stop at the face! The French skincare routine extends from the face to the neck and chest, since those areas are all actually quite similar when it comes to skin thickness and level of exposure to the elements. Make sure to use your cleanser, moisturizer, and sunscreen from the face all the way down to your decolletage. It’s particularly important if you rely on your skincare routine to prevent premature signs of aging. If you forget to care for your neck, it’ll be an instant giveaway. Nurture your body with oils The rest of the body also deserves some attention, although it doesn’t necessarily need the same products as the delicate skin on the face and neck. The skin on the body is a little thicker and it’s usually less prone to acne, which is why French women love to nurture it with body oils rich in beneficial fatty acids and regenerative antioxidants. Just as with the face, the body is also most ready to accept moisture when it’s damp. The best time to use body oil is immediately after the shower when the skin is totally saturated with water. Using oil immediately after will help to prevent that water from evaporating, which will leave the skin hydrated and soft. Skincare can be aromatherapeutic This skincare tip won’t work for everyone, but for many French women, it’s what makes their beauty routine so fun. France has a centuries-old tradition of perfumery, essential oil production, and aromatherapy, which also touches into the skincare world. While the benefits that essential oils have for the skin are debatable, it’s undeniable that they can have a beneficial effect on the mood. Lavender is incredibly calming while rose essential oil can make you more cheerful. Using natural skincare with essential oils can have a positive impact on your mental health, and it can also simply make the skincare experience more sensorial and enjoyable! If your skin is sensitive to fragrances, try lighting a scented candle while doing your beauty routine, instead. Go all-out with the occasional treatment While consistency is important, treating yourself to some extra self-care can also be beneficial! In general, it’s not great to surprise the skin with new products, but a few times a week, you should exfoliate or mask your skin and give yourself a longer-than-normal massage. While these added treatments aren’t mandatory for healthy skin (it’s what you do every day that really matters), they’re still an easy way to amp up your glow and to feel pampered. It’s not all or nothing Since consistency is so important, we also want to reinforce that skin care is not all or nothing! While a multi-step routine with double cleansing, toning, multiple serums and creams can be nice, you’re also allowed to keep things basic and even to take shortcuts. Having a few pre-planned shortcuts, like a bottle of micellar water in a cupboard for easy makeup removal or a bottle of face lotion near your bed can go a long way towards helping you maintain your consistency on nights when you’re too tired to go all-out. Simple skin care success Skin care is highly individual since each person has a different skin type and slightly different concerns. However, our tips for great skin are universal, because no matter who you are or what your budget is, you deserve to have healthy, well-cared-for skin!

Have you heard of the 5-Piece French wardrobe? This is not just any wardrobe. It’s the secret to attaining that effortlessly chic Paris style we all swoon over. Plus, it’s the best way to build a capsule wardrobe that is both fun and functional, and helps you get the most out of every piece you purchase. Have you ever woken up in the morning, stared at a huge closet packed with clothes, and thought, “I’ve got nothing to wear?!” Do you keep buying more stuff each season, and need a way to curb those bank-draining spending habits? If you find yourself nodding your head, this French wardrobe philosophy might be a match made in heaven for you. Don’t panic over the whole “five-piece” scenario. It’s not a wardrobe built of just five pieces—that would be crazy. All will be revealed in this article. The ins and outs of a five-piece French wardrobe Minimalist French style is all about investing in fewer pieces that are higher in quality, and will hopefully last you a long time. It’s focused on longevity rather than trends. And this is exactly where this French wardrobe philosophy stems from. There isn’t a set number of pieces or a timetable to follow. To start, you build a solid collection of basic pieces. Things like plain t-shirts, black tailored pants, and a classic white shirt—simple items that can be mixed and matched with everything in your wardrobe. If you find any gaps, fill these in with new staples. Each season (four times per year), you’re allowed to purchase 5 new investment pieces to help you build your collection. These should be non-basic pieces. You can take as much time as you like choosing these—there’s no rush! The point of this is to refresh your look with each passing season, but to also focus on investing in pieces you truly love and will wear for years to come. Five might not sound like much, but trust us on this one; coupled with your trusty basics, this will give you endless outfit combos that will embody that French I-just-woke-up-like-this look. The rules: The 5-piece French wardrobe can be a little tricky to understand at first. So, here are some of the rules you need to know before you get started. Basics don’t count towards your five pieces, and can always be replaced. Makeup doesn’t count. Accessories, socks, and underwear don’t count (unless they’re particularly pricey purchases.) Shoes do count. And everything else that’s not mentioned above counts. How to get started creating your 5-piece French wardrobe The secret to rolling out of bed and looking like one of those impeccably dressed French women you see on Instagram is focusing on fit. The reason these women look so good in simple clothing like jeans and a plain white tee is because of the fit. They wear flattering cuts and silhouettes. Instead of following the trends, they stick to what works for their unique shape. So the message is, it’s not what you buy, it’s how it fits you. Remember, you’ll only be purchasing 20 new non-basic items each year, so choose wisely. Out with the old Get started by clearing out your wardrobe. Donate anything that no longer fits you, or that you haven’t worn in the past year. Chances are if you haven’t worn it by now, you never will! Hold on to any basics that fit you well, and part ways with the rest. Be ruthless through this process. If you notice any gaps, make a list of what you need and start shopping. Don’t rush to buy everything at once. Take your time, be considerate, and choose quality items that feel good against your skin. Because when you feel good, you will look good. Back to basics We touched on basic pieces a little earlier, but what exactly is a “basic” item of clothing? Generally, it’s a functional piece of clothing that you don’t need to spend a ton of money on. Basics will generally be plain or block colored, practical, and go with those fancier, statement pieces in your wardrobe. French outfit essentials: Items every woman should have in her wardrobe Here are some of the pieces you should think about stocking up on to make sure your wardrobe game is on fire. Tops: block colored t-shirts, button-up white shirts, silk camis. Pants: well-fitting straight-leg jeans, tailored pants Skirts: pencil skirt, white linen skirt, block colored mini skirts Dresses: a little black dress Shorts: jean shorts, linen shorts Sweaters: cashmere sweaters, oversized wool sweaters, cozy cardigans Outerwear: a trench coat, a classic blazer, a leather jacket Shoes: ballet pumps, brown/black heeled boots, sandals, court shoes. Make your shopping list for this season. The great thing about the 5-piece French wardrobe is that each season you get to make a wish list of things you want to add to your collection. What have you had your eye on for a while? What are you noticeably missing right now that would take your wardrobe to the next level? Set yourself a reasonable budget each season for your 5 pieces. It’s okay to spend more on these items than you usually would, because the focus is on quality pieces that last longer. So don’t scrimp, but don’t blow more than you can afford. And that’s how to create a 5-piece French wardrobe! The only other rule is to have fun creating your capsule collection. It won’t be long before you have a beautifully sustainable and ethical wardrobe that makes getting dressed each morning a joy. Why not use these principles and apply them to your other purchases too? For example, focus on investing in good makeup: a quality mascara, a classic red lipstick, and the perfect shade and texture of foundation for your skin. Follow these steps, and you’ll be Paris-ready in no time.