


How to Use a Makeup Sponge
Is a makeup sponge part of your beauty toolkit? For us, it’s a must-have! Makeup blenders, in particular, are a fairly recent innovation that has had a big impact.
French girls have totally fallen in love with makeup blender sponges because, when used damp, they give a glowy finish that’s integral for achieving natural-looking makeup in seconds.
Whether you only apply a touch of concealer once in a while or you like a full foundation and contour makeup look, using a makeup sponge correctly will help up your makeup game. In this post, we’ll focus on a more French approach to using a makeup blender, with tips for simplistic makeup that’ll help your skin look naturally radiant.
First, we’ll give you a quick overview of the different types of makeup sponges, and then we’ll provide tips for using them depending on the products you like.
Types of makeup sponges
There are two major types of makeup sponges to choose from, so let’s quickly summarize the details you should know about them.
Makeup blender sponges

When we hear the word makeup sponge, the first thing that comes to mind is a round, reusable sponge, much like the original Beauty Blender and the other sponges inspired by it.
These sponges are meant to be used damp to apply and blend complexion makeup. You wash them with soap and water after every use. You can use the same sponge again the next time you do your makeup.
These reusable sponges are fantastic for complexion makeup. They blend away streaks and harsh lines, and because they’re damp, they don’t absorb your foundation. The water in the sponge helps add more moisture and glow to the foundation, contributing to a healthier and more natural finish.
Disposable sponges

Before blenders became standard in all of our makeup kits, many women were using disposable sponges to do their makeup. They were usually wedge shapes, but occasionally you could also come across flat sponges. They were never especially popular in French beauty since French women preferred to use their fingers to apply their makeup.
Some brands market their wedge sponges as reusable. In practice, they’re usually flimsier and more likely to harbor bacteria compared to makeup blender sponges, so while you might be able to wash and reuse them, we don’t recommend keeping them around for long.
These days, many makeup artists still use disposable wedges. They can just throw them away instead of having to carefully sanitize a reusable sponge for their next client. They work well in a pinch, although their smaller size and straight edges mean that getting a seamless blend takes a little longer.
How to use a makeup sponge for foundation makeup

This is the French approach to using a makeup blender for natural-looking makeup. It works whether you use a foundation or a product with lighter coverage like tinted moisturizers or BB cream.
- Always start with clean and very well-moisturized skin. If you want, you can even use your sponge to apply your skincare steps!
- Next, soak your sponge with water until it doubles in size, and then wring out the excess, so it’s damp but not dripping.
- Dispense your cream or liquid foundation makeup on the back of your hand. The heat from your skin will help warm it up so it’ll glide more easily.
- Dip the sponge into the makeup on your hand.
- Start with the area of your face where you would like the most coverage, and gently bounce the sponge over your skin.
- Never drag the sponge over your skin since that can leave visible streaks.
- Use overlapping bouncing motions to spread your foundation and to give your skin a seamless, poreless blend.
- If it looks like you’ve overapplied makeup to any part of your face, use one of the sponge’s clean sides to blot away the excess and to prevent a cakey look.
Applying concealer with a sponge

Many French women use concealer instead of foundation since they can just dab it where they’d like to even out their skin tone a little. Getting a concealer to blend into bare skin isn’t always easy, but with a makeup sponge, it’s a piece of cake!
It’s best to apply concealer directly to the area that needs the added coverage, either with a brush, a finger, or the applicator that comes with your concealer. Then, use the clean, pointed end of your damp sponge to blend out the concealer into the rest of the skin so it becomes truly undetectable.
Using a makeup sponge for blush and contour

Powders aren’t especially popular in French beauty because they can leave the skin looking too matte and dry. Instead, cream blushes, bronzers, highlighters, and contour makeup are much more common.
Using a sponge blends out those colorful, precise complexion products in a way that gives them a skin-like finish.
- As with concealer, it’s best to first dab the product on the skin, concentrating on the areas where you want it to be more saturated.
- For blush, that means the apples of the cheeks, while for contour or bronzer, it usually means below the cheekbone and along the temples.
- Using a clean side of the sponge, gently tap over them to blend, and add a bit of a dragging motion if you also want to distribute the product further out.
- Finally, if you think your blush or contour is a little too dark or vibrant, you can actually dip the sponge into a bit of your foundation and concealer and then bounce it over the makeup. It’ll help to soften the blush, as though it’s emanating from within your skin.
Soak it up
When you use it correctly, a sponge is the ultimate makeup aid. No other tool can blend things quite so seamlessly for natural-looking makeup every time. Use it damp, and that added moisture will help you realize all of your French beauty fantasies!
Do you love Parisian style and want to know how to create the perfect French fashion statement? French women are known for their impeccable, timeless style. Paris street style is effortless, chic, classic, and subtly sexy. The French have mastered the balance between looking dressed up while remaining laid back. Basics are mixed with one statement piece, so nobody ends up looking overdressed. Fashion in France is about clean lines and simplicity. Want to know the best thing about Parisian style? It values comfort. We don’t mean heading out the door in sweatpants and sneakers, but French women will never wear something that isn’t comfortable. For example, ballet flats are still chic and look great — comfort and quality are just as important as a piece’s aesthetics. Don’t you love that? Ditch those heels you can’t walk in and those jeans that are so tight you feel like your circulation is cut off. It’s time to do what the French women do and get comfortable while perfecting the Paris look. Here are twelve French fashion statements that Parisians love. 1. Sophisticated sunglasses No Paris look is complete without the addition of a sophisticated pair of sunglasses. Parisians favor big, bold style frames over slim ones. It doesn’t matter if the sun is shining or it’s the middle of winter — sunglasses are a must. They add cool points and help you channel the strut that Paris fashion week is renowned for. When in Paris, always wear sunglasses. Forget about what others may think; after all, French women never worry about such thoughts. 2. Mindful minimalism Nobody knows Parisian style quite like Coco Chanel does. When it comes to any outfit, minimalism is key. Less is always more. That means build most of your outfit up with simple basics: a plain white t-shirt, a tailored pair of black trousers, a white button-down shirt, a strappy camisole top, a classic trench coat or blazer. “Before you leave the house, look in the mirror and take one thing off.” - Coco Chanel If you want to wear a statement piece, then stick to one, like an amazing scarf, handbag, or a pair of shoes. This will help streamline your look and keep it refined and elegant. When it comes to jewelry, the rule is to keep it simple and don’t wear more than three delicate pieces. Minimalism is the secret to everyday Paris street style. 3. Casual glam Paris outfits are renowned for being sophisticated with a hint of imperfection. And the secret to this is mixing casual pieces with more glamorous evening pieces. A pair of jeans can be mixed with a silky, lace camisole top or a pair of jewel-encrusted sandals. A lovely printed dress might be paired with some old biker boots. A pencil skirt paired with ballet flats instead of traditional heels. Fashion in France isn’t about perfection, whether it’s your outfit or your hair and makeup. So when in doubt, mix things up. 4. The I-woke-up-like-this look When it comes to makeup, French women are all about highlighting their natural beauty. A good face cream, some SPF, a touch of brow gel, a coat of mascara, a pinch of blusher, some tinted lip balm, and you’re Paris ready. Remember to keep things relaxed. Go for simple eyeliner looks. Instead of perfectly straightening your hair, try for a natural wave and add a little texture. Classic colors are preferred over anything “in-your-face.” And opt for dewy, matte textures instead of shiny ones. 5. Hardly-there handbags No Parisian wardrobe is complete without a good quality leather handbag. This can be a quality faux leather too. French women strive to look chic rather than rich, which means avoiding big, recognizable logos. It’s okay to keep it subtle. Work with your budget, and invest in something that is small enough it can be hand-held but not too small that you can’t fit anything in it! 6. Have your cake and eat it: style & comfort French-style clothing prioritizes comfort but doesn’t compromise on style. It’s the best of both worlds. So, if you can’t walk in heels all day without hurting your feet, leave them at home! Most Parisian women prefer classic loafers and ballet shoes as their footwear of choice, or a low block heel. Cardigans are another French wardrobe staple, in a neutral color and high-quality fabric like wool, cashmere, or angora. Pair over a basic t-shirt or silk cami — you’ll feel oh-so toasty and comfy. A plain t-shirt in white or light gray is also a must-have item. Pair with a blazer or some high-rise straight jeans for an effortlessly chic look. Be sure to choose t-shirts made from 100% cotton (organic is best) — it will feel soft against your skin, and the quality will show. 7. The modern vintage look View this post on Instagram A post shared by Sabina Socol (@sabinasocol) If you don’t yet have a classic tailored blazer, you’ll want to add one to your wardrobe to perfect the Paris look. The great thing about a blazer is it goes with just about everything. Wear it with a basic t-shirt, a pair of jeans or tailored trousers, and even a mini dress. French women prefer an oversized blazer that looks like it came out of a man’s closet. Better yet, raid your partner’s wardrobe and see if there’s one you can borrow! 8. Laidback silhouettes Leave your skinny jeans and body-con dresses at home, ladies. Parisian style is centered on a more relaxed silhouette. Think A-line dresses, straight leg jeans, and oversized outerwear. If you opt for a tight pencil skirt, then pair it with a loose-fitting top to balance your look out. French women express femininity with masculine-inspired silhouettes and laid back shapes. Nothing should ever be too tight or fitted. 9. Timeless outerwear Always inspired by the philosophy that less is more, Parisians splash their cash wisely. They’ll save up and make investments in key pieces that can be worn over and over again. One of the most important pieces for any Parisian wardrobe is timeless outerwear: trench coats, biker jackets, bombers, and blazers. If there’s one item you must own, it’s a chic long beige trench coat. And given the unpredictable weather in Paris, you’ll certainly make the most out of it. Before making any purchase, ask yourself if this will be something you wear for the next few years. If the answer is yes, you’re thinking like a Parisian. 10. From day to night: the little black dress The little black dress is a classic piece for any woman’s wardrobe worldwide. But Parisians love wearing that LBD day or night. In the day, they’ll pair it with sneakers or some ballet flats with a loose blazer on top, and at night they swipe on some bold red lipstick and some voluminous mascara for a sexier look. When it comes to the shape, stick to what is most flattering for your figure and something you feel comfortable in. It can be short or long, and with or without sleeves or straps. 11. Head to toe neutral tones When it comes to color, neutral tones are your friend. Head to toe monochrome looks are part of everyday Paris street style — it’s all about discretion. Neutral tones include white, black, beige, camel, navy blue, gray, and khaki. The great thing about neutral colors is they can easily be mixed and matched with other pieces in your wardrobe. As a general rule, no French outfit will have more than three colors. 12. It’s not what you wear; it’s how you wear it There’s a reason why Parisian style is so simple yet chic. It’s less about the actual clothing you wear and much more about how you wear it. French style is all about how you mix and layer pieces together, the way you carry your handbag, your posture, and the way you smile. So the secret to French beauty isn’t about being a slave to the latest trends, but more about finding your unique style and wearing pieces that flatter your figure. And the most important thing to remember about making a French fashion statement? Have fun with it!
Maybe you’ve got your very first set of lash extensions, or perhaps you’re thinking about getting some. But you’re wondering, “can you put mascara on lash extensions?” Great question. And if you’re going to invest money in lash extensions (along with sitting still for that long), you want to make sure you’re taking care of them the right way. Don’t worry, we’ve got you covered. In this post, we’ll be answering all your burning questions. By the end of it, you’ll be a lash extension and mascara pro. Can you put mascara on lash extensions? So, should you wear mascara with eyelash extensions? Or is it a total no-go? You can wear mascara on lash extensions. When your lashes are fresh, you won’t have a huge need for mascara, but towards the end, you may want to reach for it! That being said, if you prefer to wear mascara with your lash extensions from the start, you can definitely do so! Estheticians recommend to avoid applying it to the base, as this can create a clumpy look. So keep it to the tips, and you’ll be golden. It’s worth pointing out that if you’re opting for volume lashes (the 2D, 3D, or custom-made fans), you probably won’t need mascara. Adding it will likely cause the fans to close and ruin the effect. Why wear mascara with lash extensions? Mascara will help darken and add volume to both the upper and lower lashes. Synthetic lashes are thicker than your natural eyelashes, whereas silk extensions taper out at the ends. Mascara helps give you that extra impact all the way to the tips — perfect for a more dramatic look. Many women also choose lash extensions that match their natural lash color. Adding a darker shade of mascara allows you to deepen the color as you like. And like we mentioned above, when your fake lashes are on their last legs and begin to shed, you can fill in the gaps with mascara. They’ll look as good as new! Which type of mascara should I avoid? Be careful; if you use the wrong kind of mascara, you’ll ruin your lash extensions. Here’s what to avoid: Waterproof mascara Waterproof mascara is designed to stay put through extreme conditions. You know, like thunderstorms and balling your eyes out on your wedding day. It’s great when you need it, but it’s a no-go when it comes to lash extensions. It can make your lashes brittle, and it’s extra tough to remove. You need an oil-based makeup remover, which can pull off flares, sometimes your lashes, and the glue holding your extensions in place. Tube mascara Although tube mascara can be removed with water, it’s not suitable for lash extensions. Why? Because it will stick to them like glue, and water will not be sufficient to get them off once that happens. Fiber mascara Like waterproof and tube mascara, fiber mascara is also difficult to remove. Plus, the purpose of fiber mascara is to add length to your natural lashes. If you’ve got extensions already, you probably don’t need it. Mascara you can use with extensions Oil-free mascara is best for lash extensions. That means the best mascara for lash extensions is a water-based formula. This is the only safe choice and will keep your lashes in tip-top condition. And it’s perfect for all types of falsies. If you have sensitive eyes or wear contact lenses, opting for an oil-free mascara is always the best choice. This will prevent unwanted irritation. What you want is a mascara that glides flawlessly across your lashes and comes off with minimal effort at the end of the day. When it comes to consistency, you want a mascara that is not too thick or too dry. A thick mascara can cause tension on the lashes, tangling, and clumping. Choose your brush wisely, and make sure it doesn’t grip your lashes too tightly. How to safely remove your makeup when wearing lash extensions Choosing the right mascara isn’t the only thing to consider. If you choose the wrong makeup remover, you can still end up damaging your lashes. There are many makeup removers and cleansers that contain oil, which you don’t want. A water-based product is what you’re after here again. The best way to remove your makeup while wearing eyelash extensions is to use a water-based wipe or lash shampoo with a charcoal brush. Avoid cotton pads or balls because they may get lint on your lashes! Remember, when you take care of your lash extensions and keep them clean, they’ll last longer and look better. So it’s in your best interests to pick the right products and treat your lashes with the love they deserve.
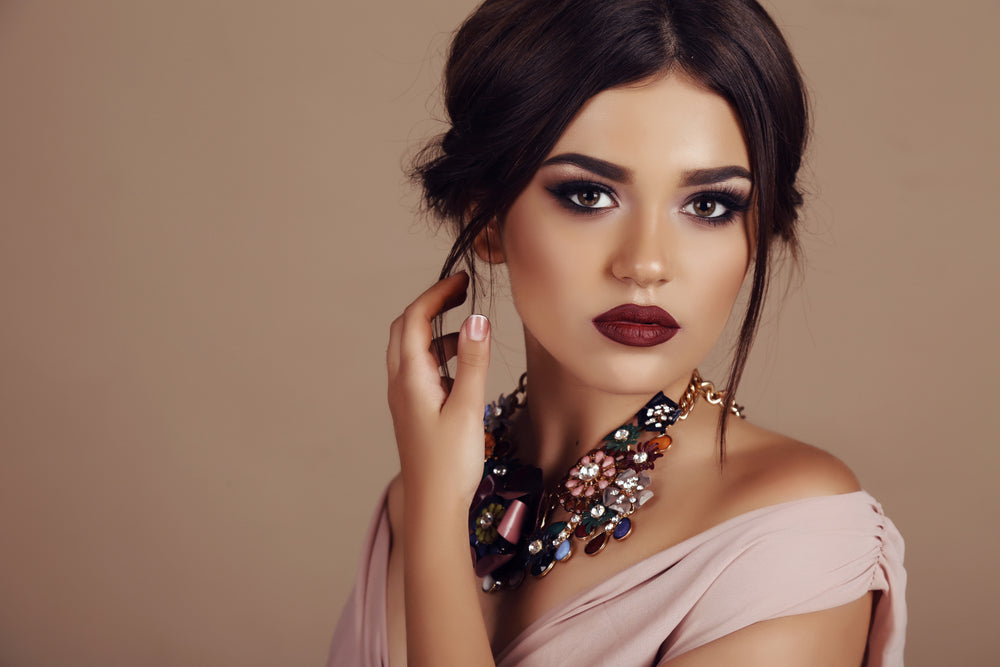
Smokey eye makeup is up there with the most popular makeup looks of all time. One quick search for a smokey eye tutorial will field millions of how-tos in seconds. And for good reason. A smokey eye is sexy, sophisticated and the perfect makeup look for any party or celebration. And although it may seem complicated, when you know what to do, you’ll find it’s pretty simple. That’s why we’ve put together this simple guide on how to get the sexiest smokey eye step by step. It should take around ten to fifteen minutes to complete, but a little longer if you’re a newbie. Remember, the more you practice your technique, the better the result. So what are we waiting for? Let’s dive in. Here’s what you’ll need to get started: Eyeshadow base (primer) Dark-colored kohl eyeliner Lighter eyeshadow (pearl or creams work well) Darker eyeshadow (see color recommendations below) Eyeshadow brush (a couple if possible, but you can wash between uses) Eyelash curler Mascara Which color should I go for? If you’re after a deep smokey eye then opt for a rich, matter color in black, brown, or deep gray. These colors will create an edgier look and make a bolder statement. If you’re looking for a more natural smokey eye, choose something less harsh, like a plum color. For a jeweled tone, purples, blues, and greens are striking. You can also use a shimmery eyeshadow if you like, for extra sparkle. Don’t do any other makeup before your smokey eye You might think that applying your foundation and concealer before working on your eyes is the natural thing to do. But the pros apply eye makeup first. Why? Because no matter how careful you are, there are bound to be flecks of eyeshadow powder and mascara that fall down your face. If you’ve already done the rest of your makeup, then you’ll have to touch it up. It’s much easier to fix mistakes like this without a full face of makeup. So no matter how much you want to apply other makeup first, don’t do it! Trust us on this one. Prime your eyelids Not everyone does, but if you have shiny lids, priming your eyelids first is a must. Without it, your eye makeup is bound to melt and smudge all over the place. And nobody wants that. Primer will create a solid foundation for any layers of eyeshadow you apply on top and will help you build color that lasts. Plus, it will prevent it from creasing. Use a brush or cotton pad to sweep it over both lids. Leave it to dry before starting your smokey eye makeup. Begin with a kohl eyeliner Start with a kohl eyeliner as a base. This is what will anchor your eyeshadow, and keep it on all night. We recommend picking the same color as the eyeshadow you’re using, but feel free to mix things up and experiment with color combos. Concentrate the eyeliner on the inner and outer corners of your upper lid, leaving the space in the middle bare. Use a brush to blend this across your upper lash line. This is how you begin creating that smoldering, sexy look, and it stops it from looking too intense. Next, use the same eyeliner on your lower lash line, blending it out with the same brush as before. Apply a light base color Every smokey eye look tutorial will recommend contrasting a light eyeshadow with a dark one. This adds to the smokiness. Using a clean brush (or washing the previous one), sweep the lighter color across the eyelid, following along to the brow bone. This is how you create the shadow for your smokey eye. Apply dark eyeshadow Next, grab your chosen darker eyeshadow color, and apply to the eyelid with a clean brush. Use enough to coat the color on your lid, but make sure you stop below the brow bone this time. Once you’re done, blend the color into your upper lash line (where the eyeliner is) as well as into the line between the dark and light shadow. Use a clean brush to do this, working small circular movements. The most important thing when creating a smokey eye makeup look is to avoid harsh lines, and to blend... and blend again. When you think you’re done, take a step back and check both eyes for symmetry. You’re looking for an even blend on both eyes. Curl the eyelashes The next step is to use an eyelash curler to give your lashes a sexy curve. Heat it with a hairdryer for ten seconds, and test it on the back of your hand before putting it near your face. Hold the curler for 10 seconds on each eye. Complete the look with a swoosh of mascara To complete your smokey eye, finish with as much or as little mascara as you like. If you’re going for a bolder look, amp up the volume here. If you’re going for a natural smokey eye, then stick to one or two layers. We love our Classic French Mascara for voluminous lashes in just one coat. Start at the root of your upper lashes, and wiggle up to build length and volume. You can apply mascara to your lower lashes too, but keep it to a minimum to avoid a spidery look. And that is your complete smokey eye look tutorial! Remember: Let your smokey eye makeup stand out Even if you’ve opted for a natural smokey eye, it’s still a strong look. And you want it to stand out. So keep the rest of your makeup to a minimum, and stick to neutral colors. A little bronzer, a neutral blush, and a nude lip will complete the look, but your eyes will remain the star of the show. And that’s it! We now pronounce you ready to create the sexiest smokey eye look ever.