Back to articles

Step-by-Step Winged Eyeliner

Perfect winged liner is one of the most challenging makeup techniques to master. At first swipe, you end up with an overly subtle winged eyeliner, so you decide to add just a touch more, and next thing you know, you’ve overdone it…

Don’t even get us started on getting both eyes to match! 

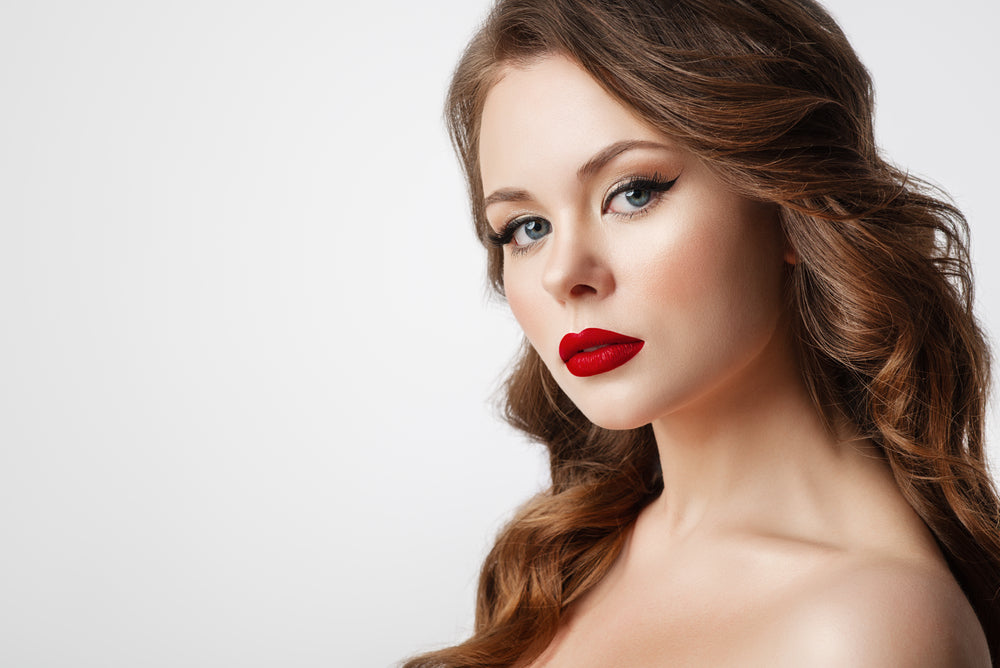
The only thing that might be tougher than winged eye makeup is a vivid red pout, so it’s funny how one of our favorite go-to looks in French beauty is a combination of these two.

Through years of practice, we've refined our skills and uncovered some of the best winged eyeliner hacks that make achieving that subtle wing a little easier. Today, we’ll be sharing all of our tips with you! 

What kind of winged eyeliner look do you want? 

The perfect winged eyelinerAre you aiming for a natural winged eyeliner look, or would you prefer a dramatic cat eye? Winged eyeliner comes at a few different intensity levels, and the angle of your wing will have a big impact on your look. 

These days, the sharp “fox” winged eyeliner look has become especially popular, but we’re still enamored with the subtle winged eyeliner of the ‘40s and the sultry winged eye makeup of the ‘70s.

While you do need to decide on the kind of look you want, our tips will help you achieve the perfect winged eyeliner every time. 

Winged eyeliner for different eye shapes

Eye makeup chartTaking your eye shape into account will help you figure out how to master the wing since when you draw on a liquid liner, you’re effectively changing the borders of your eye. 

The more sharply angled your eyeliner, the more upturned your eyes will look, while if you go horizontal, they’ll look a little sleepy and sultry. 

As for the lash line, a rounded shape will make the eyes look doll-like, while progressing from thin to thick towards the outer corner will make the eyes look almond-shaped. 

What about the inner corner? 

Woman with stylish winged eyelinerIn classic French beauty, we like to stop the eyeliner before the inner corner, and sometimes even at the eye’s center; this opens the eyes and gives the face a very fresh look. 

However, in recent years, it’s become trendy to aim for a sultry look by bringing the eyeliner all the way down to the inner corner in its own little wing. Feel free to experiment and see what style you like best!

Choose the right eyeliner 

Vivienne Sabo EyelinerLiquid and gel eyeliners are the ideal choice for a winged look, but some are easier to work with than others. Gels usually come in a pot, so they require a separate brush, which can be inconvenient at times. 

As for liquids, many come with ultra-thin brush applicators that are difficult to control. Felt-tipped pens, like the Feutre Fin, are ideal. With a tapered, sturdy felt tip, a pen eyeliner offers a precise wing but can still cover a lot of space when necessary. 

Keep your distance from the mirror 

Woman applying eyeliner in mirrorThis is one of our most useful winged eyeliner tips, so read closely. 

Instead of holding your mirror close to the face as you draw on your eyeliner, take a step back. This will allow you to see both of your eyes simultaneously, which is essential for achieving perfectly symmetrical eyeliner wings.

Otherwise, working too close to the mirror can easily result in two gorgeous eyeliner wings that look nothing like the other – giving you a lopsided look. 

Steps to a perfect wing

Steps to the perfect eyeliner graphNow, for the actual application! If you start with the hard part first, the rest of your winged eye makeup will be a breeze. It just so happens that the most challenging part of winged eyeliner is the wing itself. 

  • Start with the eye you usually struggle with, and draw the lower line of the wing by following your lower lash line. 
  • Do the same thing on your other eye while checking for symmetry in the mirror.
  • Then, draw on each wing’s top line, creating a little triangle at the outer corner. 
  • Once again, do the same on the other eye and check that everything lines up.
  • If your wing is a little more dramatic, you may need to fill it in a little as well. 

Small lines from outer corner to inner corner

Makeup artist applying eyeliner to modelNow it’s time to draw your liner over the lash line. To avoid gaps between the liner and your lash line, pull your lid upwards (gently!) as you apply. Then, working from the outer corner inwards, draw the eyeliner on in short strokes. 

Don’t worry too much about achieving a perfect line yet — once you let go of your lid, you’ll be surprised to see how even and delicate your winged eyeliner looks. You can then correct or thicken up the line after you have that base layer down. 

Keep the eye open to fit a hooded lid

Pretty woman with stylish eyeliner 

One common struggle many makeup lovers face is how to apply winged eyeliner to hooded eyes. The secret is to draw the top line of your eyeliner wing while your eyes are totally open so that your eyeliner sort of “skips” over the crease. It’ll look like there’s a little step or divet in your eyeliner when your eyes are closed, but when they’re open, it will look incredibly flattering. 

No more winging it 

Closeup of a clean winged eyelinerUsing liquid eyeliner might seem daunting at first, but with our winged eyeliner hacks and suggestions, we know that not only will you master the wing, but you’ll also refine it to suit your flare.

Next to read


    46
How to Look Great on Zoom Calls
February 26, 2021
How to Look Great on Zoom Calls

These days, more of us around the world are using technology to speak with friends, loved ones, and colleagues than ever. Life and communication look different, and so do we. While we’re used to styling ourselves to look gorgeous in person, this doesn’t always transfer through a digital screen. Looking nice on camera is a different skill set, and it’s no longer limited to Hollywood glamour or French fashion shows. That’s why we’ve compiled this list of tips and tricks that will help you learn how to look great on zoom calls. Whether you’re curling up on your sofa for a remote trivia night with friends or armed with coffee for an early-morning work meeting, these video call makeup tips will help you look great and feel confident. Choose the Right Filming Location As the best videographers would tell you, lighting is everything. Sit in front of a window and allow the sun’s rays to light up your features. The best lighting for Zoom calls illuminates your face from the front, not from overhead or behind. Artificial lighting can appear yellow on a screen, which can mess with the way you appear through the lens. If you’re taking a call at night or otherwise don’t have access to natural lighting, try placing a white-toned light in front of you to get a similar effect. Turn off any rear or overhead lights, then check to see if the lighting looks natural on-screen and that you can easily be seen without strange shadows or highlights. You might have to adjust other lights in the room by turning them on and off until you get the desired effect.  Once you’ve chosen the right location, simplify your background so that fellow video call attendees can focus on your face, not the overcrowded shelving or dirty laundry behind you. Adjust Your Camera Angle Next, adjust your camera angle so that you can look better on video. You should be able to look comfortably forward into your camera, not up or down. A camera from below, where most laptops, tabletops, and even our phones are naturally positioned, can distort your features and cause your face to look unnatural. The people you’re speaking with may end up with a view of your nostrils rather than being able to make eye contact. Being able to look straight into the camera will also help with your posture so that you don’t have a sore neck or back halfway through your call. Use regular household items such as books stacked under your device to get a flattering angle. Keep it steady so that it doesn’t topple over, especially if you have children or pets in the home that may bump the table or stand you’re using.  Have Confidence The French know that the first step to success is to have confidence. When you feel your best, your natural beauty shimmers through. Dress from head to toe, even if nobody can see your lower half. Or, have some fun and pair pajama bottoms with your best blouse. The relaxation and happiness you feel when you’re comfortable in your own skin are contagious, so focus on feeling good, and the rest will follow. Conceal Discoloration Concealing discoloration, such as eye bags and red spots, goes a long way on camera, which can accentuate our imperfections. Dab on some concealer to hide any blemishes. If needed, you can also use a camera filter to even out your skin tone. Choose Vibrant Colors You can cause makeup to look better on video calls by selecting brighter, bolder colors than you would when meeting up in person. A vibrant blush and lipstick combo will make you look more lively and less flushed out, as can sometimes happen in a video call. Our Matte Constance Duo Pack comes with two stunning lipstick shades for you to try. Focus on Your Eyes Focus on your eyes while formulating your makeup look to draw attention to them on camera. Cover dark circles and apply Cabaret Premiere mascara for beautiful, full lashes. Pair this with a neutral eye shadow to complement your vibrant lipstick and blush selection, and voila!  Keep it Simple Don’t feel that you have to go overboard on applying your makeup to look cute on your Zoom call. A little can go a long way, and it’s alright to keep it simple. Focus on accentuating one or two features, and don’t be afraid to have some fun trying new techniques or products. Relax, be yourself, and don’t take things too seriously. Preview Before Going Live Whether you’re using Zoom, Facetime, Skype, or even just taking a photo, you’ll likely notice that your face looks much different than it does in the mirror. The lens type, the distance between you and the camera, and the angle can all distort your image. This is why it’s important to preview before you go live so that you have an idea of what others will see. Fix any lighting, makeup, or angle issues ahead of time so that when you take the call, everything goes smoothly and you aren’t stressed about the lipstick on your teeth or that plate you forgot to put away in the background.   Enjoy Your Meeting You're all set to join any video call with confidence! When it comes time to log on, relax because you've thoroughly prepared for this. You go girl!

9 Mascara Mistakes That You Need to Stop Making
February 19, 2021
9 Mascara Mistakes That You Need to Stop Making

Mascara is that special touch that ties every makeup look together. Without its darkening, lengthening effect on the lashes, eyes can look bare and small, so it’s key in nearly every beauty look.  However, applying mascara poorly is worse than not applying it at all. Clumpy lashes and smudgy lids can ruin an entire look, and there are even some mascara mistakes that can lead to eye infections.  That’s why you shouldn’t play games when it comes to mascara. We’ve collected our best mascara tips to help you avoid the most common mascara mistakes, so you can always bat your lashes with confidence.  1. Leaving too much mascara on the wand If you want to learn how to apply mascara without clumping, remember to always wipe down your mascara wand. This crucial step is often forgotten. It’s easy to miss in the excited rush to lengthen those lashes. However, a mascara wand that’s too saturated is guaranteed to cause clumping.  From now on, immediately after unscrewing your mascara cap, gently wipe the wand over the lip of the tube. Pay special attention to the tip because that’s where mascara really tends to collect, and if the wand seems especially clogged up, you can wipe it down with a tissue. This way, when it’s time to apply, you won’t need to worry about big globs of mascara clumping your lashes together.  2. Pumping the wand In films, whenever a character goes to put on mascara, she’ll first pump the mascara up and down a few times in the tube. Women all over the world started believing that this was the right way to go about putting on mascara, when in reality, it’s one of the worst mascara mistakes you can make. In the short-term, it has no benefits. If anything, it just loads up your wand with a massive, clump-causing amount of mascara. In the long-term, it introduces air and bacteria into the precious tube, which significantly shortens the life of your mascara.  3. Using old mascara Of all the most common makeup products, mascara has the shortest shelf-life. If you use your mascara after its use-by date, you can run into all kinds of issues. It will get dry, which leads to clumpy lashes, and it may also start harboring bacteria, which can cause styes and painful infections.  Most mascara should be replaced 3-6 months after opening. If you’re worried about forgetting, we’ve set up an auto-subscription system that will send you a new tube of our best-selling Cabaret Premiere mascara every few months. 4. Forgetting to wiggle Always remember to give your mascara a wiggle! This classic mascara tip guarantees that your lashes will look both voluminous and separated every time.  When you apply your mascara, give it a small wiggle as it comes in contact with the base of your lashes. This will allow the bristles of the wand to really wedge themselves in between your lashes, coating them thoroughly without clumping them together. Then, as you pull the wand up to coat the length of the lashes, move it in a slight zig-zag motion to keep that momentum going. 5. Only coating one side This mascara hack is especially for the blondes and redheads out there, because brunettes can sometimes get away with making this little mistake. When you apply your mascara, you only see the underside of your lashes, so you might forget the top. If you leave the top bare, the second you blink, the natural color of your lashes will be visible, and it’ll take away from the consistency of your makeup.  To cover the top part of the lashes, use the tip of your mascara wand and carefully color it in, especially close to the lashline. Don’t try to build up volume or length from above since it can weigh the lashes down; just focus on coloring things in.  6. Blinking too quickly It can be tempting to blink immediately after putting your mascara on, but unfortunately, it often results in black smudges on the eyelid ruining your eyeshadow. Not blinking may sound like a tall order, but if you just close your eyes after applying mascara, the issue will be solved. Just wait a few seconds so that when you finally open your eyes, the mascara will be dry and won’t smudge. 7. Applying too many coats It can be tempting to add coat after coat of mascara, but it rarely works well in reality. Yes, 5-6 coats of mascara will make your lashes look longer and thicker. However, it’s also going to make them look uniformly thick from root to tip, leading to a “spidery” look.  To avoid having your mascara look spidery, you need to exercise restraint. Don’t apply more than three coats to your lashes, and if that doesn’t give you the effect you want, you may just need to switch to a more volumizing mascara. 8. Forgetting to remove it at night  Sleeping with mascara on is never a good idea. In the best-case scenario, forgetting to remove it at night will just dry out your lashes, cause a few to fall out, and leave a few marks on your pillow. But it can also lead to eye irritation and even eye infections. This is another serious mascara mistake, so make sure to remove your eye makeup thoroughly every night with a high-quality makeup remover.  9. Using the same mascara for all occasions Wearing the same mascara all the time isn’t the biggest mascara mistake you could make, but it can get boring. Tailor your mascara choice to each event!  A lengthening and separating mascara is best for day-to-day. Waterproof mascara is a must-have for beach-side vacations or rainy days.  For date nights and parties, emphasize your eyes with a volumizing mascara. For upscale evening events, when you want maximum drama, double up! Start with a coat of waterproof mascara for a separated, waterproof base, and then add a coat of volumizing mascara for a false-lash effect.  Now that you know all of our favorite mascara tips, no more faux pas!

How to Get the Perfect French Girl Hairstyles
March 16, 2021
How to Get the Perfect French Girl Hairstyles

French women are known for their effortless yet sophisticated look. French girl style is all about looking like you basically "woke up like this,"  perhaps with just a touch more polish. It’s never too much or too little — it’s always perfect.  The same philosophy applies to French hairstyles. They should never be too complex or intricate. Instead, the focus should be on having a flattering haircut styled to honor your natural hair texture and to frame your beautiful features.   If you’d like to give French girl hair a try, we’ve got some ideas to inspire you. We’ve selected our four favorite ladies’ hairstyles for 2021, and we’ll explain how you can achieve them, along with some matching makeup tips.  French bob cut   A bob cut is one of the most popular French haircuts right now! Vogue called it the biggest hair trend of 2020, and we can assure you that it’s going strong well into 2021. While every bob is tres chic, consider adding bangs to your look to truly embody that French girl style.  To get the bob cut   The secret to getting a bob to work for you is to make sure that it hits your features just right. The eye will be drawn to the spot where the bob ends or where the fringe falls, so consider which features you’d like to emphasize with the length and layering.   You can try to cut your hair on your own, but we’d recommend going to a professional hairdresser. A great hairdresser will take the time to chat with you and help you figure out which lengths will flatter your face shape the best.  Matching your makeup to a French bob If it’s your first time going short, you may want to put a little extra effort into making sure your makeup is visible. We’re partial to pairing this popular French haircut with a vibrant red lip, using our Matte Constance Lipstick in Classic Red.  Wavy French girl hairstyle    You don’t have to go short to achieve amazing French girl hair. Soft waves and natural-looking texture are just as chic, and they work beautifully on longer bobs, shoulder-length hair, and even ultra-long tresses. While a natural wave looks totally effortless, it does take a little bit of technique.  To get soft waves  If you’re naturally blessed with wavy or curly hair, the curly girl method is ideal because it skips the damage of heat styling and brings the very best shape out of your tresses.  If your hair is naturally straight, you’ll have to resort to just a bit of heat styling. First, spray your hair with a texturizing salt spray, and blow dry it if needed. Then, use a large-sized curling iron to create alternating curls in your hair, focusing only on the bottom half of each strand. Finally, once your entire head is curly, use your fingers to gently loosen up the curls to turn them into gorgeous waves.  Tie it together with makeup  The beautiful thing about softly textured waves is that they match any makeup look, including barely-there makeup. The key is to keep the eyes nicely framed by your brows, so they don’t disappear behind the mane of hair. All you need to do is lightly fill them in with the Brow Arcade pencil and then brush them up into a groomed look.  Effortless messy bun While it’s important to have a signature look, French girl style is also about knowing when to change things up. Before dates or nights out, having a go-to effortless, yet sophisticated, bun really comes in handy.   Creating a simple bun The more effortless and messy you want your bun to look, the more bobby pins you’ll need, so make sure to have plenty on hand. You’ll also need strong, tight hair elastics. Start with your hair already a little wavy, and consider using a little dry shampoo to add some grit.  First, pull your hair into a ponytail, leaving a few loose strands at the front to frame your face Next, twist your ponytail, and then wrap it around the elastic so it forms a donut-shaped bun.  Use bobby pins to secure the base of the bun.  Then, gently pull on the bun with both hands to slightly expand it and give it a more voluminous look. If any strands come loose, you can tuck them under the bun and then pin them into place. It’s super easy to create, but the results are impressive.  Match it with soft-glam makeup You’ve already gone through the effort of pulling and pinning your hair up into a bun, so finish off your look with a careful swipe of liquid liner to make your eyes gleam, and then a healthy dose of our Provocation volumizing mascara.   Flirty ponytail French girl hairstyles can lean into a playful, feminine vibe as long as they retain their chic simplicity. A hairstyle with a low-ponytail does the trick, and it’s great for days when you want your hair out of your face. Tying it off with a scarf gives rustic charm and a bit of color to the look!   Styling the perfect ponytail You can rock a sleek ponytail if you like, but we’re partial to this voluminous style. You can start with air-dried hair or go all out and use a hair curler to achieve loose waves. If your hair is feeling a little flat, section it at the crown, and tease a little bit to add some volume.  Then, pull your hair back into a low, loose ponytail. Leave a few loose strands around your face, and give them a quick curl with a curling iron. Finally, pick a colorful scarf, and tie it around the base of the ponytail!  Playful makeup to match This kind of look pairs best with a fresh face. We suggest giving your pout a sheen; so first, use our volumizing Polynesie Francaise gloss in Bora Bora, and then add a sheer wash of pink blush over the cheeks.  Finishing in style  Which of these French hairstyles will you try in 2021? From changing things up with a short bob to embracing length and texture, French girl haircuts and styles give easy options that’ll keep you feeling chic and sexy!