


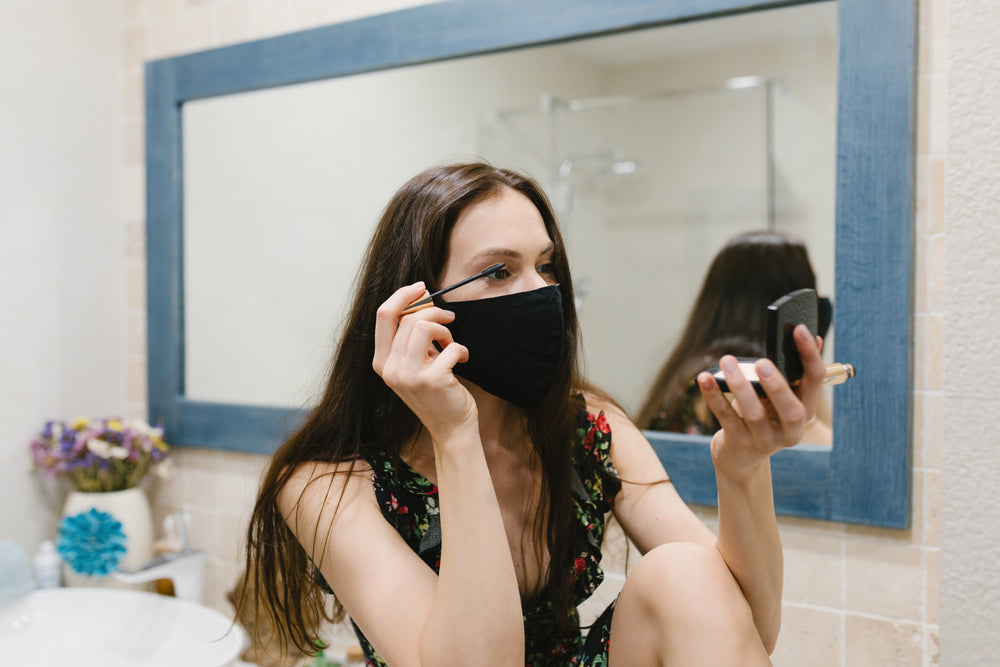
How to Keep Your Makeup From Getting on Your Mask
All around the world, many of us are still required to wear face masks in public places. There are no clear signs as to when this will end completely, which means we’ve had to accept that a mask has become a permanent accessory.
But what does this mean for your makeup?
Anyone who has tried wearing a full face under their mask will be no stranger to smudges, smears, and mask transfers. And if it’s warm outside, it’s game over.
You’re left wondering "why did I even bother putting makeup on today?"
So, the golden question is: Do you know how to keep your makeup on when wearing a mask? We do; so keep reading to see how!
What causes your makeup to rub off?

There’s a couple of things going on underneath your mask.
First off, wearing a mask causes humidity between the fabric and your skin. This, combined with the oil in your makeup, can cause your makeup to transfer or completely melt away.
Second, every time you breathe (which we do around 20,000 times each day!) you produce warm air which also causes your makeup to lift and transfer.
Third, the simple fact that most masks are in direct contact with your skin makes it likely that at least some of your makeup will rub off onto it.
That might sound like a real challenge, but don’t panic. We’ve done a lot of research and figured out how to keep makeup from rubbing off under a mask.
Are you ready to say goodbye to the smudged look and dirty masks?
Give the natural look a try
Okay, so this is kind of a cheat way to eliminate all that smudging and smearing.
But if no one’s going to see half your face anyway, why not take a break from makeup or keep things minimal?
Less is more when it comes to classic French beauty. Plus, you’ll save money on makeup and so much time in the morning!
Your skin will also get a much-needed break.
If you’ve ever thought about embracing a more natural look, there’s no better time to give it a try than right now.
Embrace your natural beauty.
How to keep your makeup on when wearing a mask

Okay, maybe the totally natural look just isn’t your thing.
We get it.
Putting your makeup on each morning might be a part of your everyday routine, and maybe it helps you feel a sense of normality during your week.
So, although we would recommend skipping foundation and only wearing makeup on the visible parts of your face (your eye makeup), we get it.
You might still want to wear a full face of makeup. It’s kind of like lingerie—although it’s not always seen, you know it’s there, and it makes you feel like a total Goddess.
That’s why we’ve rounded up expert tips to help you protect your makeup underneath your mask and keep it in place the whole day.
Use a moisturizer and primer

The first step in your beauty routine is to cleanse and moisturize your skin. This will help combat some chafing or spots that masks are known to cause.
Next step, follow up with a long-lasting primer. Primer is a great product to use because it’s oil-free, which means it will help keep all the other products you layer on top in place.
But don’t get too carried away and use an excessive amount of primer, because this will have the opposite effect!
Use it sparingly and add a light layer as you normally would.
A matte or waterproof foundation is best
If you’re going to wear foundation, look for a matte or waterproof formula.
A waterproof formula will dry and lock onto your skin, without drying it out. On a good day, it can stay put for up to 24 hours!
A matte foundation will also stay put for longer than a glossy one because it’s water-based rather than oil-based.
Apply a thin layer of foundation onto the areas where you need it most, and blend using a brush, sponge, or your fingers.
Tips for applying concealer
After you’ve applied your foundation, follow up by applying a long-wear concealer. Avoid overly creamy, luminous concealers as these tend to not set well and are likely to transfer onto your mask.
Keep your concealer to your eye area (if you need it), but avoid the nose and chin to keep smudging at bay.
Set your base
Now it’s time to set your base.
What you’re after here is a loose, translucent powder. Work it into your skin with a beauty blender or brush. This will allow your mask to slide over your skin without removing your foundation.
Although it may be tempting to go all-out with the powder, too much of it will create a chalky effect. And you don’t want to end up looking like a ghost!
Make your eyes and brows the star of the show

Although wearing a mask can be a nausiance, the great news is your eyes are still very much on show! So, now is the time to upgrade your brow and lash game and make your beautiful eyes pop.
This is the first area of your face that people will notice when you’re wearing a mask. In fact, this is usually the first area people normally notice anyway.
Embrace your natural-looking brows, and easily add definition with a good eyebrow pencil Experiment with eyeliner and keep your look as natural or dramatic as you like.
And the final step is to finish with your favorite mascara. This is what really makes your eyes pop!
Use an eyelash curler to add lift, followed by an eyelash primer. Then finish with a couple of coats of lengthening and volumizing mascara.
Swap bright lips for neutral shades
You may have heard this strange myth going around that lipstick sales have plummeted since the pandemic, but this couldn’t be further from the truth!
Women are still wearing lipstick for their video calls, as they go for a walk to the shops, or as they lounge at home for no other reason than it makes them feel beautiful.
But if you are wearing a mask for most of the day, avoid anything sticky because you don’t want it to stick to your mask! Be wary of bright colors too, as if the color does end up rubbing, it will be very visible on your face.
We recommend sticking to subtle, light or nude shades in a hydrating formula that nourishes your lips.
Don’t let your face mask ruin your makeup routine!
And that’s how to keep your makeup on when wearing a mask.
We hope you’re feeling more confident about going for a more natural look or picking the right products to wear under your mask.
Here at Vivienne Sabó we’re making our eyes the star of the show and having a lot of fun trying out new eye makeup looks!
So, remember to have fun with your makeup and don’t let wearing a mask get you down.
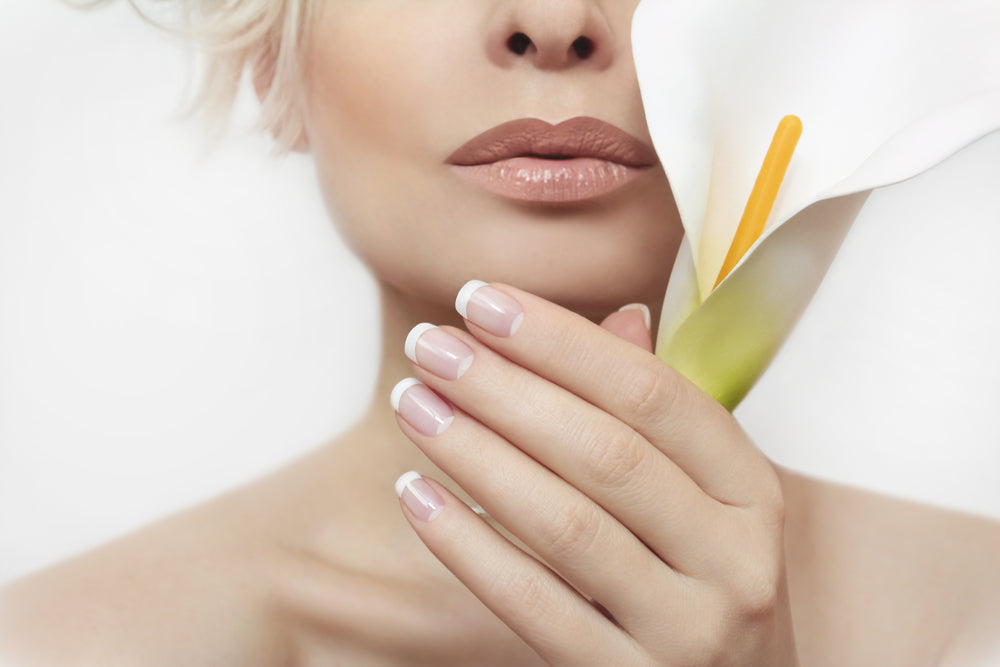
One of the most important parts of French beauty is looking well put-together. On the one hand, you want to look effortless, but on the other hand, you also want to look intentional. Groomed nails are essential for striking this balance, especially if you opt for a natural-looking French manicure. We’ve compiled a step-by-step guide to achieving perfect nails at home, so you can skip the nail salon. You can also adapt these tips to give yourself a relaxing pedicure! First, we’ll cover all the tools you need to have on-hand, and then dive straight into the how-to. At-home manicure tools You don’t need fancy tools to create a DIY French manicure at home, but you do need some basic nail grooming essentials. Here’s our comprehensive list of all the things you’ll need! Nail polish remover Emery or crystal nail file Cotton pads and cotton swabs Cuticle pusher (optional) Warm water and soap Hand cream or cuticle oil Hand scrub (optional) Clear base coat Clear topcoat Nude, pink, or colorful nail polish White nail polish Thin synthetic brush (optional) 1. Remove old polish First, if you still have some remnants of old nail polish on your nails, make sure to scrub it away thoroughly with cotton pads and nail polish remover. Some colors tend to really get lodged along the edges of the nail, in which case, use a cotton swab dipped in remover to really get in there and clean things up. 2. Shape your nails Next, file the tips of your nails to an even shape. There are all kinds of nail shapes you can choose from, but we prefer keeping it natural with an almond, oval, or rounded nail shape. When you file your nails, only go in one direction at a time, rather than filing back and forth. Go slowly, so you can control the shape you create and don’t accidentally over-do it. 3. At-home manicure soak If you plan to trim or push back your cuticles, it’s crucial that you soften them first with an at-home manicure soak. Fill up a shallow bowl of warm soapy water, and then dip your finger in, just up to the cuticle. Leave your fingers in the water for just 2-3 minutes, and take the moment to relax. This will be long enough to soften the cuticles but not so long that it’ll saturate your nails with water, which can compromise the integrity of your nail polish later on. If you’re happy with the condition of your cuticles, you can skip this step altogether! 4. Push back the cuticles (gently!) Pull your nails out of the water, and dry them with a soft towel. Then, use the cuticle pusher tool to gently press against your cuticles and push them back a little. If pushing on your cuticles is painful at all, it’s a sign you’re overdoing it, so make sure to ease up on the pressure. In general, we don’t recommend trimming the cuticles at home unless you already have a bit of professional experience. It’s easy to damage cuticles when trimming them, which may lead to infections or cause the skin to grow back thicker. 5. Exfoliate and moisturize Next, it’s time to give your hands and cuticles a nice treatment! For maximum pampering, exfoliate your hands by rubbing them with a scrub. You can even make your own! If your scrub is moisturizing enough, you can then just rinse your hands and move on to the next step. If you skipped scrubbing, then take a moment to rub your hands and nails with hand cream, or apply a designated cuticle oil to the nails. Wait a few minutes to allow your nails to absorb as much of the oil as possible. For simple groomed nails, you can stop here! Moisturized, well-shaped nails are already enough for simple French beauty. However, to take your nails to the next level, you’ll want to add some polish. 6. Remove excess moisture Next, dip a cotton swab in nail polish remover, and carefully wipe it only over your nail, being careful to avoid the cuticles. This will remove any excess moisture or oil from the nails to guarantee that the polish adheres well. Let the remover evaporate entirely before moving to the next step. 7. Lay down your base coat A base coat of polish is essential for protecting your nails from yellowing and creating an even base for the polish. Apply the base coat carefully to each nail, making sure to only use a minimal amount so that it dries quickly. 8. Apply your color Once your base coat has thoroughly dried, you can apply your colorful nail polish! Pink, peach, and nude are the classic choices for a French manicure, but other colors are perfectly acceptable as well. Apply the polish in thin layers, starting about a millimeter away from the cuticle, and painting it on in strips. Once your first coat fully dries, apply the second coat, and wait for it to dry, as well. 9. DIY nail tips Turn your classic mani into an ultra-chic French manicure. Dip an old eyeliner brush or a dedicated nail brush into some white nail polish. Then, carefully paint the tips (i.e., top 2-3 millimeters) of your nails. If your hand is a little shaky, you can lay down some sticky tape over the bottom of the nail first to guarantee a clean line. 10. Finish with a top-coat Once your polish is totally dry, finish things off with an ultra-thin layer of topcoat. This will help seal in all of your hard work, add some sheen, and prevent your nail polish from chipping. 11. Clean up the edges Once your topcoat is fully dry, it’s time to fix mistakes! Even the pros sometimes smudge a bit of polish over the cuticle, but thankfully, it’s easy to clean up. Just soak a cotton swab in some nail polish remover and use it to erase any smudges. Nailed it! It takes a bit of time and maybe even practice, but achieving the perfect manicure at home is totally doable. Don’t be afraid to skip the nail salon next time you want to treat yourself to a French manicure!
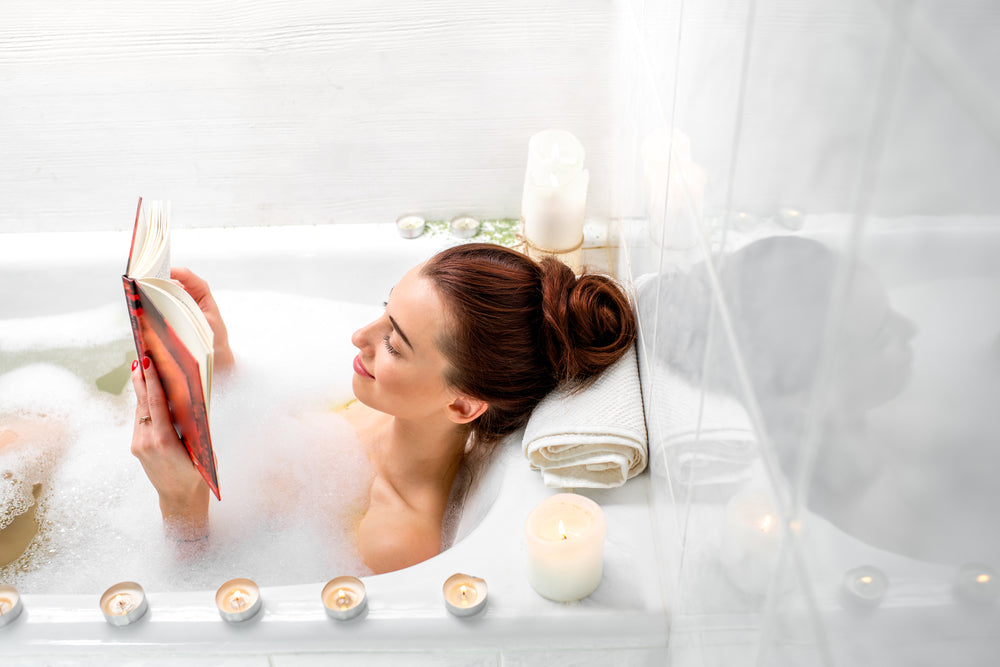
The best way to show yourself love is to take time out of your day and do something that is wholly and completely for you. A bath certainly counts! It feels divine as it relaxes the muscles and helps you unwind. It’s also a wonderful chance to pamper yourself with skin treatments, bath salts, and scented oils. We’ve put together this guide to help you learn how to take a luxurious bath like no other. We’ll help you set up a relaxing bath routine, with tips on how to run the perfect bath temperature and advice as to what kind of accessories you’ll need to have a great time. Even if you don’t have a bath, give this a read, ‘cause we cap things off with some relaxing shower tips. Dive in! Set the scene Ambiance is everything, darling. Turn your bathroom into an environment where you can unwind. Instead of harsh electric light, opt for some scented candles, and queue up the dreamiest playlist. Any music or soundscape that helps you relax will do; you can try tree.fm’s forest soundscapes, some guided meditation, or even a spa playlist on Spotify. Perfect the temperature The question of how to run the perfect bath temperature is a tough one. On the one hand, you want the water to stay hot for as long as possible, but on the other hand, you still want it to be pleasant right from the start. Filling up the bathtub can take a while, so turn on the tap early. Twist the tap to a position where it’s just a little hotter than you would normally shower or bathe in, but not cranked all the way up. There is some debate as to what the ideal bath temperature is, but most of us don’t keep thermometers on hand to check the precise temperature, anyway. You’ll know you’ve landed on the correct temperature when you can dip your foot in the water and leave it in for 5 seconds without any issues. Waterproof your entertainment A book or a TV-show can be pleasant bathtub companions, but bringing paper or tech devices into the water with you requires some planning. You can choose a cheap paperback, so it won’t be a great loss if it falls in, or simply waterproof your devices. For the best luxury bubble baths, consider buying a waterproof case or even a waterproof device. Consider a beverage The next little treat for your relaxing bath routine is a beverage. Wine is the classic choice for a luxury bath, but don’t feel constrained. Tea, hot chocolate, and even juice are equally suitable companions. If you do opt for an alcoholic beverage, make sure to also have some water on hand. It’s easy to get dehydrated or overheated in the bath, and alcohol will compound that, so staying hydrated is essential. Start with a pre-bath rinse Before getting into the bath, rinse yourself off, especially if you’ve had a long and grueling day. If you have both a shower and a bath, you can do this while the bath is filling up! Otherwise, you can do this before starting to fill up the tub. Keep the water lukewarm, and soap yourself up quickly—there’s no need to go overboard. A bath pillow is essential Unfortunately, even the most luxurious bathtubs are designed out of rock-hard porcelain, so resting your head on the lip of the tub isn’t the most comfortable. You can fold-up a small towel to cushion your head as you lie back, but if you really want to take your bathing experience to the next level, purchase a dedicated waterproof bath pillow. Consider your bath additives There are a few lovely options for additives that you can add to your bathtub. Luxury bubble baths can be a lot of fun, but the detergent-laden blends aren’t great for the skin, so here’s what we recommend. Natural bath bombs are amazing because they fizz, sparkle, and smell gorgeous. It’s even better if you learn how to make your own! Epsom salts can be a simple, affordable addition that’ll help your muscles unwind. To nourish your skin, pour in some bath oil or even just a spoonful of coconut oil. Just remember that oil will make the bathtub a little slippery when it’s time to get out. Finally, a few drops of your favorite essential oil will turn the entire bath into an excellent aromatherapy experience. Be sure to always be mindful of what oils you allow to come in contact with your skin and always test on a small area of your body before putting anything in the tub. Enjoy a skin treatment How can you take a luxurious bath without adding in some face treatments? We don’t think it’s possible. Steamy bath time is ideal for face treatments! You’ll have time to lie back while the added steam helps nourishing ingredients penetrate into the skin. Try a purifying clay mask, apply a Korean sheet mask, or go with your favorite facial skincare treatment! Guarantee a cozy finish Eventually, even if you’ve run the perfect bath temperature or put on your favorite soundtrack, you’ll still need to get out of the bathtub. Don’t let the luxurious experience end in disappointment with a scratchy, threadbare towel. Instead, prepare your fluffiest towel or bathrobe well in advance, so you can feel pampered right up until the end. What if you don’t have a bathtub? Unfortunately, not every home is fitted with a bathtub, especially if you live in a big city apartment. We’ve gathered some tips so you can have a relaxing shower, instead. While it might be hard to enjoy candles through the shower curtain, you can still dim the lights for a calming environment. Waterproof Bluetooth speakers will allow you to enjoy some music despite the noise of the showerhead. It’s harder to relax when you’re standing upright, so consider placing a plastic stool in your shower, so you can sit back under the warm spray. While bath oils or salts won’t work in the shower, you can pamper your skin with an exfoliating salt and oil scrub. Placing a bath bomb by the shower drain will create just as dramatic an aromatherapy experience as it does in the bath. As the warm water melts it away, it will release the fragrance, enveloping you in relaxation. And off to bed After a relaxing shower or a luxury bubble bath, you’ll be ready for bed! The bath routine is designed to promote calmness and relaxation. It’s ideal to save the pampering for the end of the day when you need to unwind. By the time your bath is over, you’ll want nothing more than to sleep deeply and soundly. Bonne nuit!

If you love beauty as much as we do, it can be easy to get into a mindset that “more is more.” But after a while, we find ourselves overwhelmed by a large, disorganized makeup collection, with more items than we can ever dream of using! For French beauty enthusiasts, having too much stuff just isn’t helpful, since the French approach to makeup is simplified and precise. It turns out that by organizing your makeup collection according to the tips of Japanese tidying guru Marie Kondo, it’s much easier to achieve an effortless French beauty routine! Follow our guide to learn about the KonMari organizing method and how to apply it to your makeup storage. The basic elements of KonMari organizing In her book, The Art of Tidying Up, Marie Kondo outlines both her philosophy and methodology for tidying homes. The basic principles of KonMari are fascinating and incredibly helpful. Tidying is a special event As Marie Kondo explains, tidying is a special event and you should only do it once in your lifetime (or, at least the very least, extremely infrequently), as a total reset. She views it as a life-changing and joyful experience with a spiritual element. Before beginning the process, she also recommends taking a moment to visualize your ideal life in as much detail as possible. This will help direct and guide you through the process of organizing and decluttering your life. Working in categories KonMari organizing is done in categories of items, not room by room or drawer by drawer. The categories are precise, but within them, there are more loose subcategories. It’s important to go through them in the order she outlines: 1) Clothes: Tops, bottoms, items that hang, socks, etc. 2) Books: Pleasure reads, practical books, etc. 3) Papers: Documents, receipts, bills, etc. 4) Komono or miscellaneous items: Electronics, office supplies, skincare, makeup, and more. 5) Sentimental items: Photos, keepsakes, love letters, etc. Discard what doesn’t spark joy Now the tidying really begins! Working in categories (starting with clothes), make a large pile of all of the items within that category that are in your house (as well as in your bag, car, or garage). One-by-one, take each item, examine it briefly, and see if it “sparks joy.” That’s the only criterion by which you decide whether to keep or discard something. This way, at the end of the process, you’ll feel calm knowing that you only own objects that bring you joy. If you decide to discard something, take a moment to thank it for its service. Afterward, as a separate process, you can sort through the discarded items to see what you’ll toss, what you’ll recycle, and what you’ll donate. A place for each item Once you’re left only with objects that spark joy, you need to decide where to store them. While Marie Kondo isn’t a fan of fancy storage solutions, she does emphasize that each object should have its place, usually in a drawer or even an open shoebox. Knowing where each item belongs simplifies life in two ways: You’ll always know where to find an object, and you’ll always know where to put it once you’re done with it. This is the simple beauty of KonMari organizing Another one of Marie Kondo’s tips is to store all related items together, like-with-like. Shirts in one drawer, socks in another, pens together, etc. When it comes specifically to clothes, the KonMari folding method is its own organizing marvel. She doesn’t recommend “flow planning” methods of organization, primarily because they make returning things to the place where they belong a little harder. Organizing your makeup collection Now that you understand the basics of KonMari organizing, let’s apply it to the task of organizing your makeup collection. Makeup is part of the ‘komono’ category, which includes miscellaneous items you can collect over your lifetime. While you can apply Marie Kondo’s tips just to your makeup bag, it’s better to do the entire process at once. Visualizing your beauty routine Visualization is especially helpful when it comes to makeup. Before you start gathering everything, take a moment to consider what your ideal makeup routine looks like and how you want to look. This will help you through the whole process. Decluttering your makeup Collect all of the makeup you own (including the lipstick that hides in your car and the pressed powder that lives in your purse), and put it on the floor or counter, to sort through and figure out what sparks joy. When you do this, also consider how long you’ve owned each product and whether it might be expired. Put all the makeup products that don’t spark joy in a bag or bin, to either discard or donate. Makeup storage and vanity organization Finally, make sure to store the items in a way that makes sense, so that products with similar functions are all in the same location. Never pile products one on top of the other. Instead, store them in such a way so that you can see everything at once and quickly find whatever you want to use. Vertical storage (much like books on a bookcase) is ideal for palettes, foundation bottles can stand upright, while lipsticks and eyeliners can be stored either upside down (so you can see the colors at a glance), or lying down flat. Keep them all in one vanity or bathroom cabinet. If you don’t have dedicated makeup storage, a transparent drawer set can be incredibly helpful. Marie Kondo your makeup bag After you’ve whittled down your collection to only include makeup that sparks joy, you can decide which products will go in your makeup bag. According to KonMari, your purse shouldn’t be another storage space. Instead, she recommends that every morning (or at least every few mornings), you should repack your handbag. We think that should also apply to your makeup bag. Every morning, after you finish doing your makeup, consider which items you’d like to bring with you, and put them in a dedicated makeup pouch. Once the day ends, take them out and put them back where they belong in your organized makeup vanity. Goodbye, makeup clutter! KonMari isn’t necessarily a minimalist or anti-consumerist philosophy. It’s not about getting rid of all of your earthly possessions — instead, it’s about ensuring that you truly love everything you own. By organizing your makeup according to Marie Kondo’s tips, you guarantee that your beauty routine will always spark joy.